Results 1 to 20 of 27

Thread: How to disassemble the dash on a Previa

Hybrid View

Previous Post Previous Post   Next Post Next Post
  1. #1
    Administrator timsrv's Avatar
    My Van(s):
    Lots of them
    Join Date
    Jun 2010
    Location
    SW WA ST
    Posts
    6,202
    Rep Power
    10

    How to disassemble the dash on a Previa

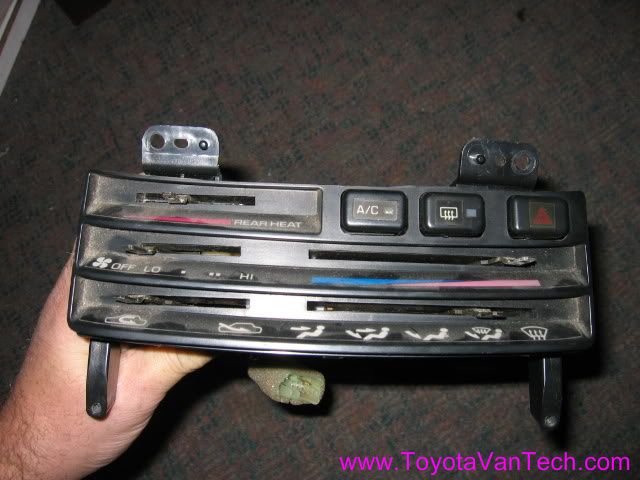
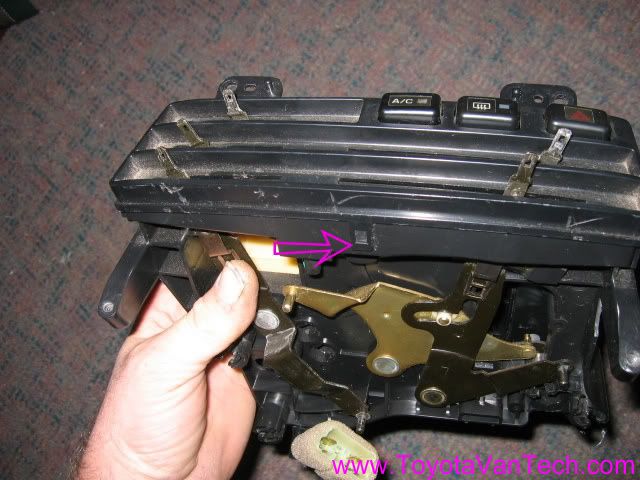
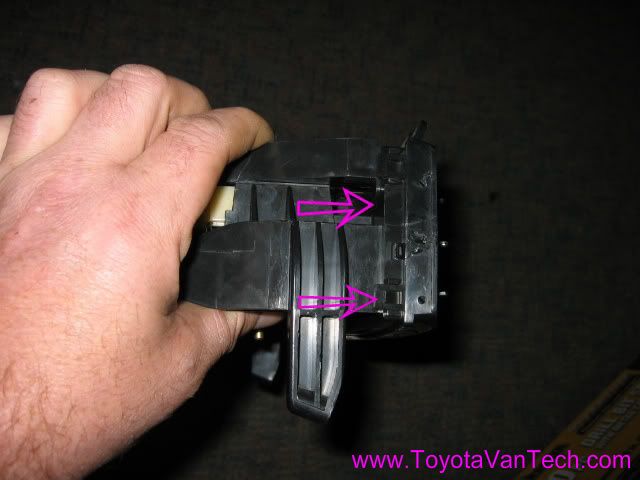
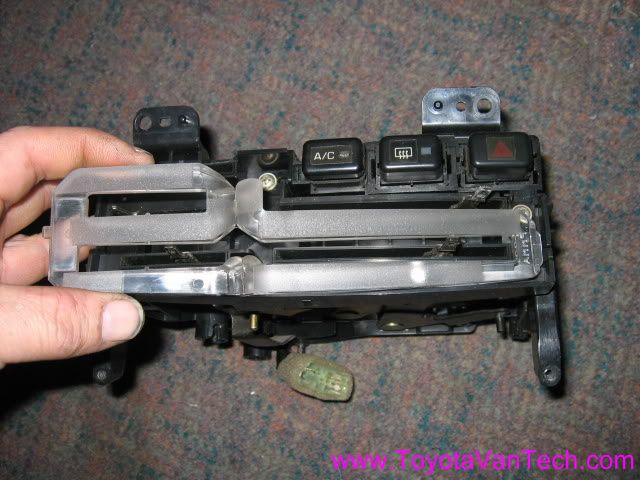
    I will demonstrate dash disassembly on a 93 Previa. I know from experience that 91 - 93 Previas are the same, but unsure of anything newer as I've not worked on one yet. I suspect 94 & up are the same in these areas.....or at least very similar, but I don't know this for sure. If anyone reading this knows of anything different, please let me know by posting here in this thread. Okay, here's the procedure for 91 - 93 Previa dash disassembly:

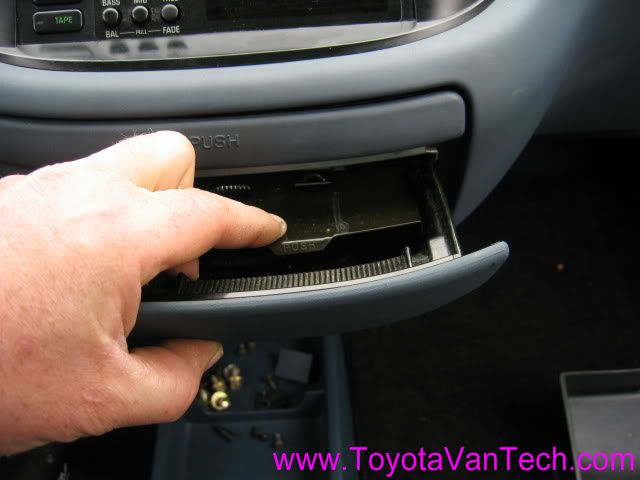
    Using a small screw driver, pry out one of the hinges to the change tray, then open it and it will come off.


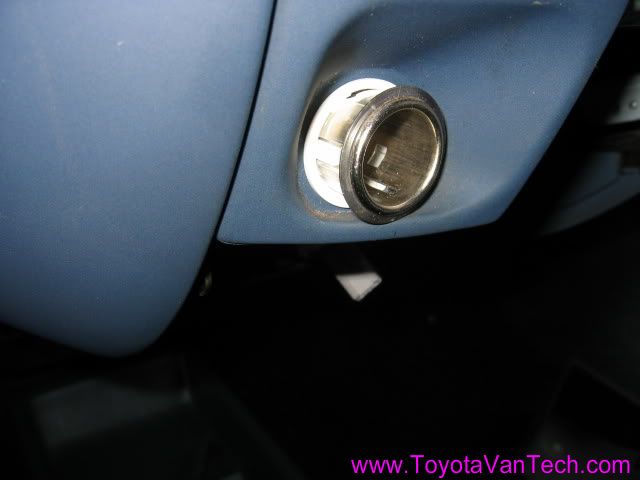
    Remove the ash tray.


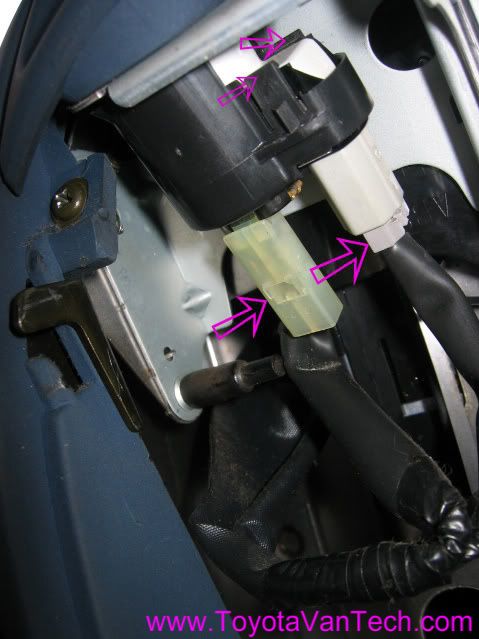
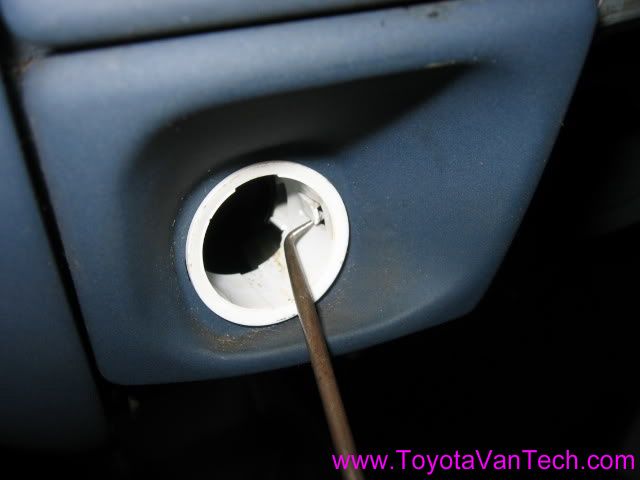
    Pull the wires from the lighter assy, then remove the black plastic cover piece.


    A 90 deg scribe works well to release the plastic hooks.


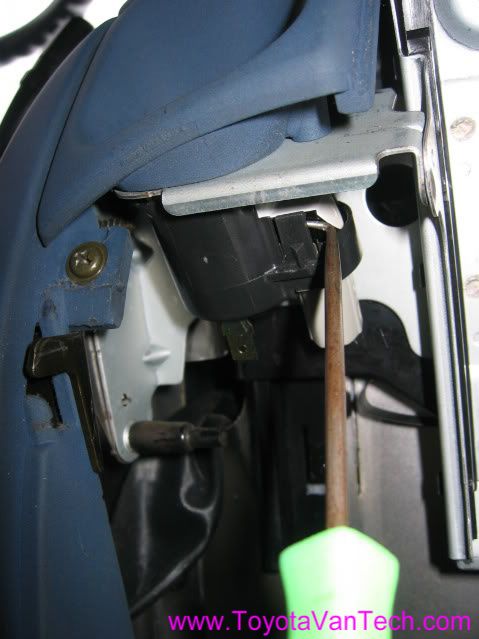
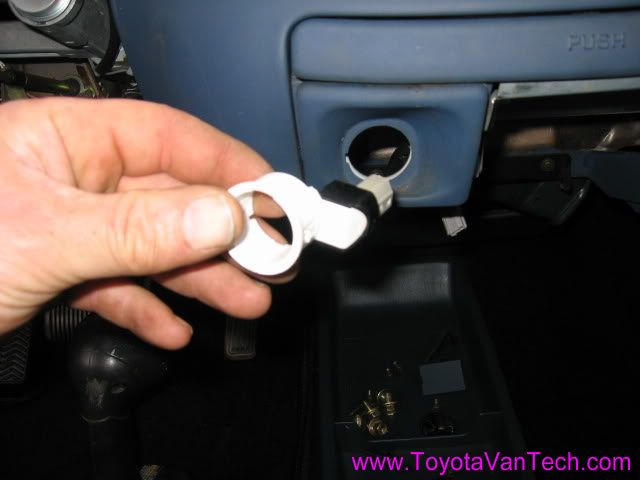
    Push the metal part of the assy out from behind.


    Use your scribe to release the plastic hooks, then remove the white plastic part.


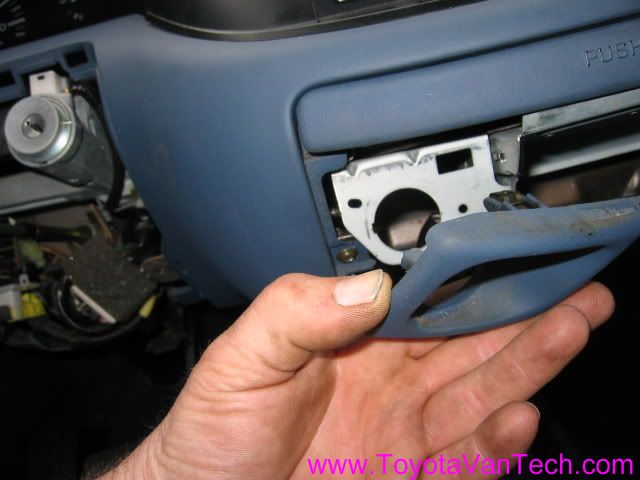
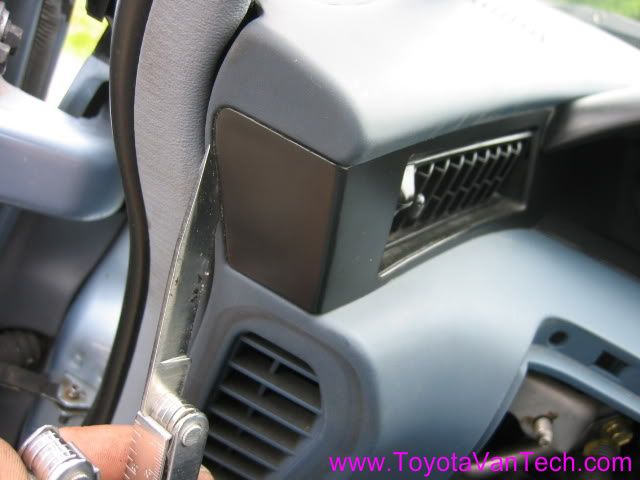
    The plastic garnish will pull off now. Do not twist or change angles. Grab it firmly and pull straight toward you.


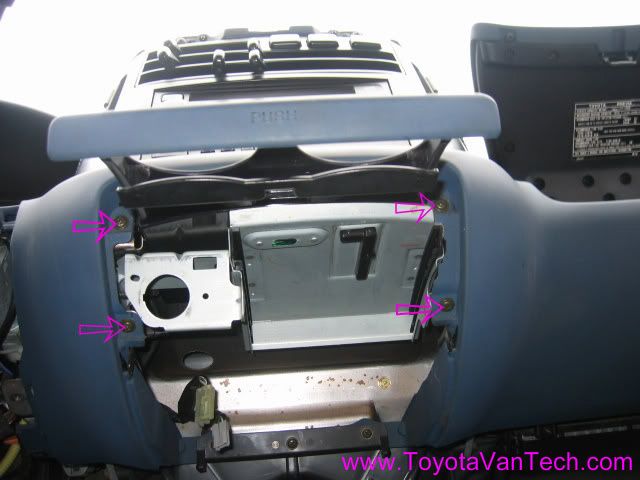
    Remove these 4 screws, then the drink tray and frame assy will come out. It's a tight fit, but play around trying different angles and it will come out when you find the right ones.


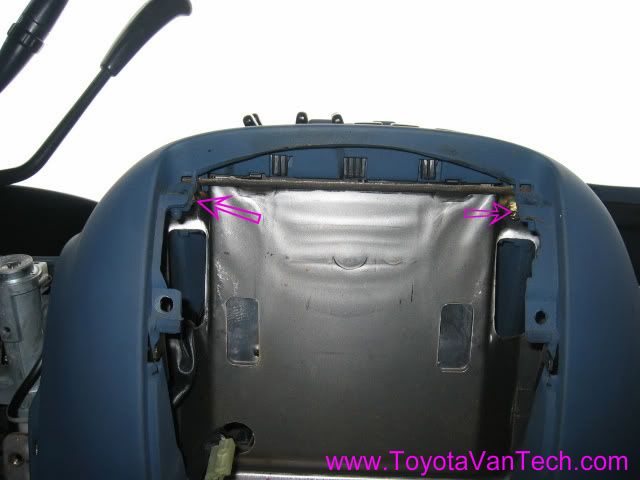
    Take out these 2 screws.


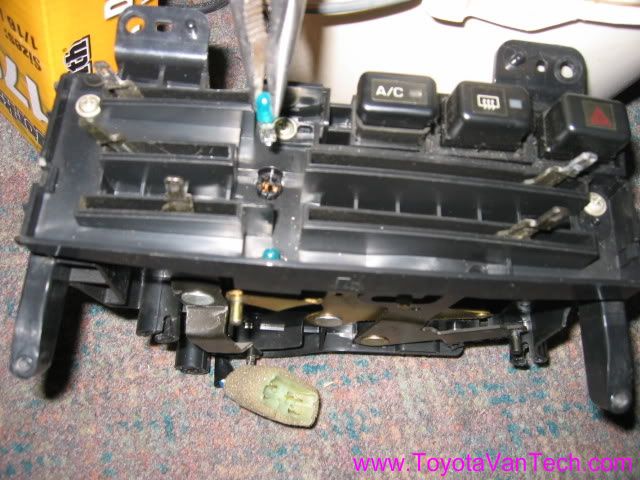
    Find the hidden latch, and remove the top center dash / fuse box cover.


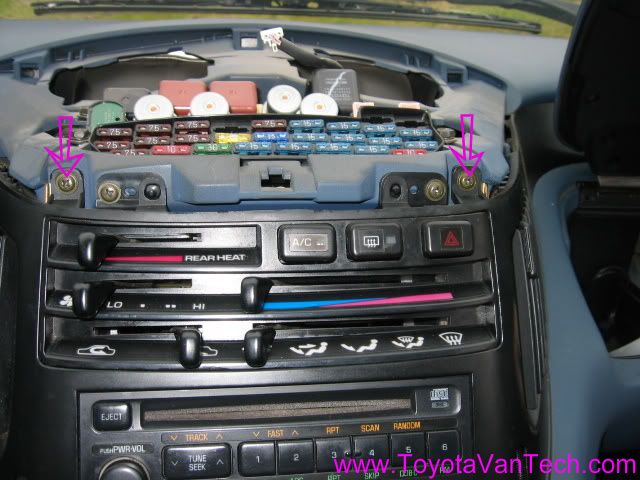
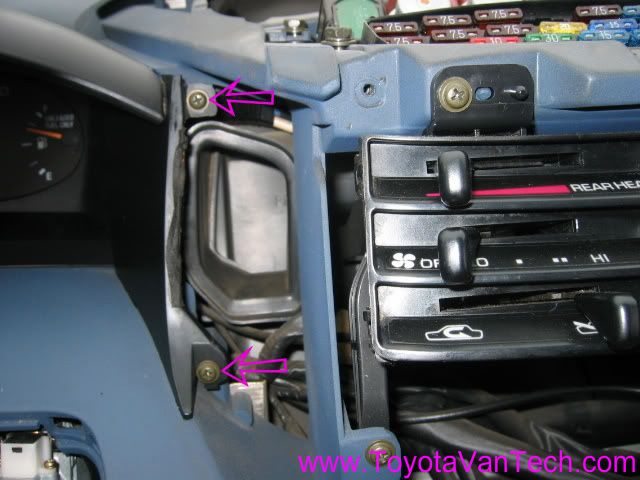
    Remove these 2 screws.


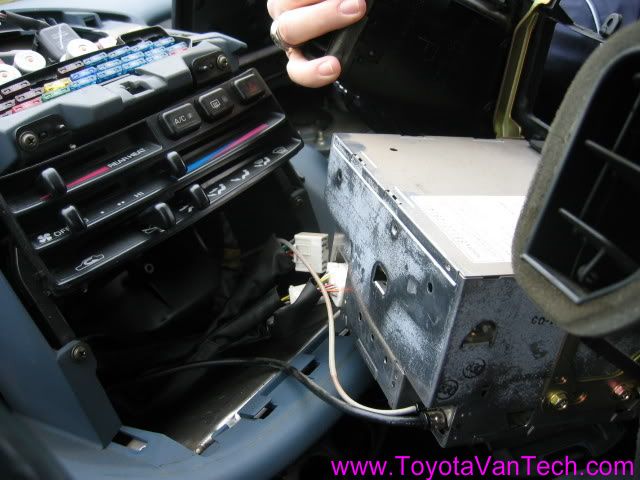
    Remove the radio and fascia assembly.


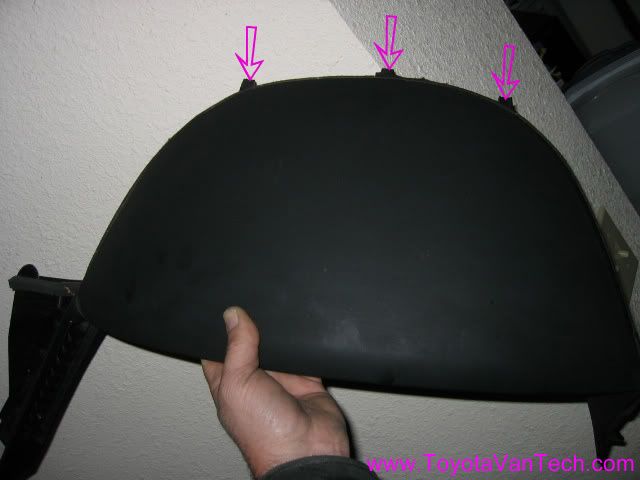
    Okay, now that you got the radio out, the rest is pretty easy. Next comes the instrument panel hood. There's only 2 screws holding it on and 5 "push in / pull-out" style fasteners. Take out the screws:


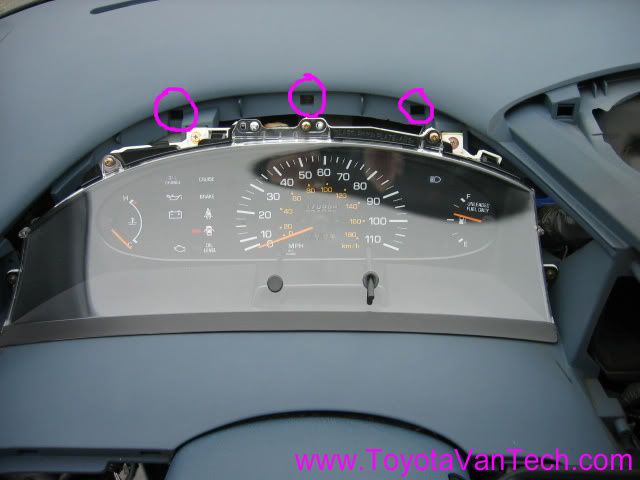
    After the screws are out, the only thing holding it are the 5 push-in / pull-out type fasteners. There are these 3 bumps on the hood


    and they go into these 3 holes in the dash panel


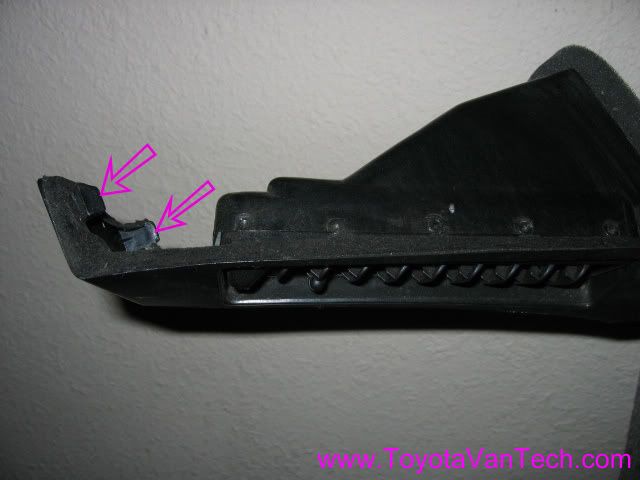
    The other 2 are here by the heater duct.


    All you need to do (after you pull the 2 screws) is grab a hold of the hood and yank. It should pop right out. Just be careful to pull straight so you don't tweak the heat duct section. Sometimes you need to carefully loosen this area with a knife as to avoid damage while yanking out.


    After you get the instrument hood off, if you need to go further, it shouldn't be a problem as all remaining fasteners are pretty obvious and easy to figure out. Tim

  2. #2
    Van Fan
    My Van(s):
    93 previa
    Join Date
    May 2013
    Location
    sandpoint idaho
    Posts
    46
    Rep Power
    1

    Re: How to disassemble the dash on a Previa

    tip to removing screws tucked in , after cup holder removal, a stubby 1/4 drive ratchet with Phillips tip, allows 90 degree access with some pressure

  3. #3
    Forum Newbie
    My Van(s):
    1995 Previa LE S/C
    Join Date
    Sep 2014
    Location
    San Diego, CA
    Posts
    1
    Rep Power
    0

    Re: How to disassemble the dash on a Previa

    awesome write-up timsrv! i remember having to do this to replace the light for illuminating the A/C controls. i guess i'm to have to do it again as some lights in the instrument cluster have gone out.

    anyone consider replacing the lights for the instrument cluster with LEDs? if so, what size LEDs should i get?

  4. #4
    Administrator timsrv's Avatar
    My Van(s):
    Lots of them
    Join Date
    Jun 2010
    Location
    SW WA ST
    Posts
    6,202
    Rep Power
    10

    Re: How to disassemble the dash on a Previa

    I've done this a few times to several different vehicles. LED bulbs are definitely the way to go as they run cool and rarely burn out. Of course you need to make sure you run them on the correct voltage or they will burn out quickly. Some of the bigger general illumination ones you can find with resistors built in (can run directly on 12v), but as far as I know you can't get the little ones yet that will run directly on 12v. For these you need to wire resistors in series. Here's a link to a write-up I made for the earlier vans: https://www.toyotavantech.com/forum/...s-Where-to-buy.

    Doing this mod on a Previa isn't much different (same bulbs are used). Here's some pics I took about 5 or 6 years ago while doing this to a Previa.


    Here's a Previa fan switch that I modded to take the small LED bulbs. Note the resistors in the shrink tubing.


  5. #5
    Van Addict cvtroger's Avatar
    My Van(s):
    95 Previa LE S/C
    Join Date
    Jun 2014
    Location
    SF, Cali
    Posts
    334
    Rep Power
    1

    Re: How to disassemble the dash on a Previa

    Thanks for this Tim!

    I was thinking out horrible the greenish light up is.

  6. #6
    Van Fan
    My Van(s):
    93 previa
    Join Date
    May 2013
    Location
    sandpoint idaho
    Posts
    46
    Rep Power
    1

    Re: How to disassemble the dash on a Previa

    Now my fan works I'm replacing mine, the blue LED"S are great ! Any tips on reinstalling the control cables .... do they push in from the end or push down from the top? I carefully pried up and off the few I needed to remove to increase access. I really can't see pushing them back down in place it would take a lot of pressure and are at hard to reach spots. Thanks as always Donny


    Quote Originally Posted by cvtroger View Post
    Thanks for this Tim!

    I was thinking out horrible the greenish light up is.

  7. #7
    Forum Newbie
    My Van(s):
    94 toyota previa
    Join Date
    Dec 2016
    Location
    texas
    Posts
    7
    Rep Power
    0

    Re: How to disassemble the dash on a Previa

    Hi, My problem is that the fan speed control lever does not move. Is it possible to take the whole unit you are holding (in the first photo) further and fix that lever? Or do I need to buy the entire unit shown in your photo to fix it? I would appreciate your advice. Thanks

  8. #8
    Administrator timsrv's Avatar
    My Van(s):
    Lots of them
    Join Date
    Jun 2010
    Location
    SW WA ST
    Posts
    6,202
    Rep Power
    10

    Re: How to disassemble the dash on a Previa

    Quote Originally Posted by jinaleecpa View Post
    Hi, My problem is that the fan speed control lever does not move. Is it possible to take the whole unit you are holding (in the first photo) further and fix that lever? Or do I need to buy the entire unit shown in your photo to fix it? I would appreciate your advice. Thanks
    Sounds like you'll need the switch (picture #8). It's Toyota part #84732-95D00. It's somewhat of a PITA to get it out of there, but once you get the larger assembly out you can see how it all comes apart. Tim

  9. #9
    Van Fan
    My Van(s):
    91 Previa
    Join Date
    Jan 2014
    Location
    PA
    Posts
    80
    Rep Power
    1

    Re: How to disassemble the dash on a Previa

    Quote Originally Posted by timsrv View Post
    ... Here's some pics I took about 5 or 6 years ago while doing this to a Previa.


    Hi Tim,

    I realize it's five or six years since you posted these pics in this thread, which seems to have been five or six years after you actually did the job, but could you help with a basic question? - How did you get the HVAC panel out of the dash to get to this point where you can take pics and work on it? Did you remove the whole dash? Even knowing (I think) how the cable clips are supposed to release, I can't get them freed up; I have only managed the easiest one of them (the lower left, closest to the access opening), which leaves two more below, plus two above. It's crazy. I keep thinking there must be some trick to it. Do you recall?

  10. #10
    Administrator timsrv's Avatar
    My Van(s):
    Lots of them
    Join Date
    Jun 2010
    Location
    SW WA ST
    Posts
    6,202
    Rep Power
    10

    Re: How to disassemble the dash on a Previa

    Lol, yeah, 12 years ago I might have had some info for you. I'm sure if I had to do the job again I'd be able to figure it out, but I don't remember those type of details from jobs back then. I got rid of my last Previa about 5 years ago, so I don't even have the option of pulling one apart. Too little brain space, too many details to remember........sorry. Tim

  11. #11
    Van Fan
    My Van(s):
    93 previa
    Join Date
    May 2013
    Location
    sandpoint idaho
    Posts
    46
    Rep Power
    1

    Re: How to disassemble the dash on a Previa

    Morning,
    So I just noticed , when I was testing my new LEDS that the dimmer dial was effecting the fan.
    When the motor was running the LEDS seemed not effected by the dimmer dail but the fan would go from 0 to low and a noticeable click or shorting maybe noise when you dailed it from most to least. Fan coming on at the least dimmer position. At least it feels/sounds like the fan is coming on low. Not related to position blower motor switch is in.
    The symptoms are interment of course.
    Dimmer dial works on control panel LEDS, electrical noise coming from that general area when rotating dial. Dail has effecting fan coming on low but LEDS do always work. OR
    Then dail doesnt effect LEDS dimming at all. OR
    Fan either works or doesn't now, if not working it may come on the next time you start the van.
    I'll take some time to really nail down the symptoms and try and find were the connection between the dimmer dial and fan is.
    thanks again.
    I'm leaving everything apart until I'm sure it's running properly and safe.

  12. #12
    Administrator timsrv's Avatar
    My Van(s):
    Lots of them
    Join Date
    Jun 2010
    Location
    SW WA ST
    Posts
    6,202
    Rep Power
    10

    Re: How to disassemble the dash on a Previa

    That's weird. Sounds like a bad ground to the blower and perhaps it's grounding through the dimmer? Make sure all your harnesses connections are attached and inspect fan related connections for burn marks. Without hands-on I can only guess. Good luck. Tim

  13. #13
    Van Fan
    My Van(s):
    93 previa
    Join Date
    May 2013
    Location
    sandpoint idaho
    Posts
    46
    Rep Power
    1

    Re: How to disassemble the dash on a Previa

    The control cables just feed in from the end not pushed in from top! Sweet and much easier.


    Quote Originally Posted by timsrv View Post
    That's weird. Sounds like a bad ground to the blower and perhaps it's grounding through the dimmer? Make sure all your harnesses connections are attached and inspect fan related connections for burn marks. Without hands-on I can only guess. Good luck. Tim

  14. #14
    Van Enthusiast
    My Van(s):
    91 Previa 5 Speed M/T Alltrac, 93 Previa 5 Speed M/T RWD
    Join Date
    Mar 2013
    Location
    SL,UT
    Posts
    150
    Rep Power
    1

    Re: How to disassemble the dash on a Previa

    The best dashboard 'mod' I ever did was NOT replacing the two screws securing the underside of the radio upon reassembly. The radio clicks in at the bottom just fine without the screws on my '91. Now, when I have to do work on the upper central dash related to the radio, switches, cables, bulbs etc, I can start the above instructable at the point of removal of the fuse cover, leaving everything below the radio untouched.
    jw

Tags for this Thread

Posting Permissions

  • You may not post new threads
  • You may not post replies
  • You may not post attachments
  • You may not edit your posts
  •