-
Replacing a Previa head gasket.
This is a copy/paste of a thread I posted on TVP a few years ago. Enjoy  .
.
Okay, so you've got a Toyota Previa with a blown head gasket. No big deal, right? Head gaskets aren't that bad, right? Well, that's what I thought too. I used to work as a flat rate mechanic for Toyota and if I can do a 22R head gasket in under 2 hrs, then I could certainly do a 2TZ head gasket in under 6, right? Wrong!
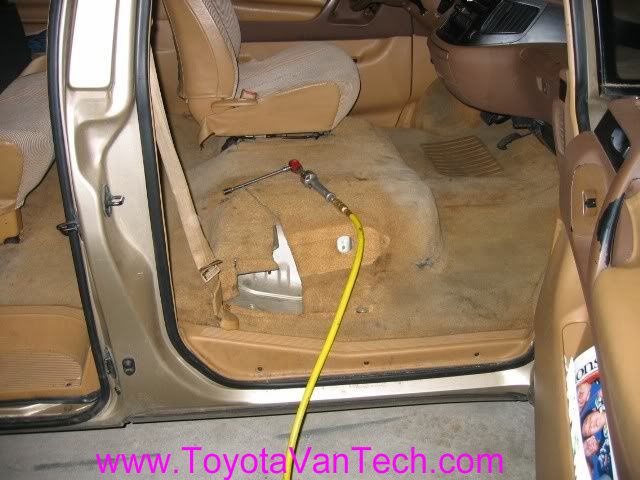
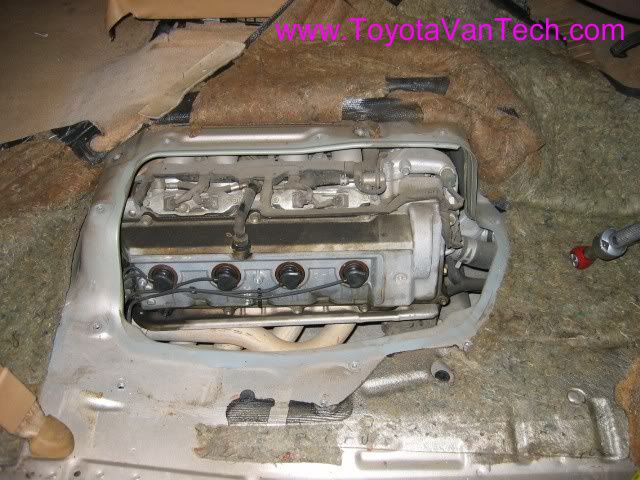
It wasn't unit I removed this access panel that I realized it's not going to be so easy. As you can see by this picture, it could almost be possible. Yeah, the access hole would need a little enlarging on the back side, but what about the intake manifold? This thing is huge and spans across the entire top of the engine. Just how the heck is this coming off? Plasma cutter? Well, I'm not that brave, so Darn it, I had to settle for option #2 (pulling the engine). My original goal was to do the job in under 6 hrs. Well forget that. After 8 hrs, here's what I was able to do.
I got to finally use my Harbor Freight extra large jack stands on the tallest setting!
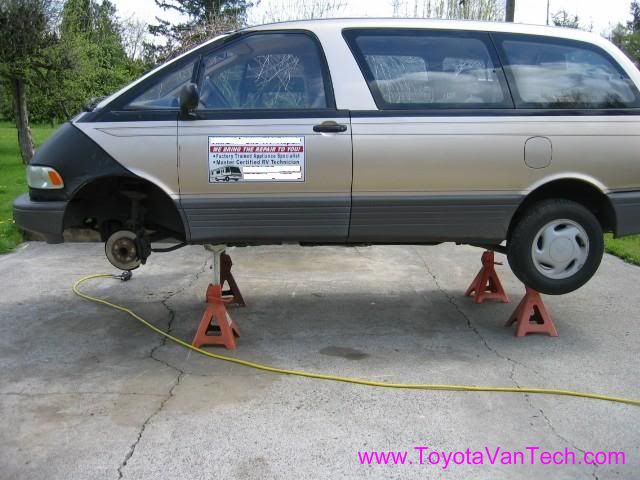
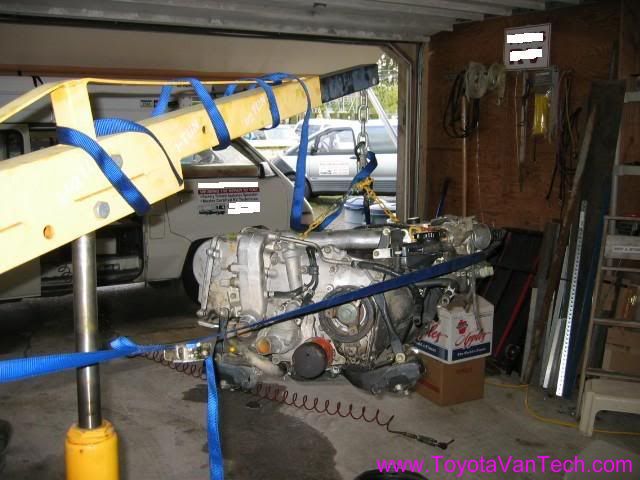
The next few pix are taken after dropping the engine out from the bottom using a floor jack and a makeshift 2x10 wood support. The engine was cleaned with solvent and then pressure washed.
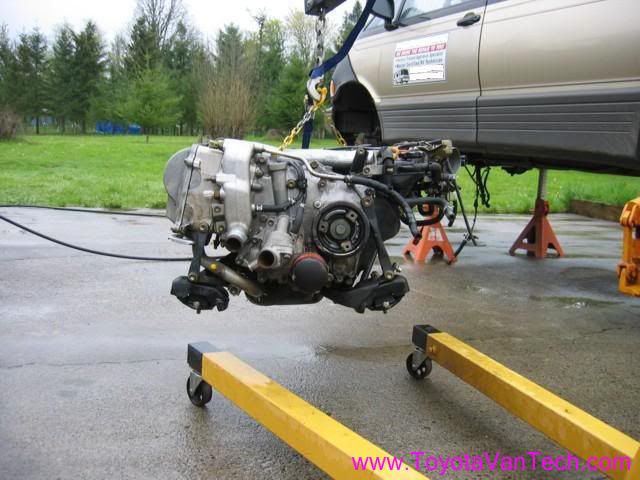
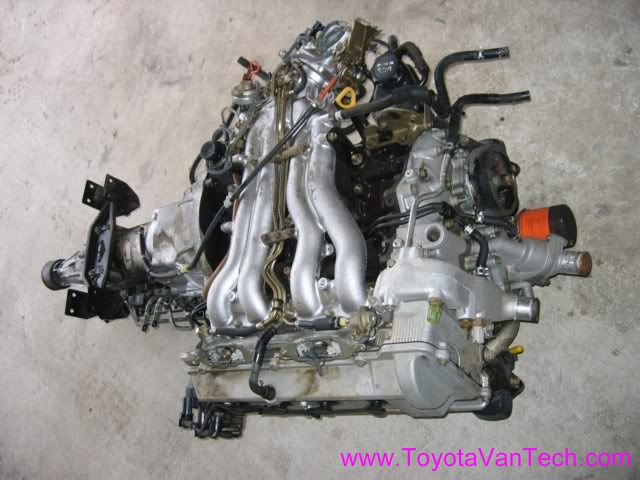
Although a pain to work on, I couldn't help be impressed by the design of this power train. Look at how thin this thing is.

I had hoped to keep it simple and leave the cams installed. Unfortunately they block access to the head bolts and must be removed before taking off the head.
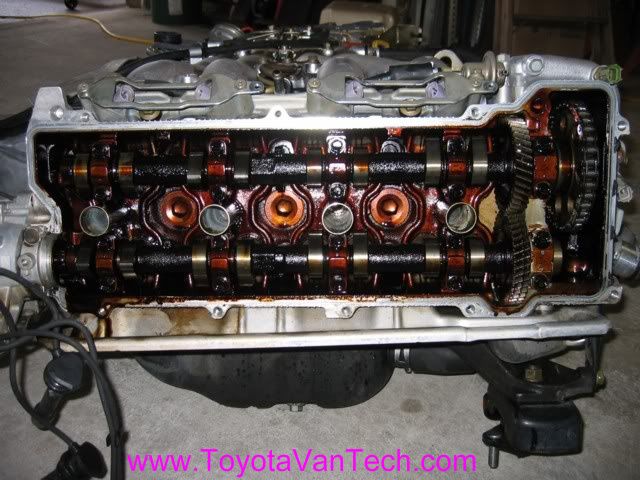
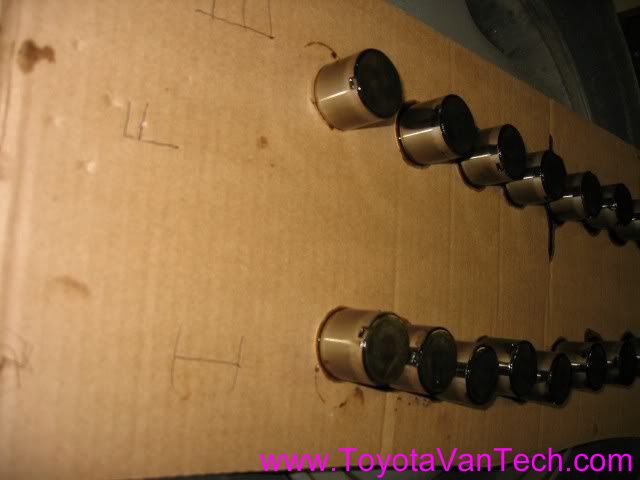
After removing the cams, the valve shim assy's must be removed or they will fall out while handling the head. It is very very important to keep these in order. Unless you plan on re-shimming and replacing, they must be reinstalled in the exact location they were taken from. I used a piece of cardboard to keep them in the correct order.
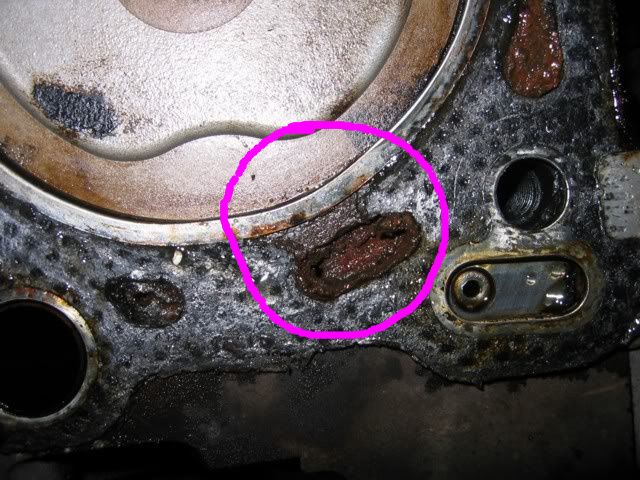
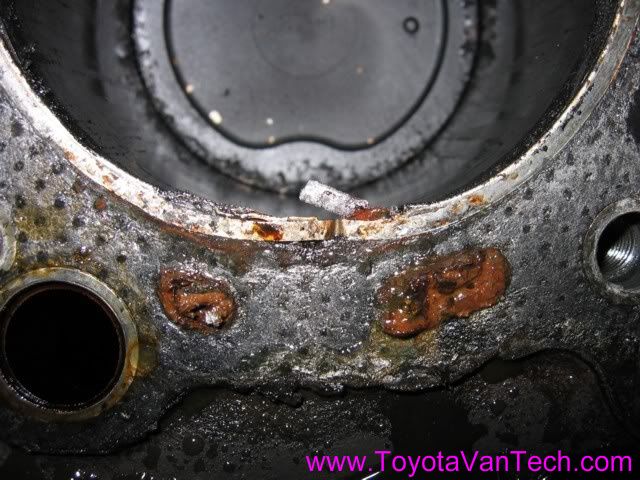
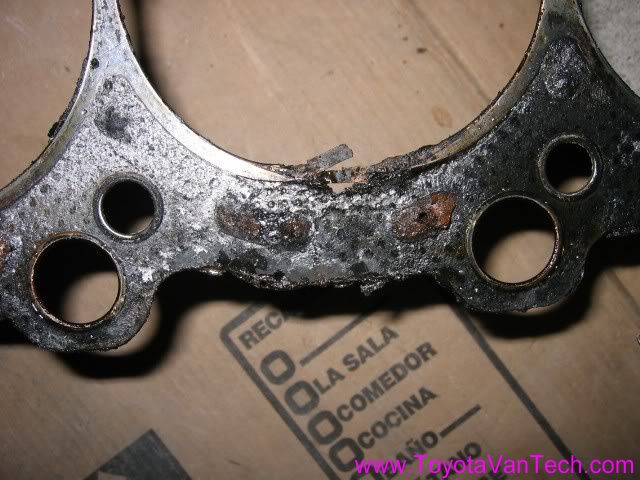
Well, looks like the diagnostic was correct. A blown head gasket is definitely the problem here. #1 was unintentionally steam cleaned by vaporizing coolant!

Here is a close-up of the trouble spot. You can see a definite path between the water jacket and the cylinder.
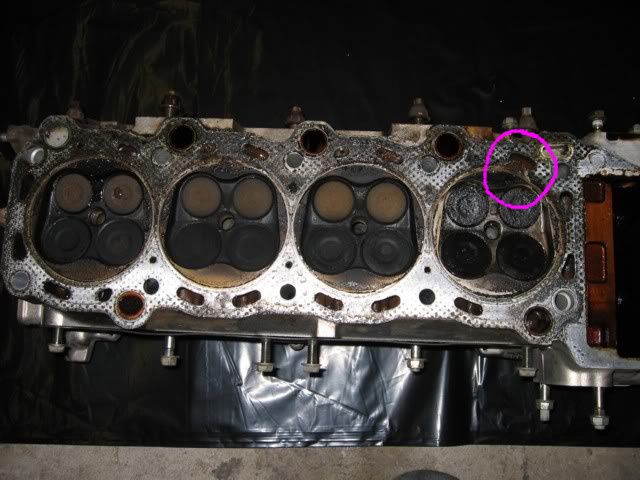
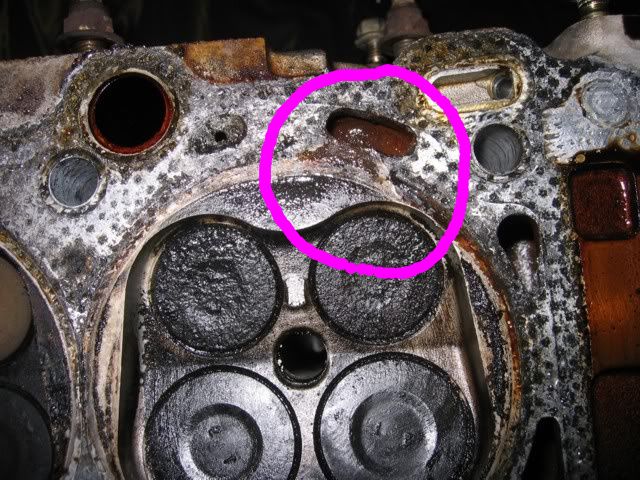
#3 wasn't much better. It hadn't blown completely yet, but was well on it's way. I believe this was a result of #1 blowing and over pressurizing the cooling system. Notice how the gasket material is pushed toward the cylinder instead of away from it.
Here's a view of the underside of the head
A close-up of the trouble spot
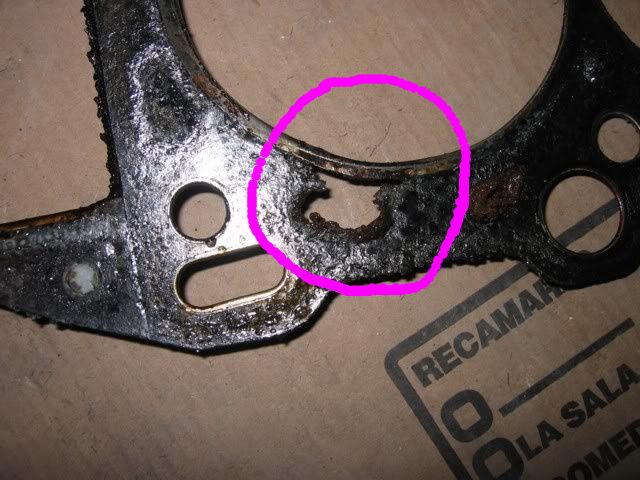
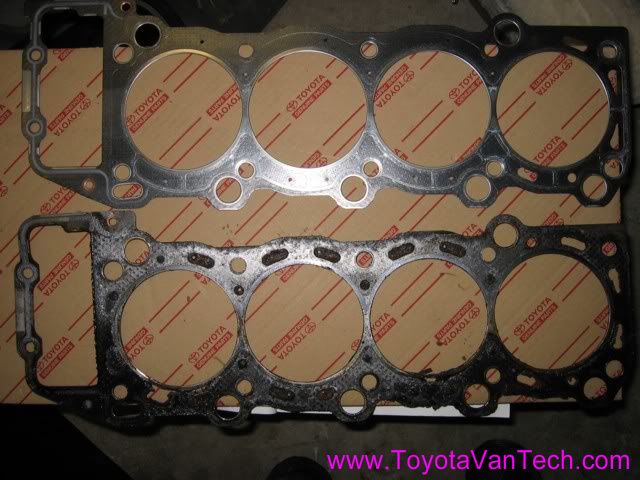
Close-ups of the removed gasket
New gasket has more metal in it. The new design probably wouldn't have helped much against the type of failure I had. It would however protect against blowing of the gasket between the water jacket and the exterior of the engine.
For clean-up and prepping of metal surfaces, I use a 2" angled die grinder with scotch brite surface conditioning pads. I prefer this color for head gaskets.
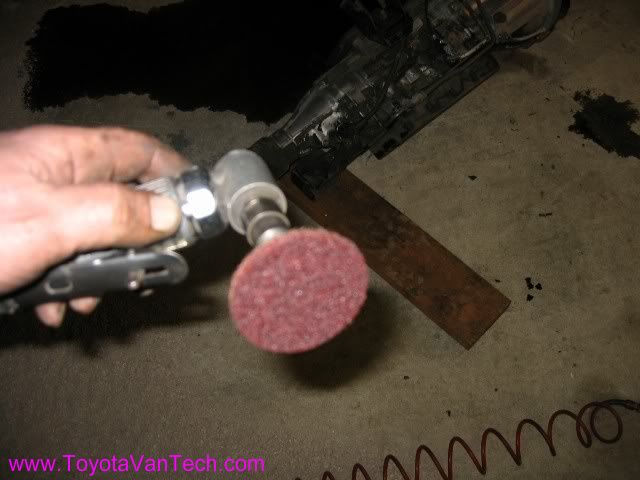
Grinding should done carefully in patterns parallel to the outside diameter of the cylinders. This type of conditioning pad will allow controlled removal of gasket material without damaging metal surfaces. It will however leave small microscopic grooves in the metal. This is good and will aid in bonding of the new gasket (gives it something to bite into). The reason for keeping patterns parallel to cylinders is done so we don't leave grooves that may promote future leaks. In other words, each parallel groove is like a road block, where-as perpendicular grooves may serve as a potential path. After all old gasket material is removed, both mating surfaces are wiped down several times with lacquer thinner. I typically use a clean paper towel each time I wipe it down, and continue wiping until the paper towel remains clean. This is to ensure no oil or other contamination will prevent a good bonding of the new gasket.
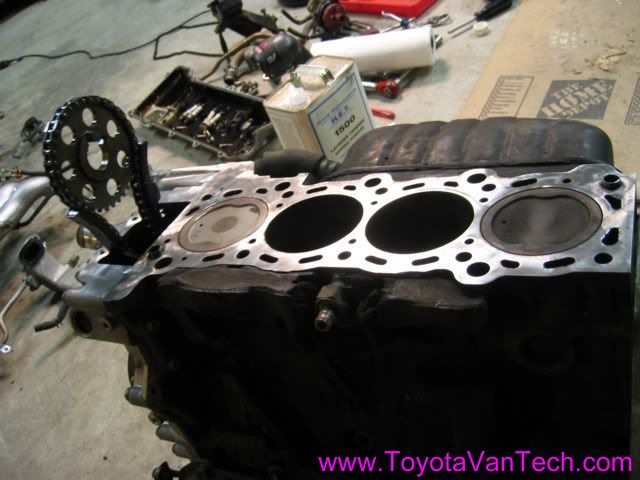

Engine is re-assembled and prepped for re-installation.
Due to the age and worth of the vehicle, I took a few short cuts. I purchased this Previa for $150 and it has 187k miles on it. If this had been a nicer vehicle, I probably would have had the head shaved, re-shimmed the valves, and checked a variety of other things. Sure, I'm rolling the dice a little bit, but feel confident this will be a lasting repair. With any luck this head gasket should outlast the rest of the vehicle.
If it's not raining tomorrow, I'll stuff it back in and let you know how she runs. Tim
Tags for this Thread
 Posting Permissions
- You may not post new threads
- You may not post replies
- You may not post attachments
- You may not edit your posts
-
Forum Rules


 Reply With Quote