

 Section Widget
 Categories Widget (Show All)
 ). For this job I went to RockAuto.com and purchased the Bech-Arnley replacements for a fraction of the price. The part numbers are #1014056 (uppers) at $12.01 each, & #1014023 (lowers) at $21.79 each. There was also $9.05 in shipping bringing the total to $76.65 for everything
  . RockAuto.com is quick and shipping typically only takes 2 or 3 days
  . Okay, before getting started I wanted to point out I did not follow the manual, so you may find some discrepancies (if you reference that). My goal was to do the job as quick and easy as possible, so I took some short cuts. For this write-up, I skipped the part of jacking up and removing the tires. I figured if you can't do that, then you shouldn't be attempting this job either
  .
. Removing the shock absorbers is step #1, but since that's pretty self explanatory I'll start here:
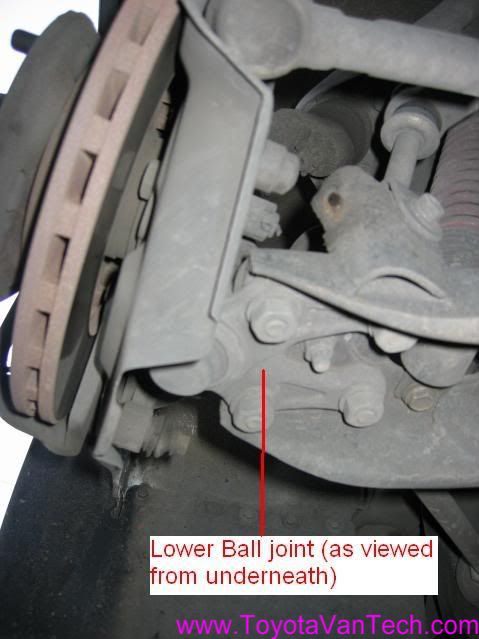
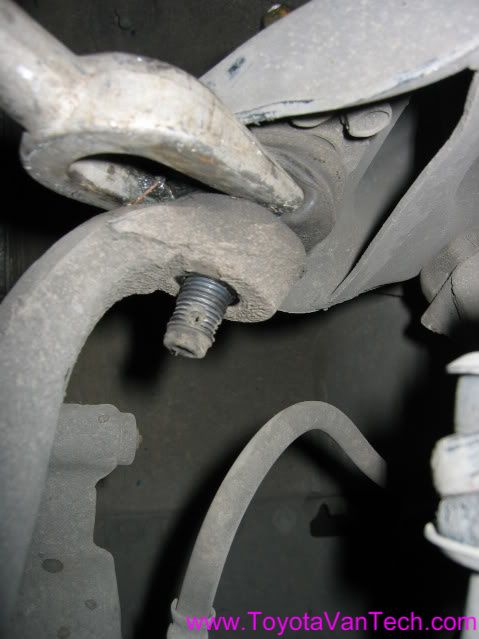
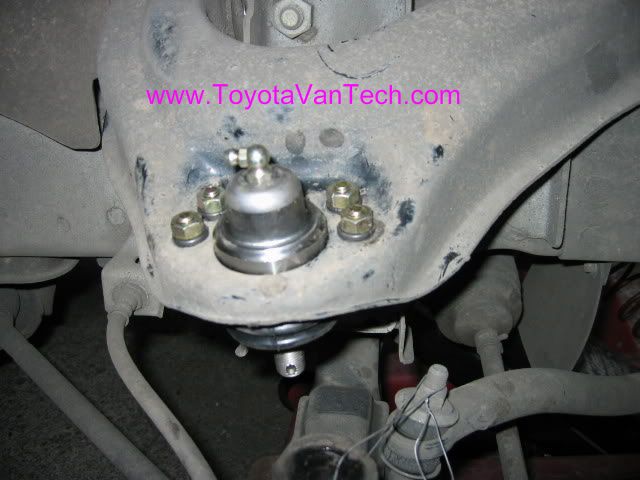
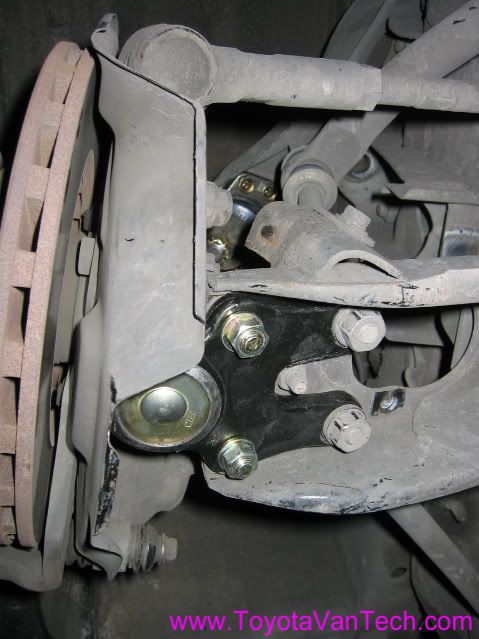
After shock has been removed, take out the 4 nuts holding the lower ball joint on & tap the bolts up and out of the way.
Next take out the cotter pins and remove the castellated nuts from both upper and lower joints.
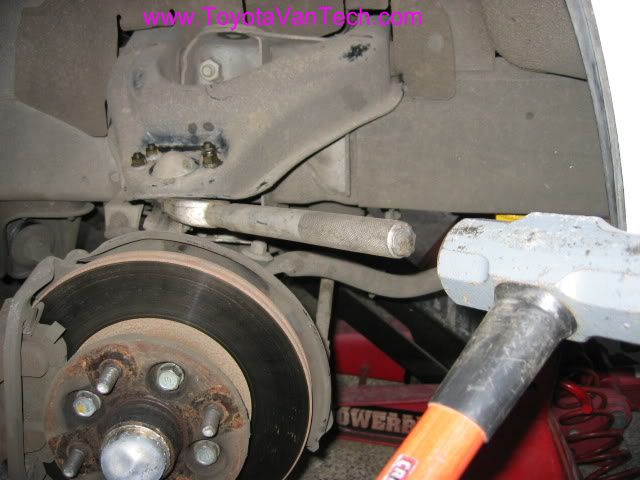
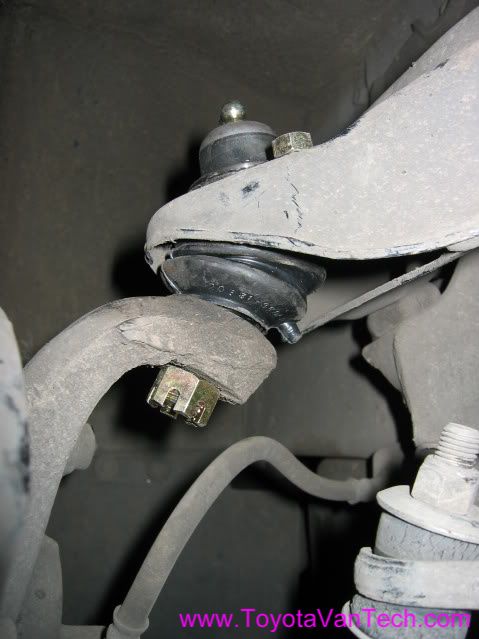
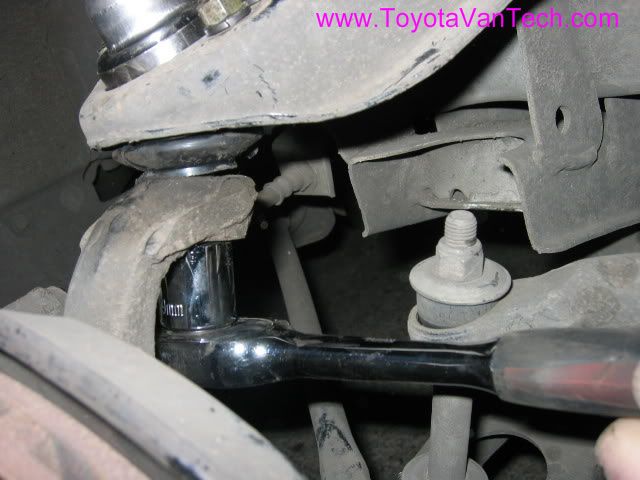
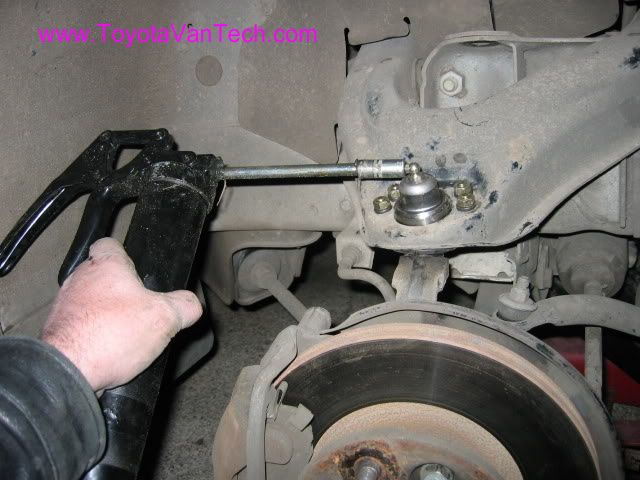
You'll need a pickle fork and a BFH (big hammer) for this next part. If you don't have a pickle fork, you should be able to find at most auto parts stores or you could probably rent one. Anyhow, position the pickle fork as shown and start giving it some big whacks. Just be ready to catch it when it comes loose because you don't want your rubber brake line to be damaged by the sudden stress caused by a falling spindle assy. I recommend having a few blocks of wood laying around and some wire for tying it up for support while you work on the next step.
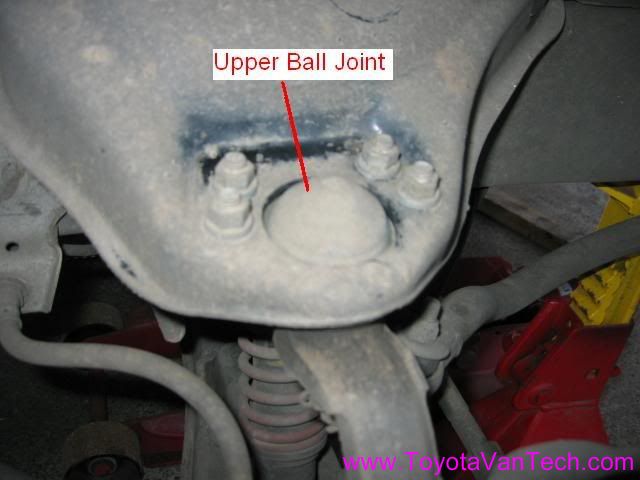
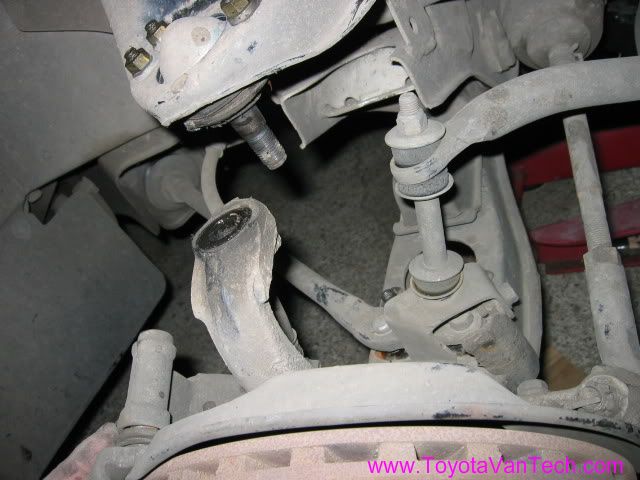
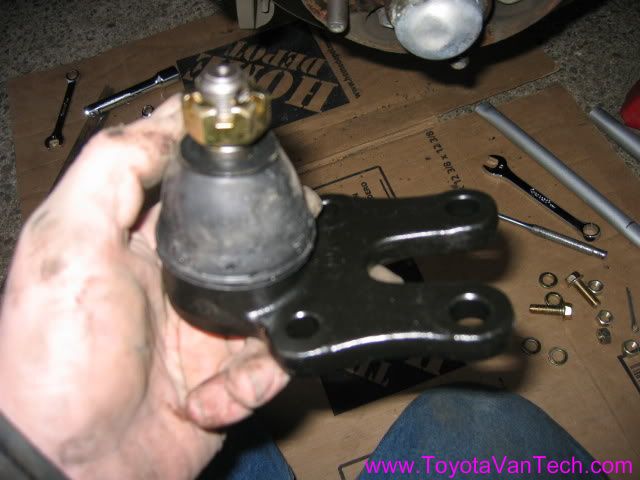
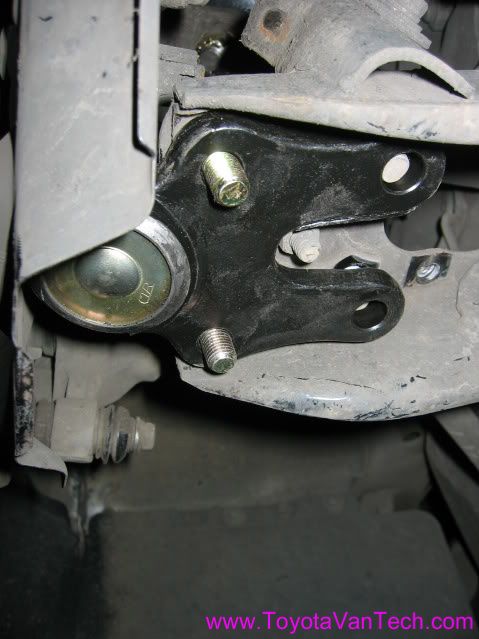
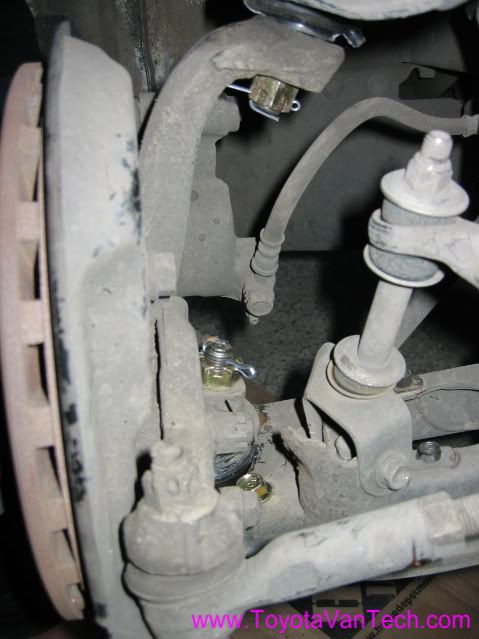
Now that the steering knuckle is removed from the upper joint and the spindle assy is supported, you can remove the four bolts and remove the upper ball joint.
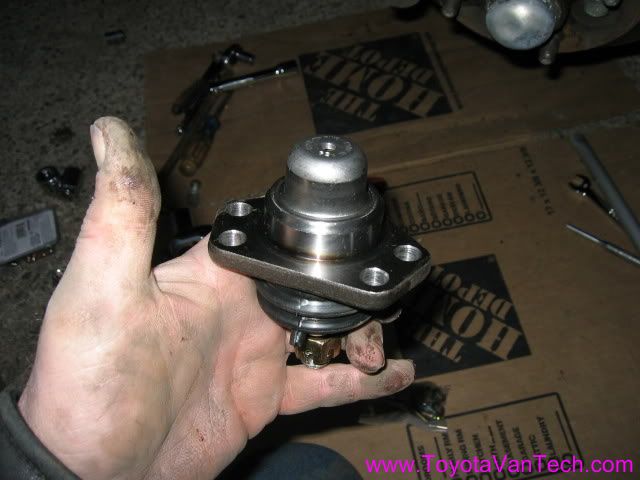
Install the new upper ball joint.
Okay, the way I do this, there's too much stuff in the way to use the pickle fork on the lower joint. When I did the job one side was stuck and needed some help, but the other side was loose and came right out. If you have a stuck lower joint, it's a bit of a problem because with the spindle assy hanging there, there's nothing solid to support it while beating with a hammer. What I did is stacked some 4x4 wood chuncks under the rotor, then used a long drift punch to go through the upper steering knuckle hole and onto the shaft of the lower joint. I applied a little heat to the area around the shaft with my torch (not nearly enough to make it glow), then one good whack and it was off (sorry, no pictures of that part).
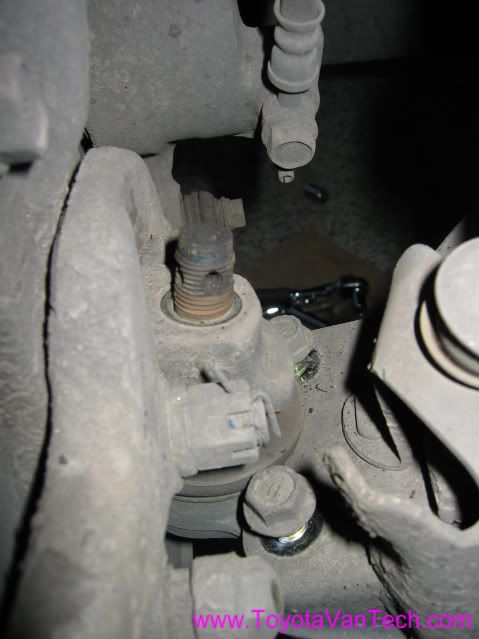
Okay, here's the next step. Install the shaft of the new lower joint into the spindle assy and snug up the nut until the joint shaft seats on the tapered bore.
Position the shaft of the upper joint so the angle lines up with the angle of the bore in the knuckle. Lift the spindle assy up and insert the upper joint shaft into the bore. Have the nut ready and start it on the threads to support the spindle assy.
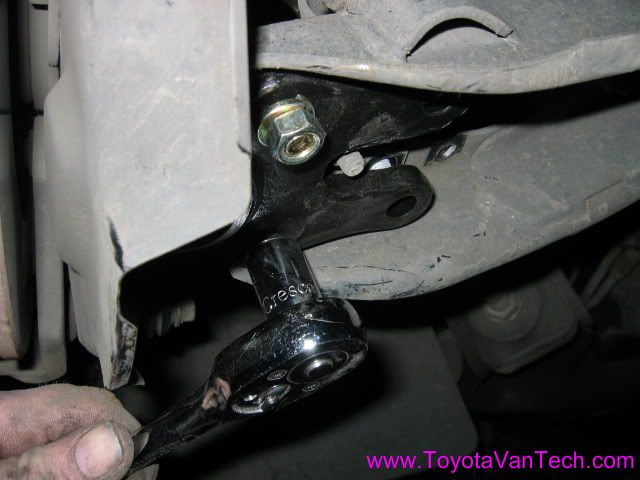
Now grab your ratchet and snug the nut until the shaft is seated against the tapered bore.
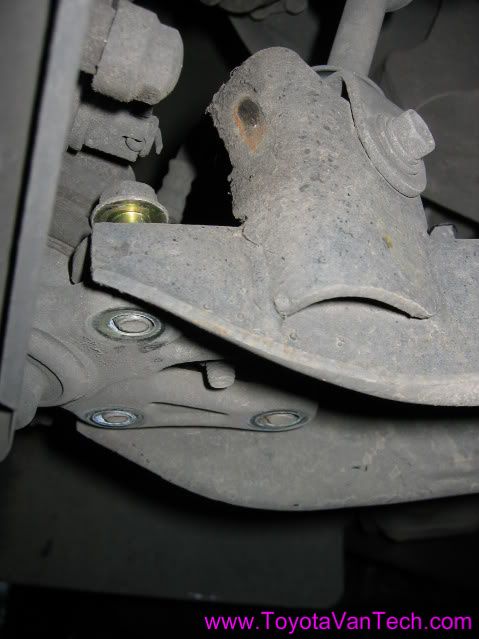
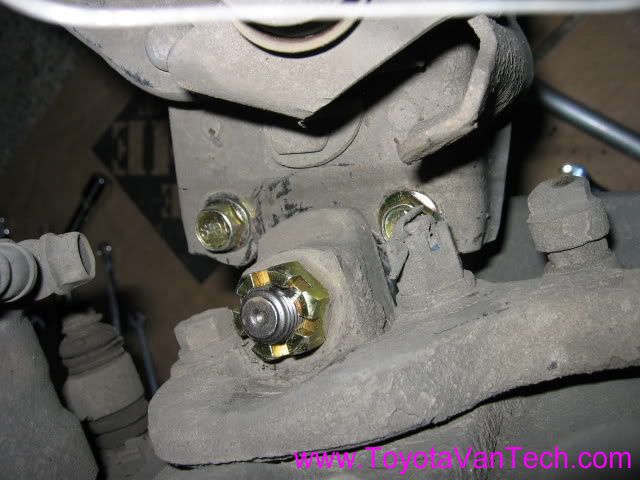
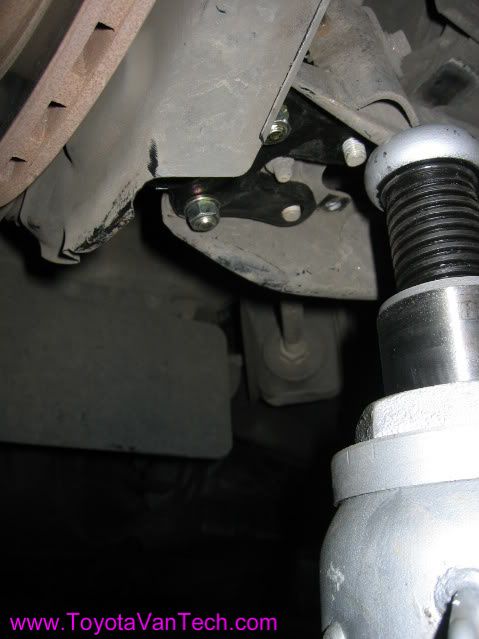
Okay, this next part can be a little fun. You'll need a large slot tip screwdriver to pry against the side of the joint in an attempt to align the bolt holes with the bolts. With a little bit of prying and pushing you'll get it close enough to push the outboard bolts through the holes.
Now put the washers and nuts on them and snug them up (not too tight, you may still need to adjust).
Now that the outboard nuts are on, use a jack under the lower control arm to lift until another bolt drops through. You should only need to move the lower arm about 1/2". If the bolt doesn't drop by then, stop and tap it from the top until it drops through the hole. When enough threads are there, start the nut / washer and tighten until the other side is close enough to put do the same. Tighten the nuts a little at a time switching from side to side to keep the pressure even.
There it is, almost done!
Put the final torque on all the nuts & install the cotter keys.
Grease the zerks (only needs about 5 or 6 pumps each) Note: lower joints have no zerks
Now the only thing left is to reinstall your shocks, put the tires back on, and take it off the jack stands. Don't forget to torque lugs to 100 ft lbs and set your tire pressure according to tire manufacturer's recommendations. Remember anytime this type of front suspension work is done it's strongly recommended to have an alignment done ASAP. So be sure to set up a front end alignment and you shouldn't drive your van unless you're driving it straight to the alignment place. Tim