-
Van Enthusiast


- Rep Power
- 1
 The Home Run
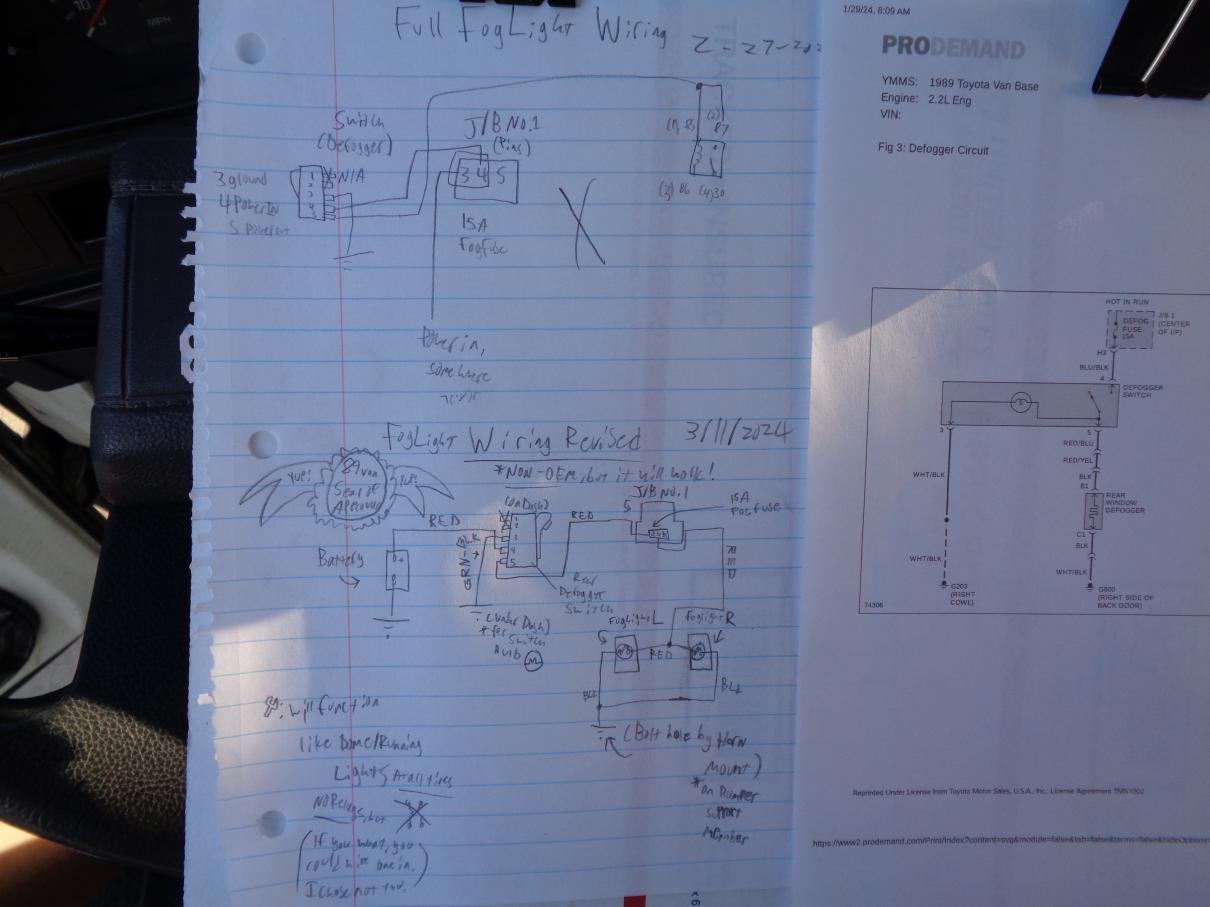
All quiet on the foglight thread... until now! Got a motivational burst to continue it and boy did I make good progress today. Got the whole wiring (Non-OEM mind you, but my way will work!) system drawn out and only now is to take it into action!
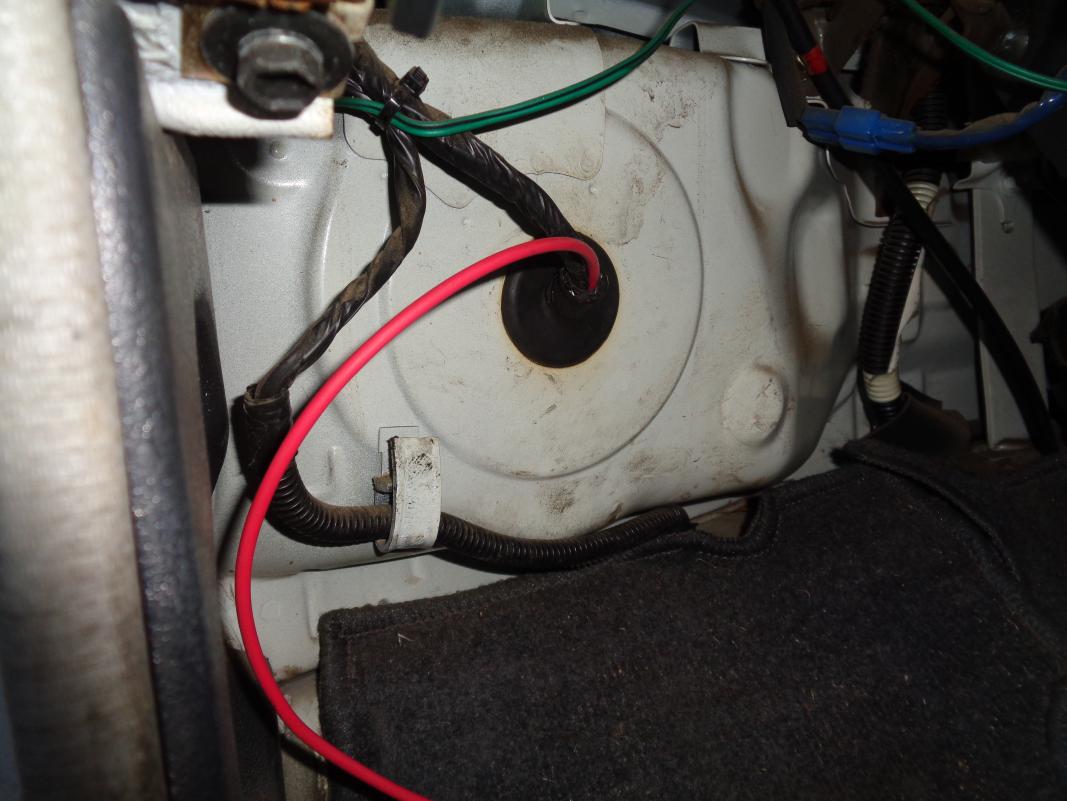
Along the way, found a few nifty points for ground which you can see here:
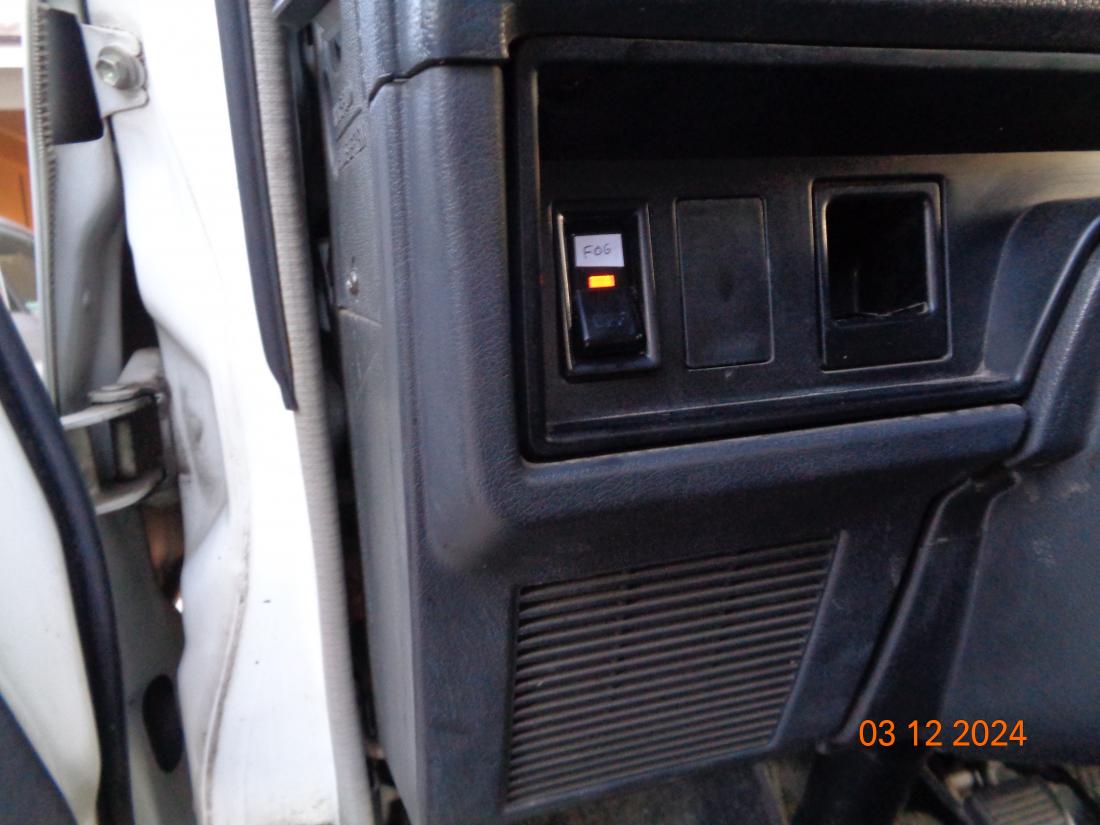
1. Ground point for my "Foglight" switch (It's a rear defroster switch, but I figured out which pin does what, exemption of pins 1 and 2 since they werent brought up in any wiring diagrams, and it'll do, fit's loose in my van's slot for the switch since the tabs are busted on it but maybe some tape will do...) off of this mounting bracket for something with the dashboard, you can see it through the radio panel's slots! Now if this is a good ground is another question, but we'll see once I have everything wired in.
Attachment 12553
2. My revised plan of attack, with my original cluttered one on top. Sure, it's not OEM but it goes over the major points: Fusebox, tapping off the battery for power (Originally I was going to tap power from the fusebox but I can't seem to figure out where power comes in to it, so I'll just tap off the battery; planning to run the power wire through the passenger's side carpeting, unless someone has any ideas for that!) going off the pre-installed oem foglight fuse, and the little things inbetween. I think it's pretty solid tho!  Also, for the junction box, pin 5 is crossed out since it does nothing on my van and it does something in the electrical diagram manual, but what exactly is unknown to me so pins 3 and 4 will do obviously... Switch is explained in section 1 and here too on the right.
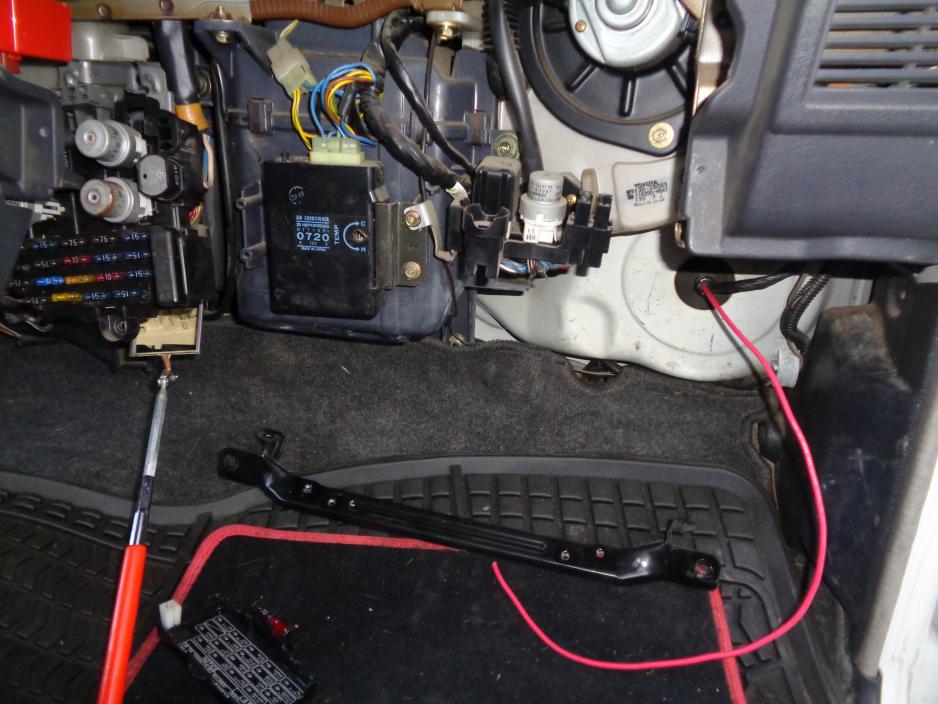
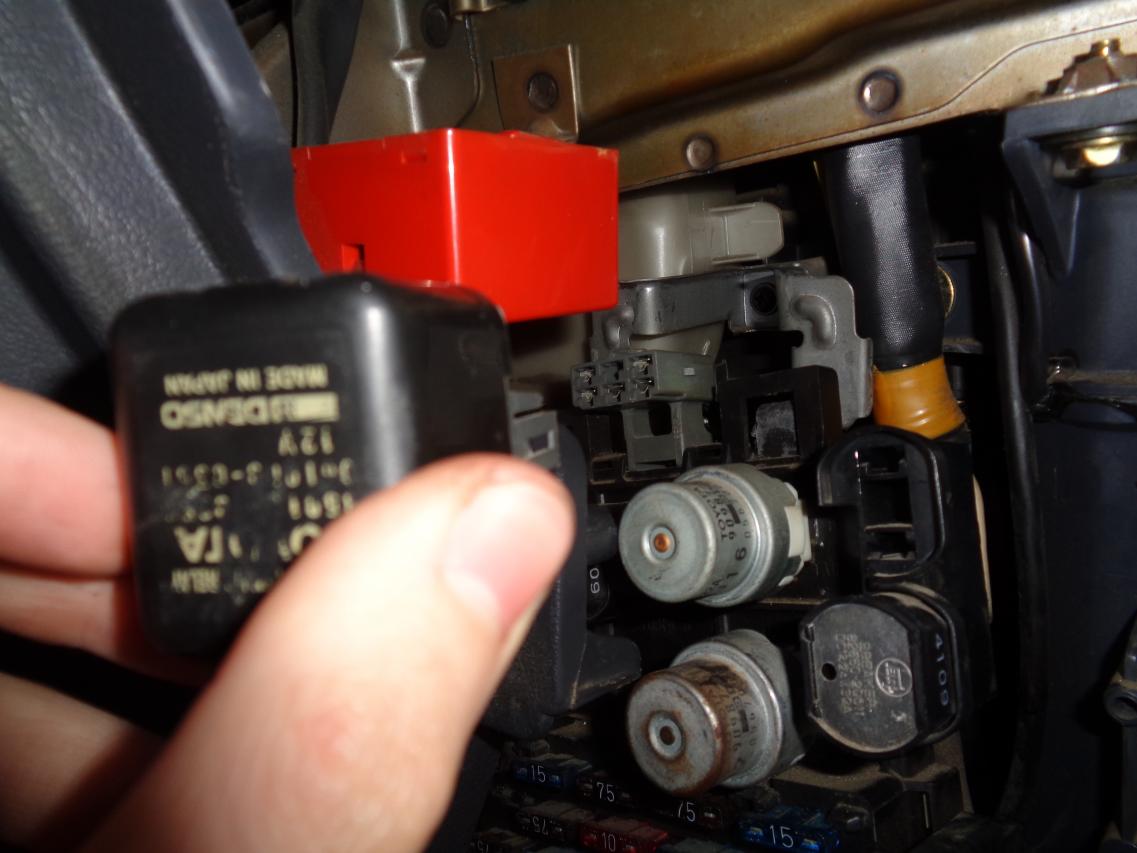
3. The work of course! I'm a tall guy, so having to scrunch down low to do anything is displeasing, but for the Van's credit at least it's relatively easy to access once you're down there! I opted to shove my new wires through the OE weatherseals in the lights which worked out in my favor, aside having to undo too many layers of electrical tape. I dropped the glove box since it's essential to also drop the circuit opening relay up there to wiggle the fuse box out of it's two brackets and to remove the relay of course (Don't forget to re-install this or your van won't start, ask me how I know  ) so you can get a better look behind the fuse box to spot your fog light fuse socket from the back. Opted for 14 gauge wire since it's just the right size, and that's all I had too
I will definetly update this tomorrow, hit a roadblock with the pins on the fuse box, my little solderless wire solutions aren't small enough to fit in there so I will have to do some research to find the proper size that will work here, see ya for now! 
-
Van Enthusiast
- Rep Power
- 1
Re: Wiring OEM fog lights and oem switch into van
Dam it, first image didn't werk. Try again mayhaps??
-
Van Enthusiast
- Rep Power
- 1
The (Almost) Finale!
Right on folks, on with the results of my wiring: Only ran into ONE hiccup; I put the power out wire on the wrong side of the plug on the back of the fusebox as well as NOT disconnecting the power when I was feeding the power out wire to the switch and popped the fuse buuuut other than that...
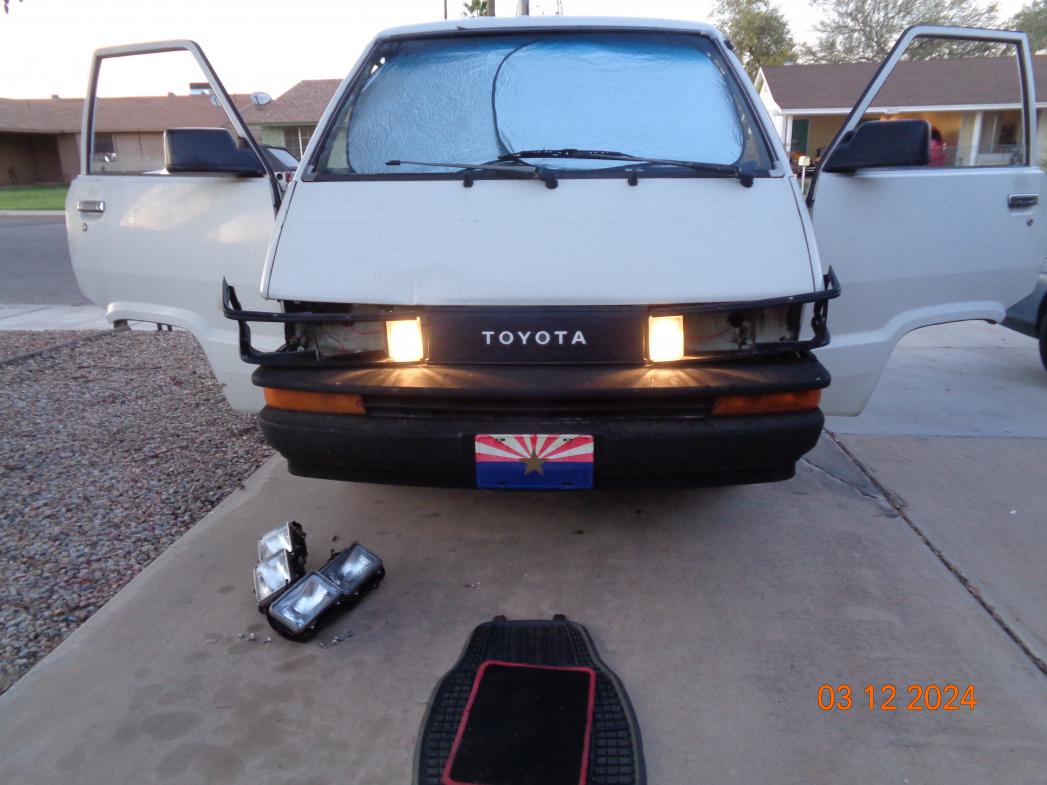
 Works like a charm now, and of course the switch lights up too which is a bonus! Although the switch is just held in by the wires, will need to figure out a good anchor system for it...
But anyways, I might've deviated from my initial diagram a bit but here's how it works in detail:
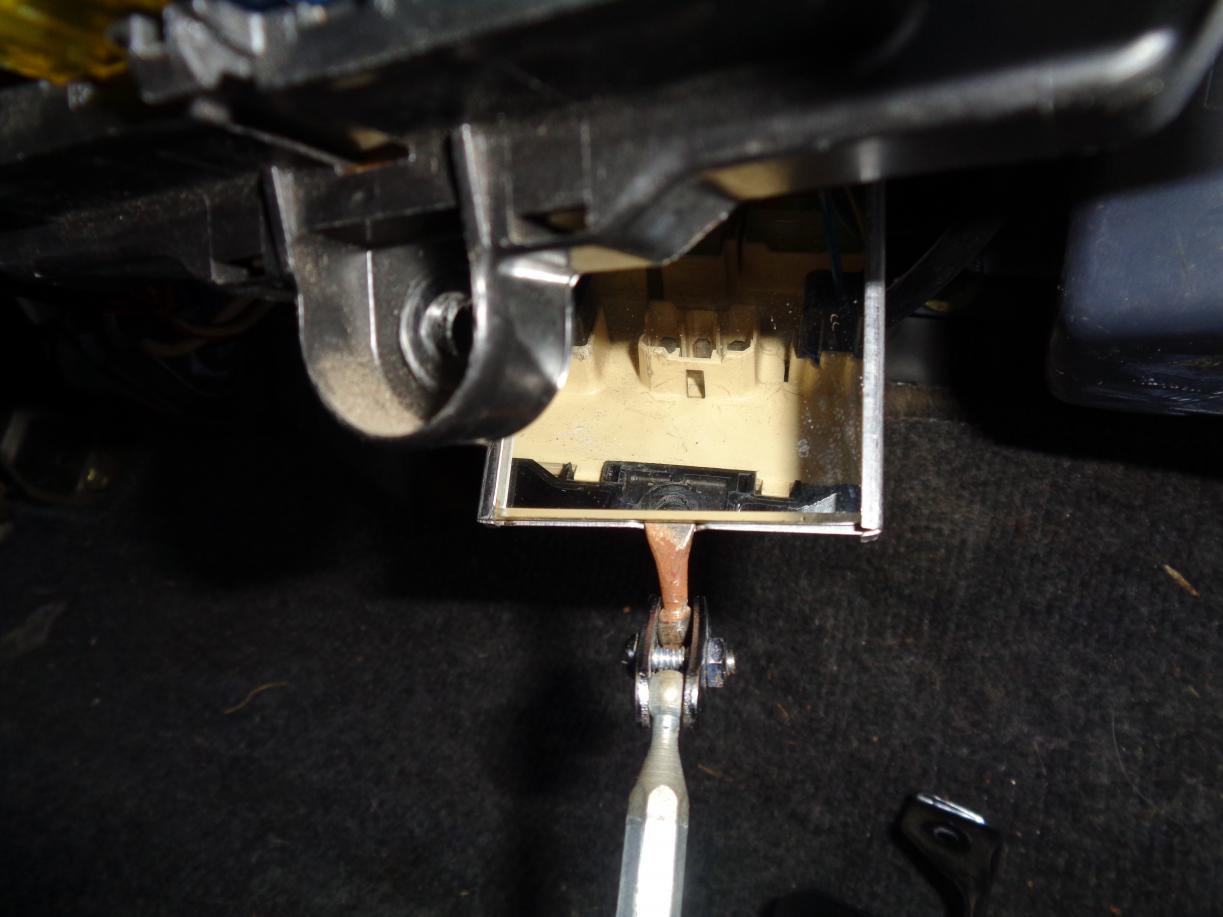
I tapped off of the battery terminal, as seen here,
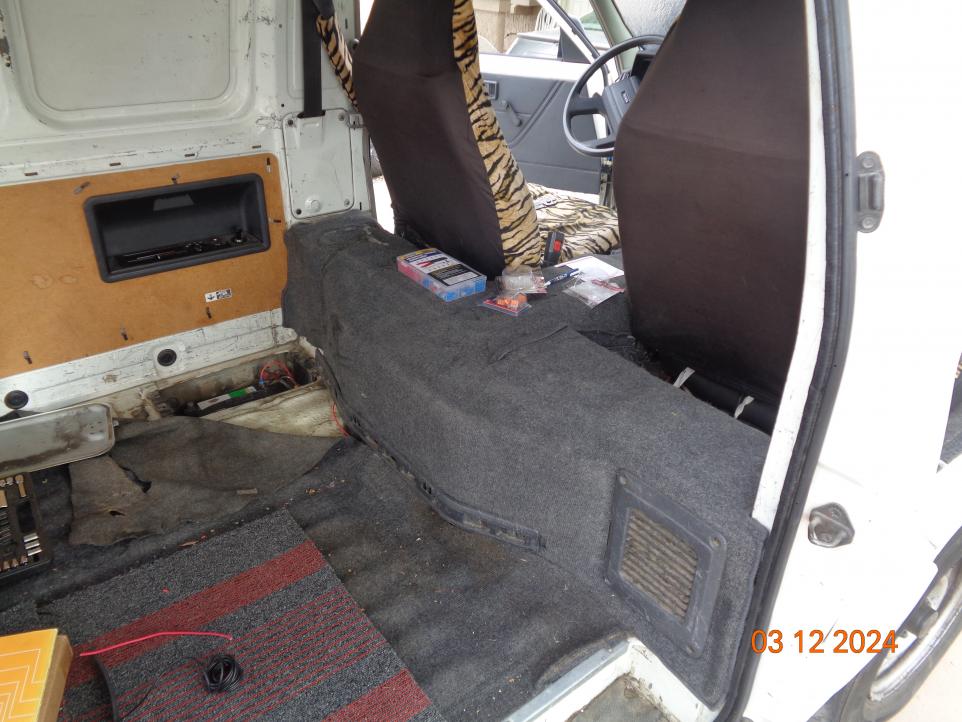
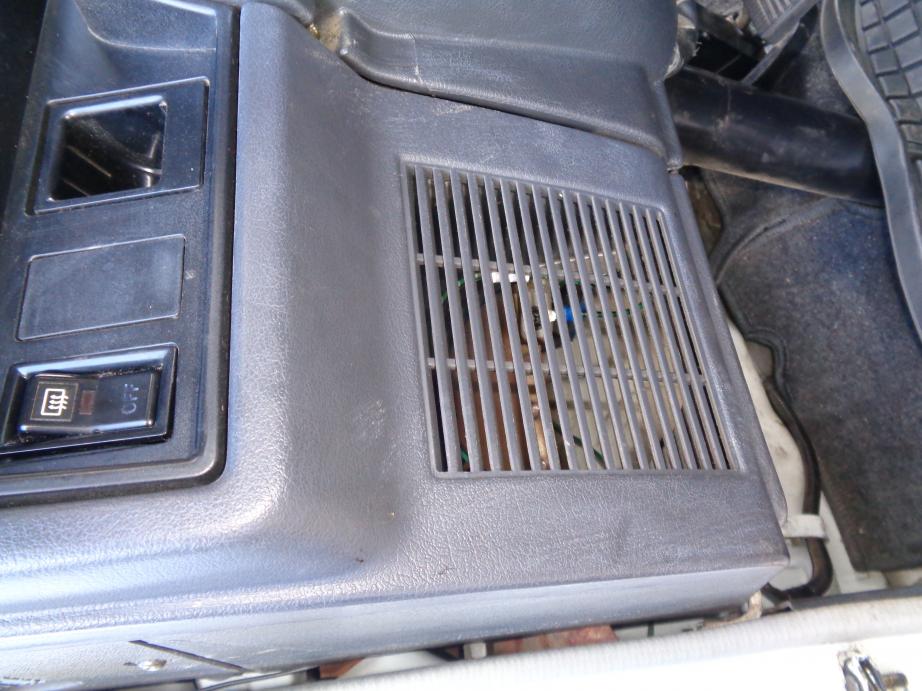
and then ran it under the carpeting along the rear hump, then tucked under the velcro patch by the rear fan vent, and ran it by the passenger's seat and up the floor to the fusebox. I used some special tinier-than-normal female connections from Ace Hardware, I think they were 1.86? something which is necessary here since the male plugs on the fusebox are real small. ALSO, I slightly spread the female connections open with a tiny screw driver to make them fit snugly on and not deathgripping those tiny old plugs! Note to self: Squeeze the insulated connections tighter as they like to come undone when unplugging them for whatever reason... 

Here, power flows in from the right and onto the switch on the left where the switch is. Thankfully, my ground on the steering cover mount? whatever it is worked for the switch since the bulb lights up just fine, and then I spliced the feed wire to the two line-ins to the foglights... Dunno if you can see them on the bottom last photo, but I used a 3-wire splice to join them, also from Ace Hardware. I like Ace Hardware, they've got everything and nice staff too!!! Not sponsored btw lol 
The ground worked marvelously, but next time I should use a little less ground wiring, had to wrap up the extra length with lots of electrical tape to the bumper mount. Very glad this is working out in my favor of course, but obviously without doing some homework of what the hell anything electrical is, I would've not done this at all without the factory electrical diagrams!!!
Anywho, I'll finish buttoning her up tomorrow, lost daylight to drop the bumper and attach the shrouds and headlight buckets. See ya then, TVT! 

-
Van Enthusiast
- Rep Power
- 1
Tags for this Thread
 Posting Permissions
- You may not post new threads
- You may not post replies
- You may not post attachments
- You may not edit your posts
-
Forum Rules


 Reply With Quote