Results 1 to 13 of 13

Thread: Temperature Gauge Dash Bulb

  1. #1
    Forum Newbie
    My Van(s):
    91 previa
    Join Date
    Jan 2012
    Location
    Nashville
    Posts
    2
    Rep Power
    0

    Temperature Gauge Dash Bulb

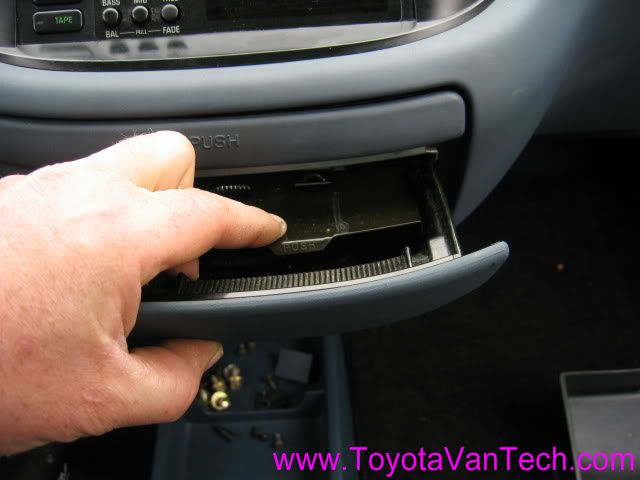
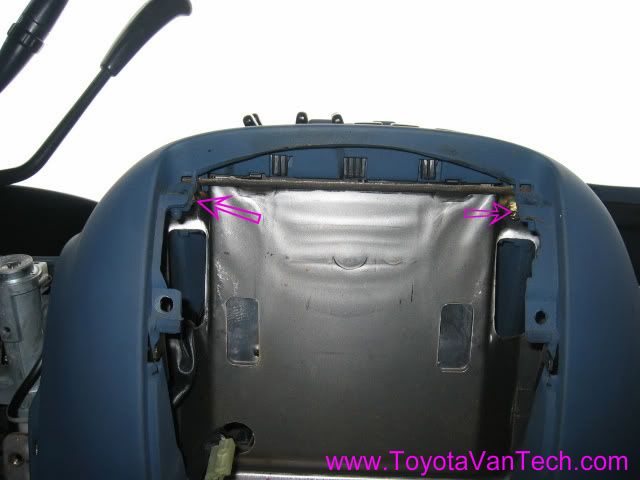
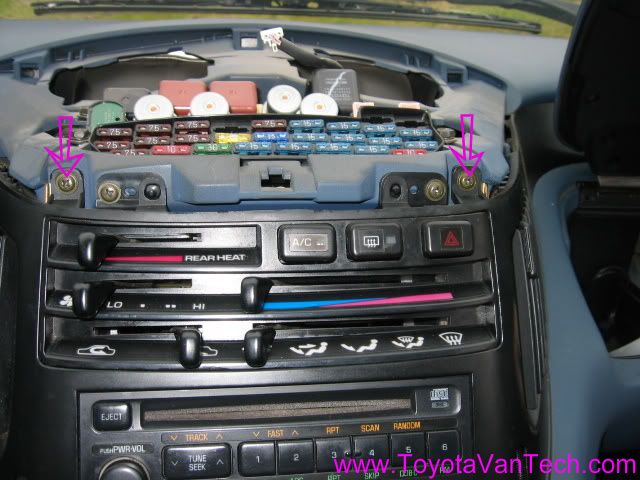
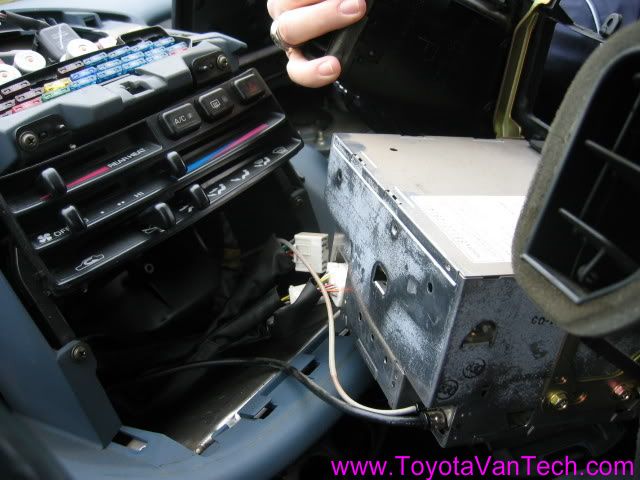
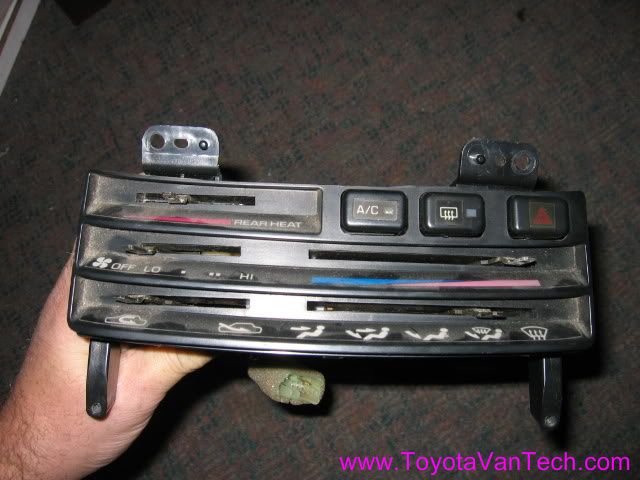
    I've been searching on how to replace the bulb for my temp gauge. i found this:
    http://toyotavanpeople.com/forum/vie...hp?f=11&t=5426
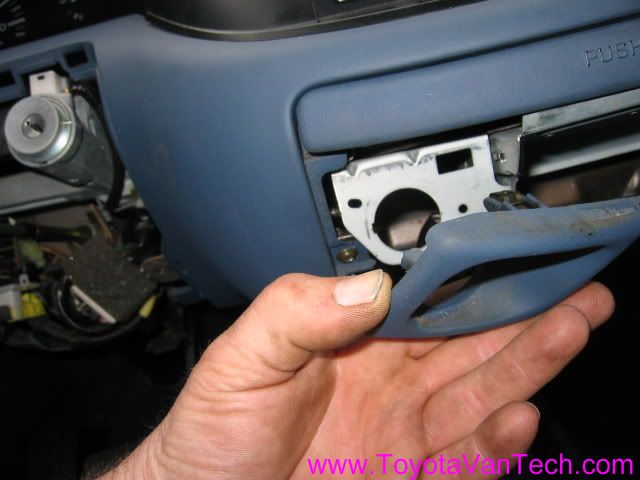
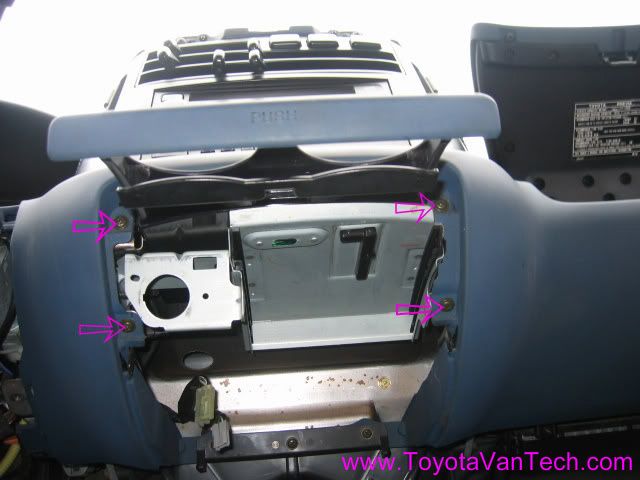
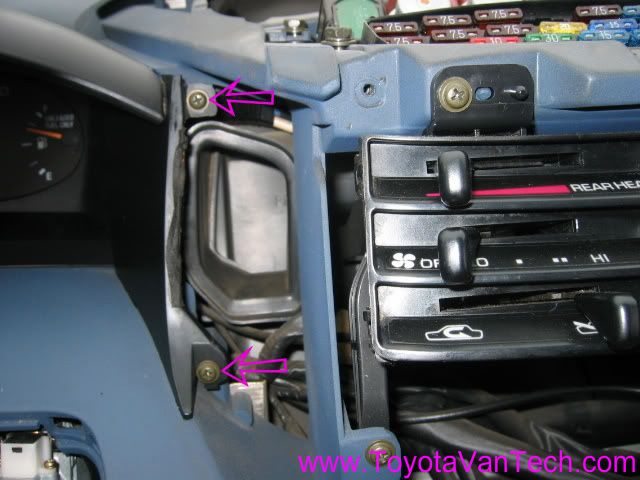
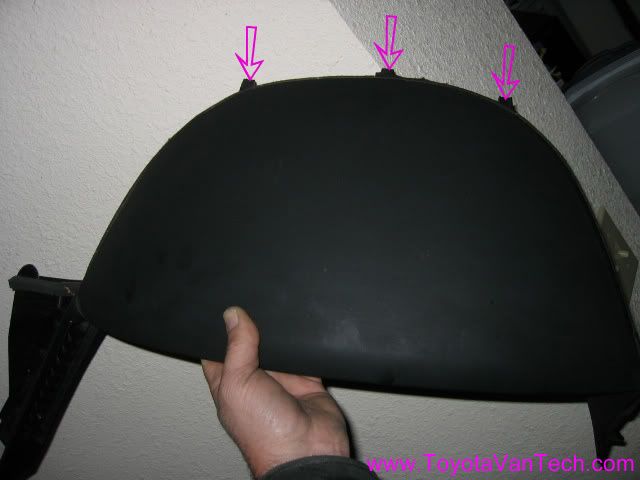
    but i'm not sure if i need to remove everything just to replace a bulb. Is there a way to replace it from behind the assembly or do i need to take everything apart? thanks
    Ben

  2. #2
    Administrator timsrv's Avatar
    My Van(s):
    Lots of them
    Join Date
    Jun 2010
    Location
    SW WA ST
    Posts
    6,203
    Rep Power
    10

    Re: Temperature Gauge Dash Bulb

    I remember that thread. I'm glad to see it's still there (I had several like this that got wiped out). Yep, all the info you need is there in that thread. I should copy and paste over here before their next "mis-hap". Tim

    PS: Due to the way the cover snaps on the temp control panel, you will need to disassemble......but it's really quite quick and easy. If it's the light in the cluster, then you need to pull the cluster too. Once removed, there's easy access to the bulb from the back of the cluster. Tim

  3. #3
    Administrator timsrv's Avatar
    My Van(s):
    Lots of them
    Join Date
    Jun 2010
    Location
    SW WA ST
    Posts
    6,203
    Rep Power
    10

    Re: Temperature Gauge Dash Bulb

    Okay, here's a copy/paste of my posts from that thread (for safe keeping here). Enjoy

    The original poster on that thread was asking about the lighting behind the temperature control panel.........here's my response:

    Yes, there are 2 small incandescent bulbs that are wired from your heater fan switch assembly (Toyota Part # 90981-11014). These are the bulbs that illuminate this area. I'm guessing they are both burned out. They are not hard to change once you get some access, but in order to do that, you need to partially disassemble your dash. I snapped some pictures for you of an extra heater control I have so you can see how the control assembly comes apart. You will most likely need to remove the hinged change tray / compartment at the bottom center of your dash, the cigerette lighter assy, the ash tray, the radio & trim assembly, then pull the mounting screws for the heater control before you get enough access to pull the fascia off of it and get to the bulbs.

    Using a small screw driver, pry out one of the hinges to the change tray, then open it and it will come off.


    Remove the ash tray.


    Pull the wires from the lighter assy, then remove the black plastic cover piece.


    A 90 deg scribe works well to release the plastic hooks.


    Push the metal part of the assy out from behind.


    Use your scribe to release the plastic hooks, then remove the white plastic part.


    The plastic garnish will pull off now. Do not twist or change angles. Grab it firmly and pull straight toward you.


    Remove these 4 screws, then the drink tray and frame assy will come out. It's a tight fit, but play around trying different angles and it will come out when you find the right ones.


    Take out these 2 screws.


    Find the hidden latch, and remove the top center dash / fuse box cover.


    Remove these 2 screws.


    Remove the radio and fascia assembly.


    Once you have adequate access, pull the knobs off the control levers.


    The next 3 pics show the plastic catches that need to be undone to remove fascia.


    Here is the optical piece, it lifts right out once the fascia is removed.


    And here are the 2 bulbs. They pull straight out of the sockets (no twisting, just pull).


    There are also 2 general illumination bulbs in the gear selector indicator, one bulb for each gear shift position and one for "O/D OFF" light. With the exception of the radio, I replaced all of the general illumination bulbs in my dash with high intensity blue LEDs. Some were easy, but some were pretty darn difficult. LEDs run cool and last for a long time, but they will burn out if you try to run them on 12 volts. Because of this, each LED bulb must have a specific resistor wired in series with it to reduce voltage. Time and patience are required to isolate the circuits, cut, and install these resistors. Tim

    Here is a disassembled view of the gear selector indicator. The 2 general illumination bulbs are the ones with the purple arrows. The "O/D OFF" light is the clear one on the far right, and the others are self explanatory.


    When I mentioned difficulty of installing LEDs, the gear selector indicator was one of those trouble spots. Perhaps the most difficult of all was the 2 little light bulbs in the heater control. Just swapping incandescent bulbs is already a pain, but in order to install LEDs with the resistors, the entire fan switch needed to be removed. Here are some pics of my modified fan switch (with LEDs and resistors) before it was re-installed.


    And here are some pics of the dash illumination after the project was completed.


    If you need to remove the cluster, it's not so hard once you get the radio and garnish assy out. There's only 2 screws holding the instrument hood on


    After the screws are out, there are still 5 fasteners, but they are the push-in / pull-out type. There are these 3 bumps on the hood


    and they go into these 3 holes in the dash panel


    The other 2 are here by the heater duct.


    All you need to do (after you pull the 2 screws) is grab a hold of the hood and yank. It should pop right out. Just be careful to pull straight so you don't tweak the heat duct section. Sometimes you need to carefully loosen this area with a knife as to avoid damage while yanking out.


    After you get the instrument hood off, all fasteners are pretty obvious and shouldn't be much of a problem to figure out. You will need to pull the cluster, flip it over, then you'll see the 2 screws that hold the shift indicator onto it. Have fun. Tim

  4. #4
    Forum Newbie
    My Van(s):
    91 previa
    Join Date
    Jan 2012
    Location
    Nashville
    Posts
    2
    Rep Power
    0

    Re: Temperature Gauge Dash Bulb

    thanks!! and do you you know the part number for the bulbs so i can have them ready when i take it all apart?

  5. #5
    Administrator timsrv's Avatar
    My Van(s):
    Lots of them
    Join Date
    Jun 2010
    Location
    SW WA ST
    Posts
    6,203
    Rep Power
    10

    Re: Temperature Gauge Dash Bulb

    Quote Originally Posted by timsrv View Post
    Yes, there are 2 small incandescent bulbs that are wired from your heater fan switch assembly (Toyota Part # 90981-11014).
    If you are talking about the general illumination for the cluster, these are a standard #161 bulb that can be found almost everywhere. The bulbs do not come with the tiny green "condoms", but you can usually peel these off of the old bulbs and re-use them......... 
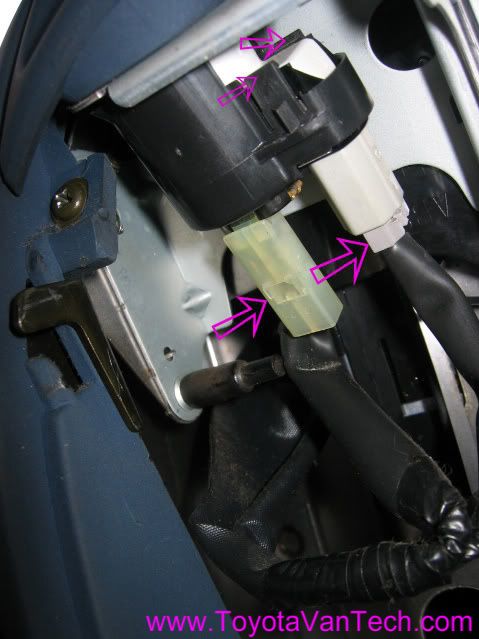
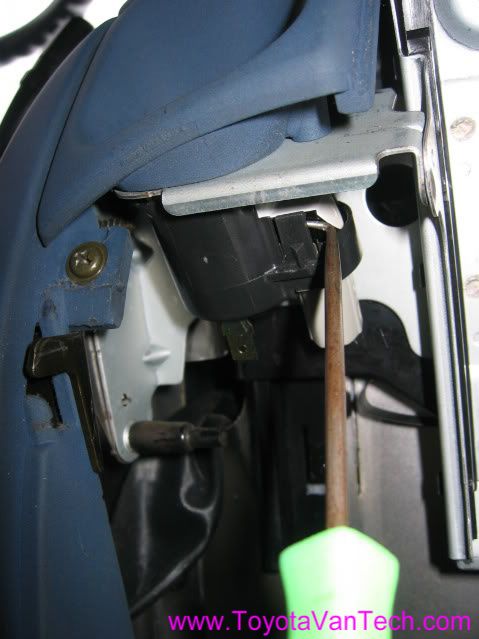
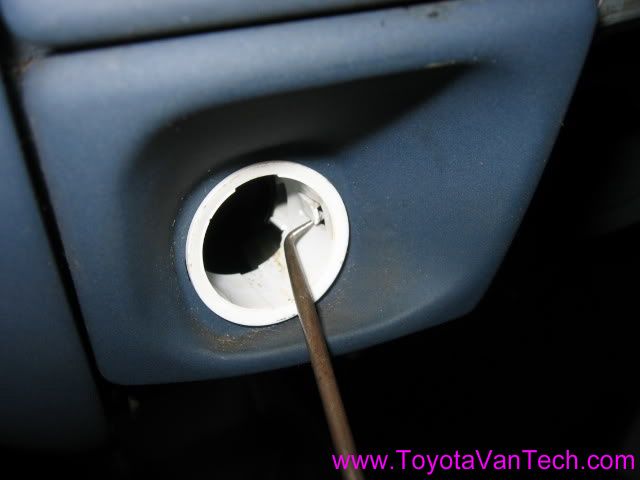
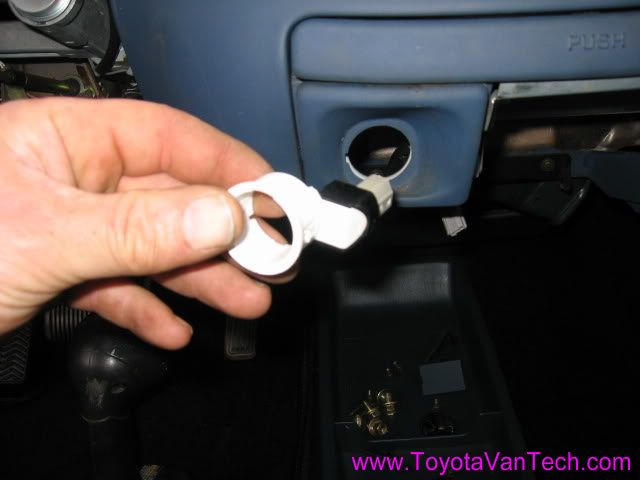
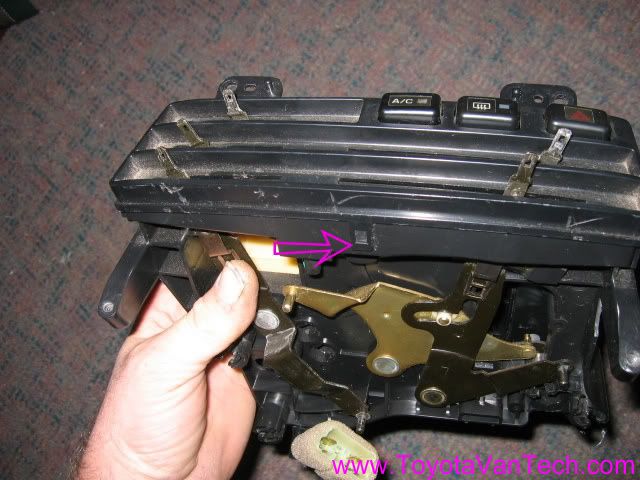
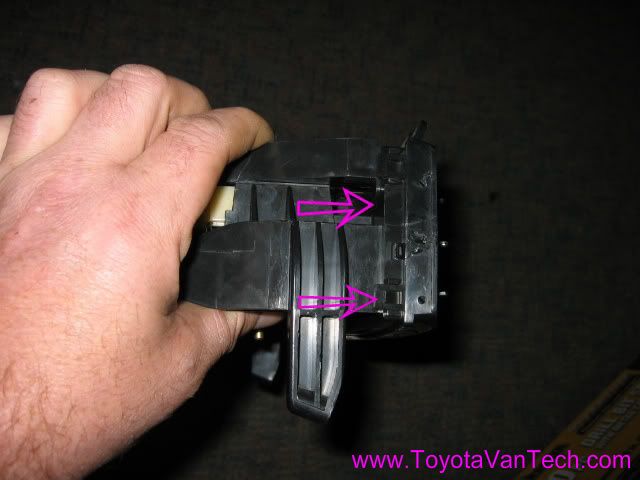
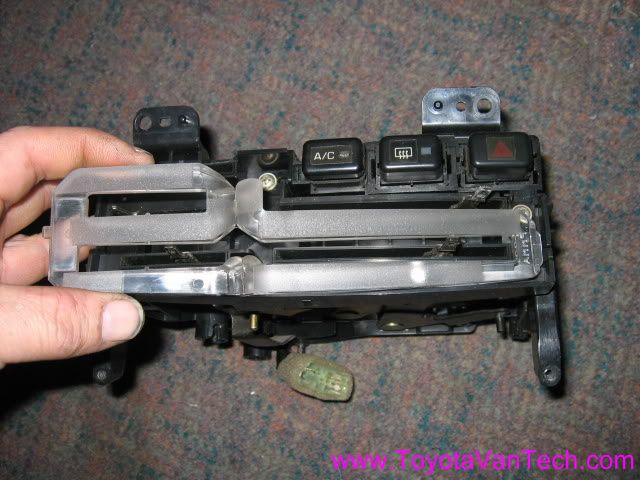
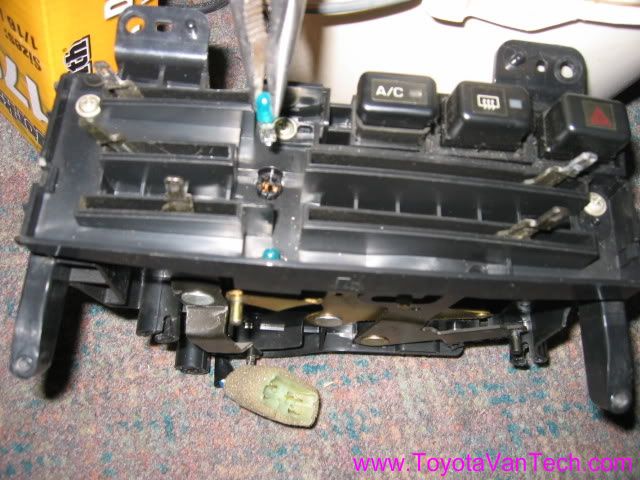
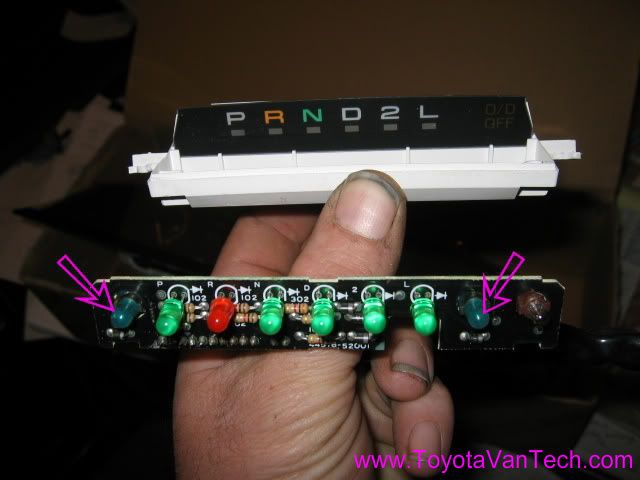
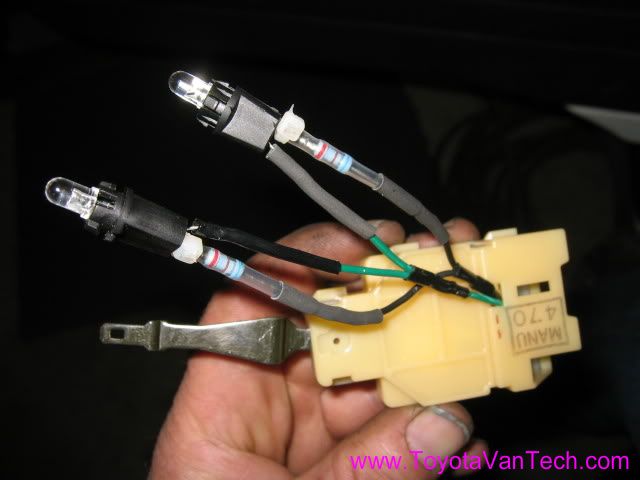
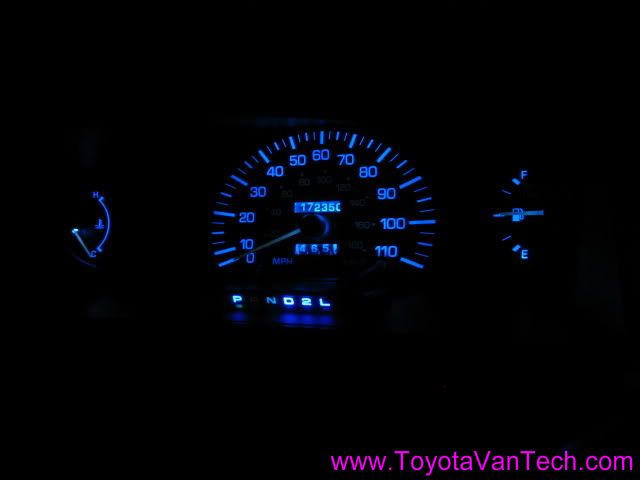
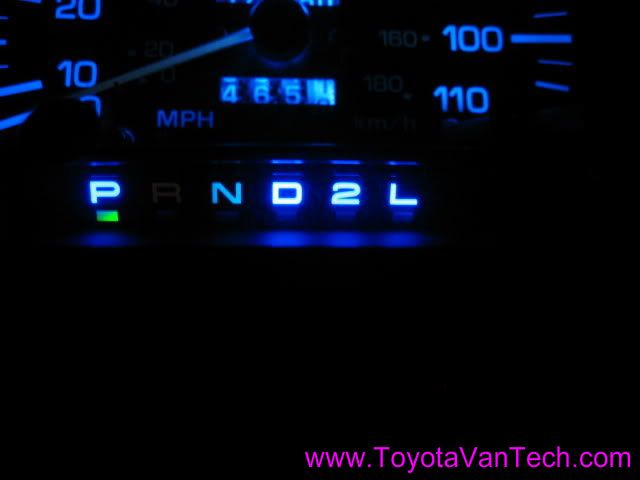
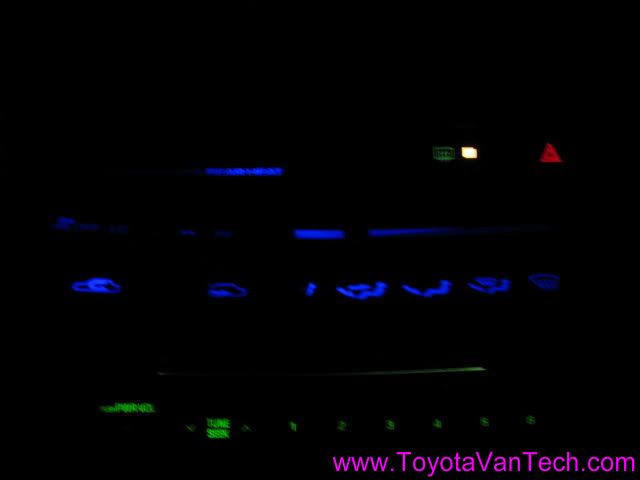
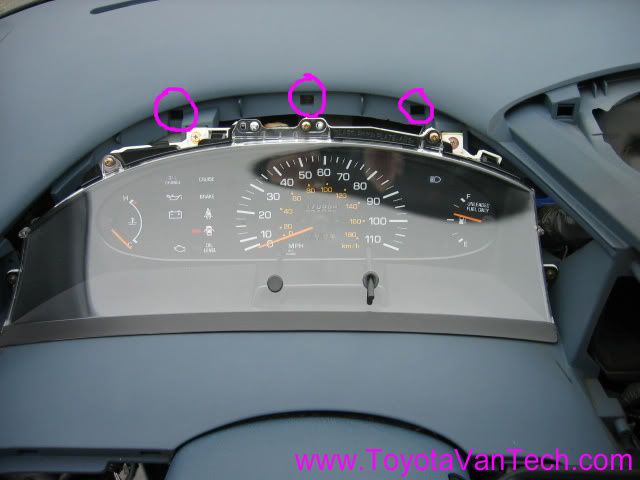
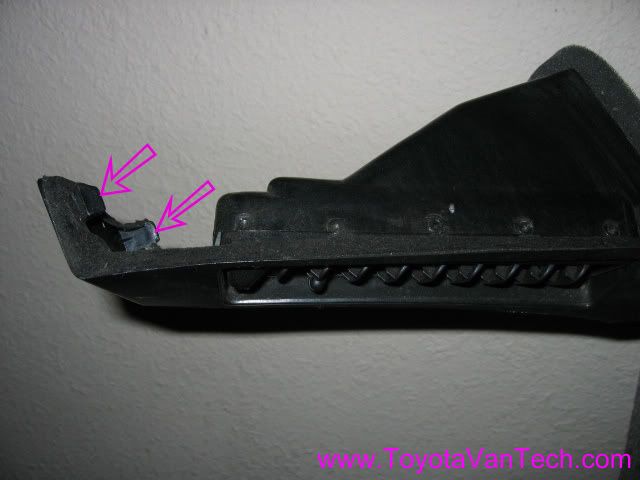
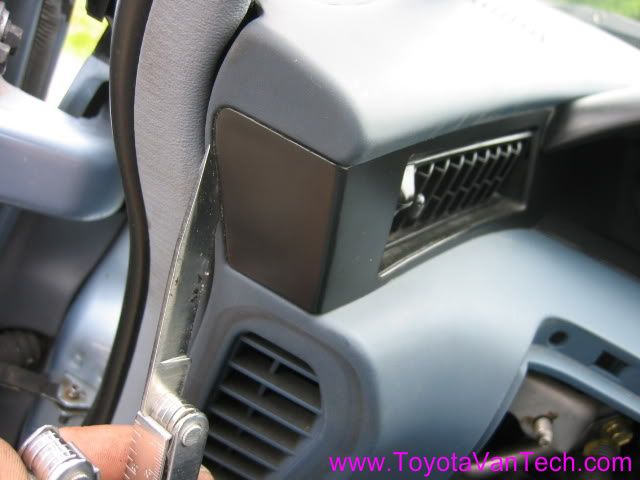
.........Or, you can take this opportunity to upgrade to the LED bulbs like I used above. LEDs draw less power and run cooler. Tim

  6. #6
    Van Fan Previa dude's Avatar
    My Van(s):
    1991 Toyota Previa le dual sunroof model jdm engine and light conversion , 1995 Toyota Previa le supercharged dual sunroof model jdm light conversion
    Join Date
    Sep 2012
    Location
    Sacramento Ca,
    Posts
    62
    Rep Power
    1

    Re: Temperature Gauge Dash Bulb

    Hey there Tim, I would love to put blue l.e.d. lights . Could you tell me where you got them?

  7. #7
    Administrator timsrv's Avatar
    My Van(s):
    Lots of them
    Join Date
    Jun 2010
    Location
    SW WA ST
    Posts
    6,203
    Rep Power
    10

    Re: Temperature Gauge Dash Bulb

    I got the small bulbs & resistors at Fry's electronics. Here's a picture of them in the package:


    The 168/194 bulbs (single bulb with blue base in above picture) I found on eBay. These ones already have the resistors built in, so all you have to do is pull out the old & put in the new. One thing to remember though, LED's are polarity sensitive, so you will need to test these before putting your dash back together. If any of them don't work, then pull them back out, rotate 180 deg, then put back in. I bought a bunch of these eBay about 5 years ago & still have a bunch left. I just checked and don't see the exact ones I got, but there are literally thousands on similar bulbs to choose from. Here's one of the listings I clicked on: http://www.ebay.com/itm/8000K-Blue-T...a80709&vxp=mtr

  8. #8
    Van Fan Previa dude's Avatar
    My Van(s):
    1991 Toyota Previa le dual sunroof model jdm engine and light conversion , 1995 Toyota Previa le supercharged dual sunroof model jdm light conversion
    Join Date
    Sep 2012
    Location
    Sacramento Ca,
    Posts
    62
    Rep Power
    1

    Re: Temperature Gauge Dash Bulb

    the blue light at the bottom seems big to me. would the fix in the back of the instrument panle? it looks more the size of a 194? i would rathe do a plug and play led light then start cutting wires

  9. #9
    Administrator timsrv's Avatar
    My Van(s):
    Lots of them
    Join Date
    Jun 2010
    Location
    SW WA ST
    Posts
    6,203
    Rep Power
    10

    Re: Temperature Gauge Dash Bulb

    Several of the general purpose lights in the cluster are 194/168 bulbs...........that's what I use this bulb for. The 5mm ones in the package are used for the shift indicator & for the fan switch. Tim

  10. #10
    Van Fan Previa dude's Avatar
    My Van(s):
    1991 Toyota Previa le dual sunroof model jdm engine and light conversion , 1995 Toyota Previa le supercharged dual sunroof model jdm light conversion
    Join Date
    Sep 2012
    Location
    Sacramento Ca,
    Posts
    62
    Rep Power
    1

    Re: Temperature Gauge Dash Bulb

    gotcha. thank you Tim for clearing that up for me.

  11. #11
    Forum Newbie
    My Van(s):
    1989 Toyota Eli
    Join Date
    Mar 2016
    Location
    Vancouver, BC
    Posts
    24
    Rep Power
    1

    Re: Temperature Gauge Dash Bulb

    So I blew my dimmer switch bulbs when I wired my radio wrong. I fixed the radio issue (Thanks TVT, why I didn't check this with you first I will never know) but now I need new bulbs. I'm looking at these options but I'm worried that they might be too bright. Also what else uses the #161 bulb in a 1989 LE?

    https://www.amazon.ca/gp/product/B01...7HQ2EF6B&psc=1

    https://www.amazon.ca/YINTATECH-Wedg...07G8VXTZ0JWVHC

    https://www.amazon.ca/Grandview-Repl...placement+blue
    Last edited by Sir Goofy; 04-22-2017 at 03:22 PM.

  12. #12
    Administrator timsrv's Avatar
    My Van(s):
    Lots of them
    Join Date
    Jun 2010
    Location
    SW WA ST
    Posts
    6,203
    Rep Power
    10

    Re: Temperature Gauge Dash Bulb

    Good luck. The last batch of LED wedge bulbs I got off amazon were junk. They seem to vary so much from one purchase to another (can never get the same thing as before).............and sometimes that is a good thing. The ones in your 1st link appear to be too big, but the others may work okay. Tim

    PS: for more "vanwagon specific" information, check here: http://www.toyotavantech.com/forum/s...s-Where-to-buy

  13. #13
    Forum Newbie
    My Van(s):
    1989 Toyota Eli
    Join Date
    Mar 2016
    Location
    Vancouver, BC
    Posts
    24
    Rep Power
    1

    Re: Temperature Gauge Dash Bulb

    Thanks again Tim, I believe the light in my shifter has also been burnt out in the same accident, is the a forum started for fixing such an issue? Do you know what size bulb I need to remedy the situation?

Tags for this Thread

Posting Permissions

  • You may not post new threads
  • You may not post replies
  • You may not post attachments
  • You may not edit your posts
  •