• Cleaning the Throttle Body

    The throttle body is a pretty simple component but after years of service the internal passages can become clogged/dirty & the TPS (Throttle Position Sensor) begins to fail. For these reasons I recommend cleaning the throttle body and replacing the TPS on any van with 150k or more miles. Here's my method of disassembling, cleaning, and adjustment.

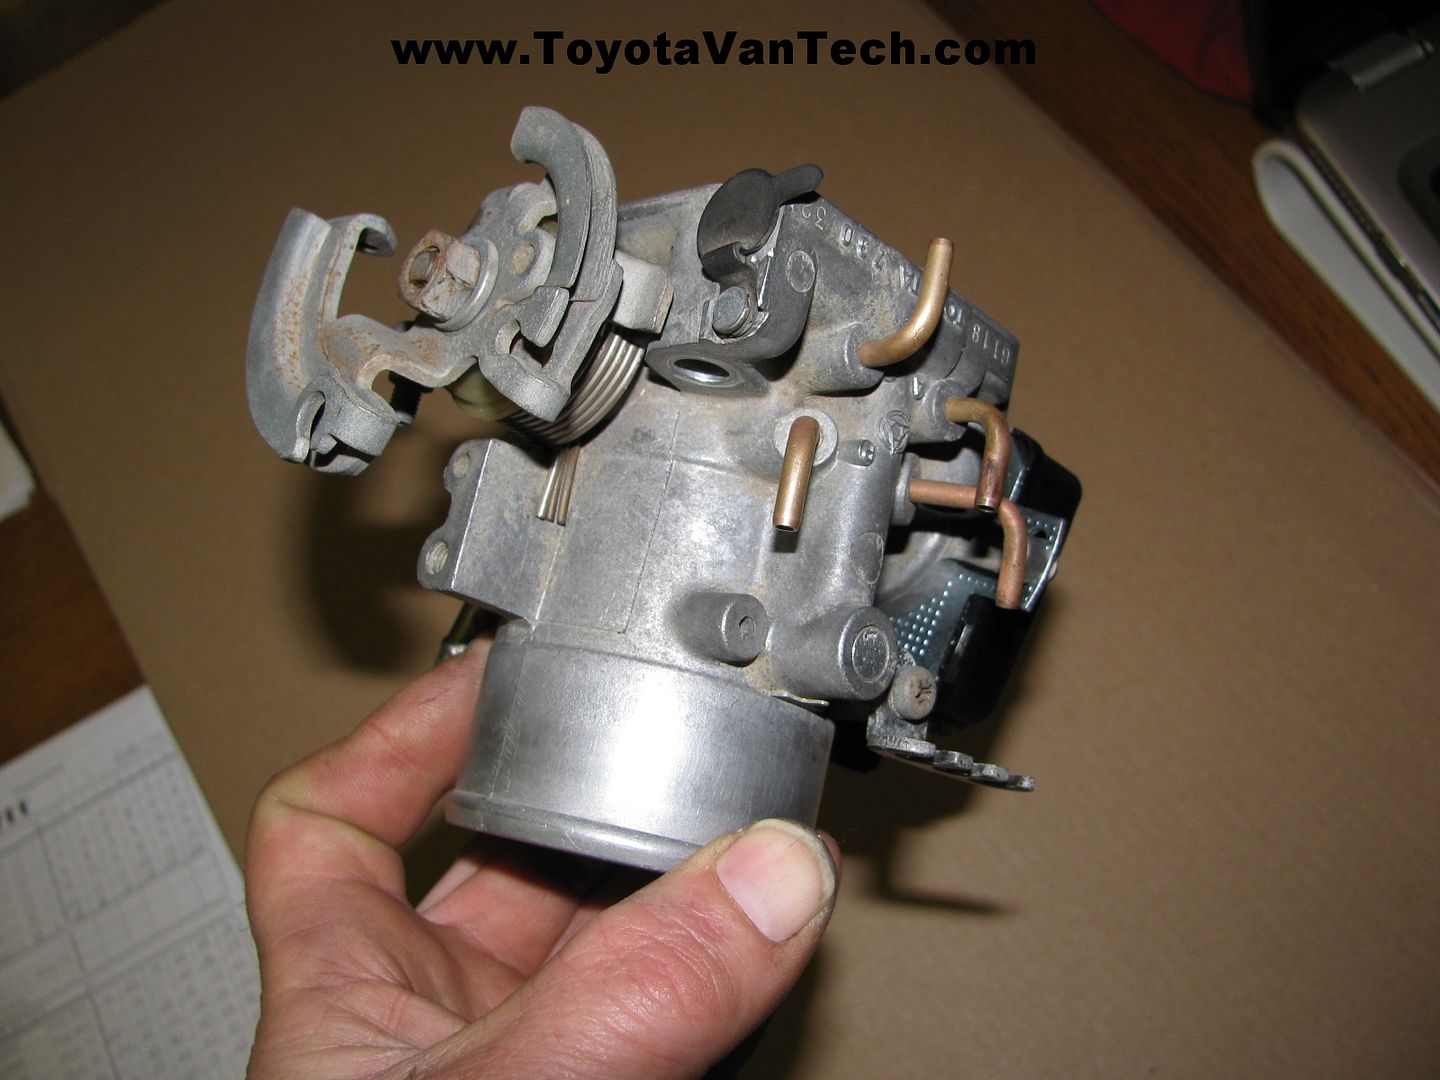
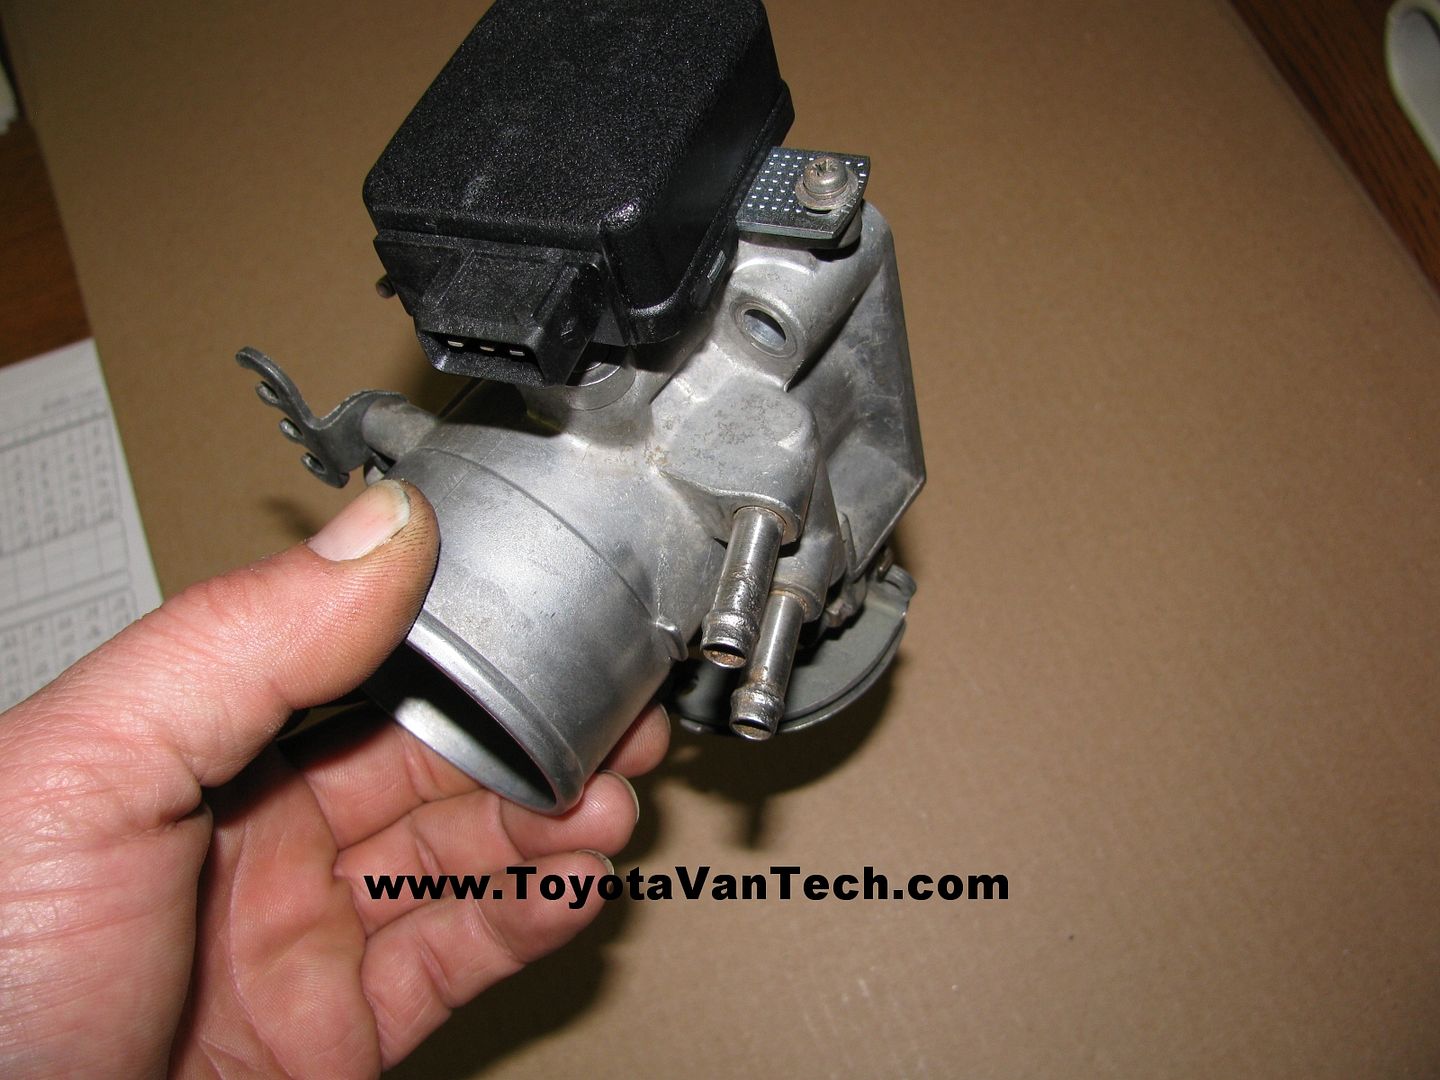
    This is a throttle body I pulled from a parts van. It will take a couple days soaking in Chem-Dip, so I can drive my van while this is being worked on, then I can swap it out with the one on my daily driver when it's ready.
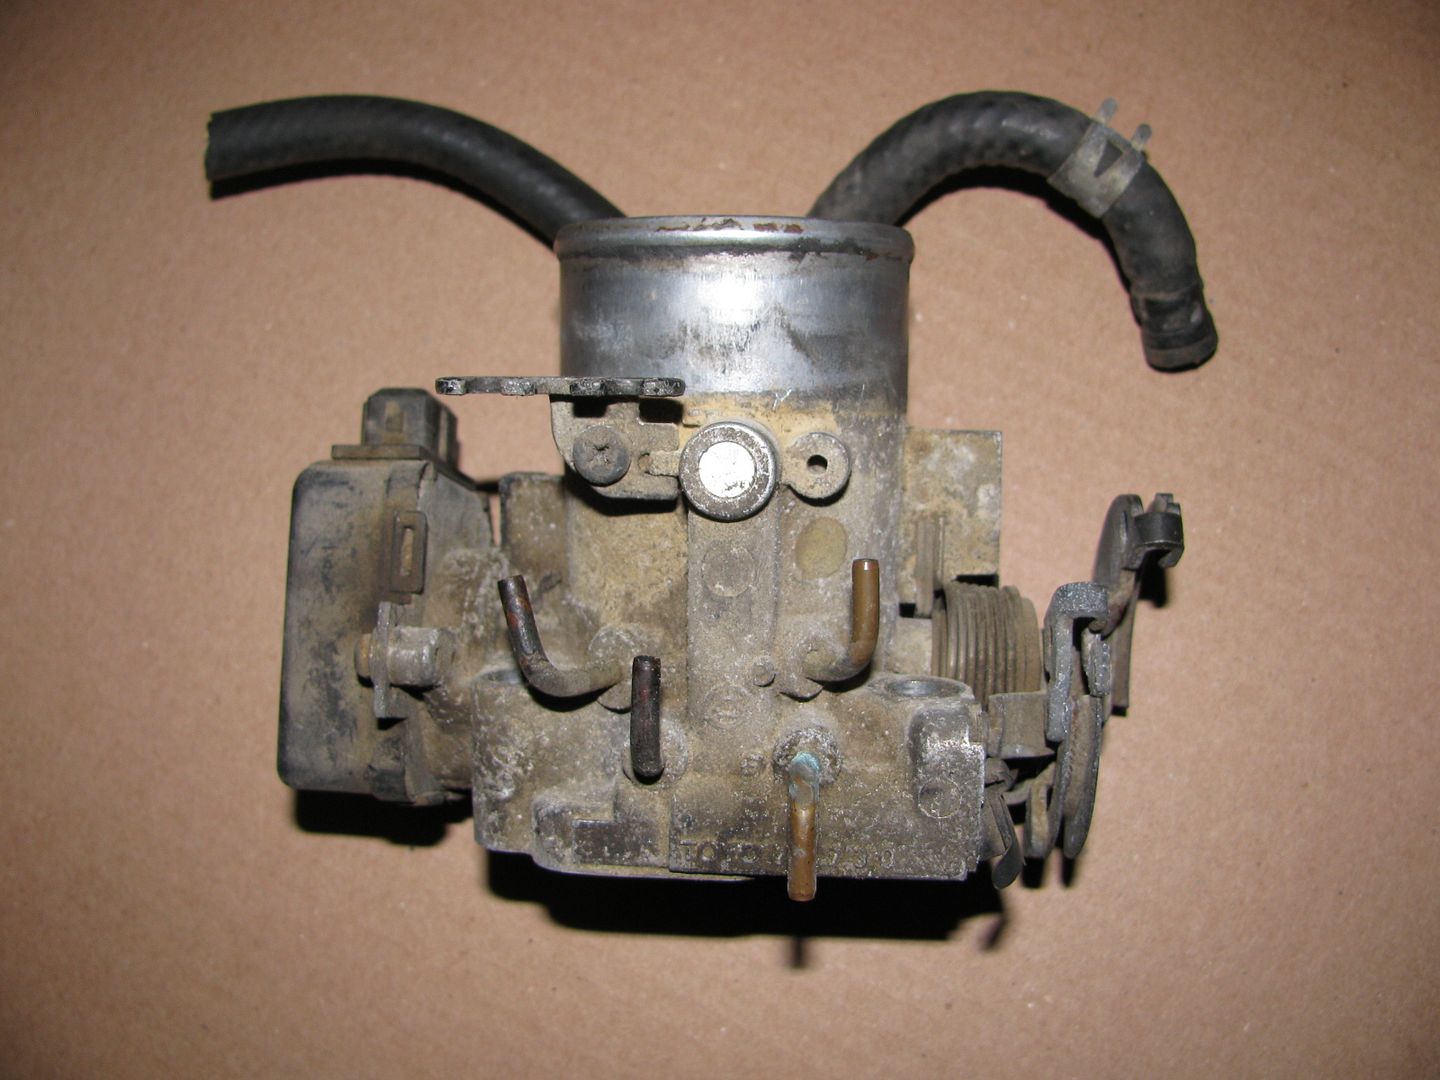


    Chem-Dip is a pretty harsh cleaning chemical. So harsh that it will eat rubber & plastic parts. Before soaking the throttle body in this it must be disassembled. Toyota didn't intend for these throttle bodies to be easily disassembled, but I have worked out a way to get the job done. The 1st challenge is the screws holding the butterfly to the throttle shaft. After installation Toyota crushed the threaded ends of these screws against the side of the shaft. To make matters worse, they used an unusual screw size (M3.5 X 0.6). So unless you plan on drilling & re-tapping the throttle shaft (to accept a more common screw size), you will need to save & re-use these.
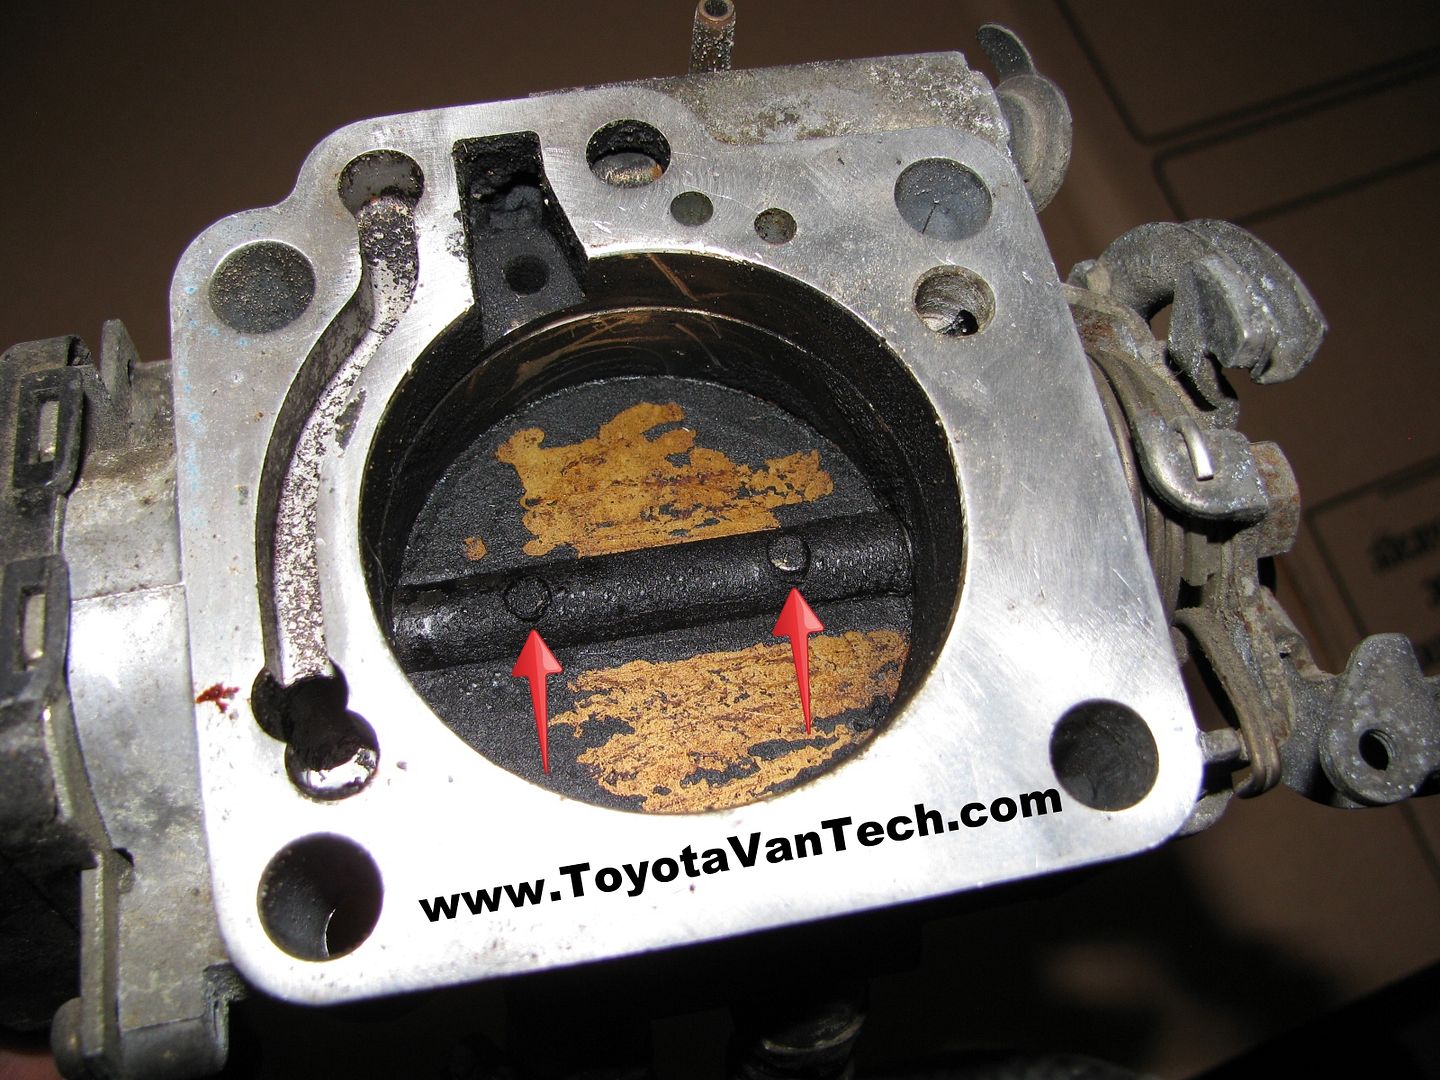


    Use a Dremel with a metal cutting fiberglass/abrasive wheel to carefully grind the crushed portion of the screws off. Don't stop until they are flush with the shaft. It will save you time later to also make an identifying scratch in the butterfly so you can orient it the same way when it's time to go back together.
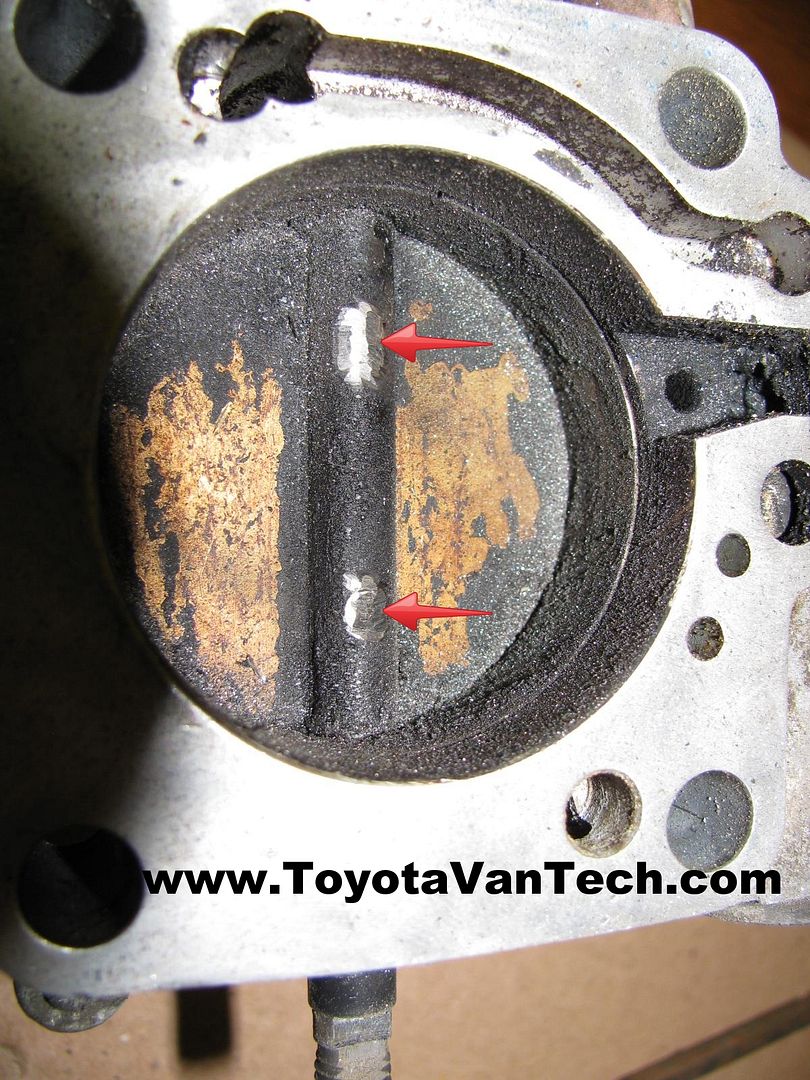


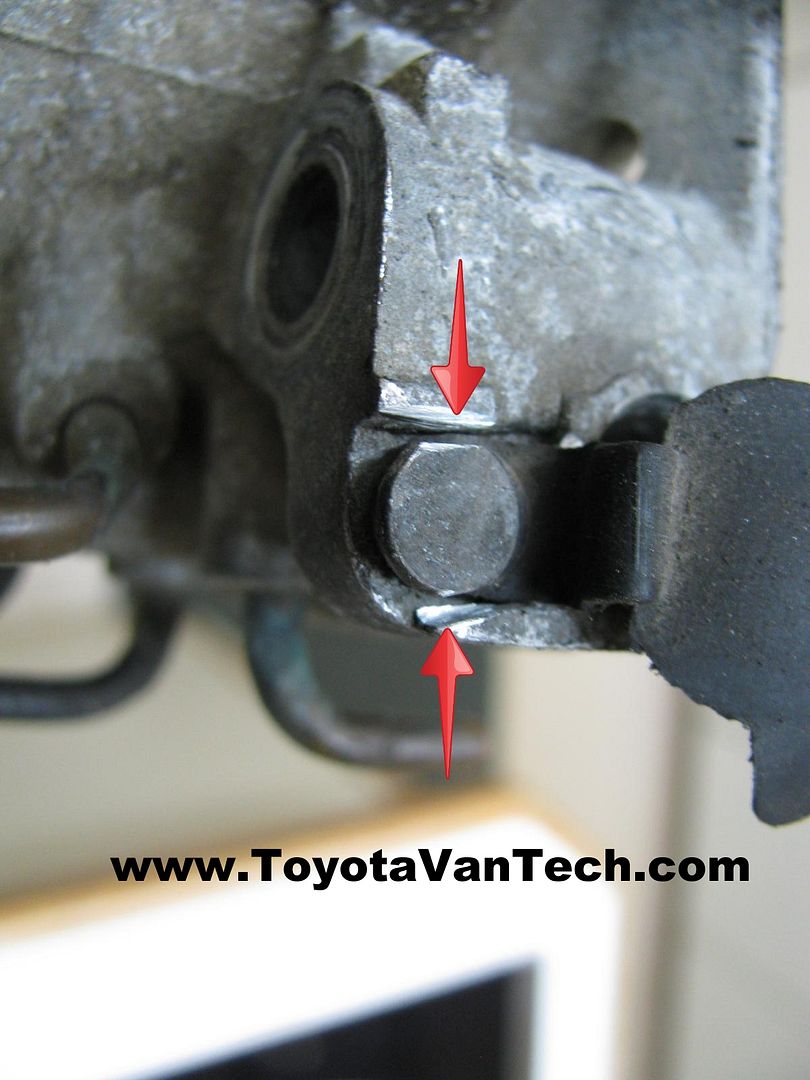
    While you have your Dremel out grind some slots to allow removal of the idle adjust screw cover.


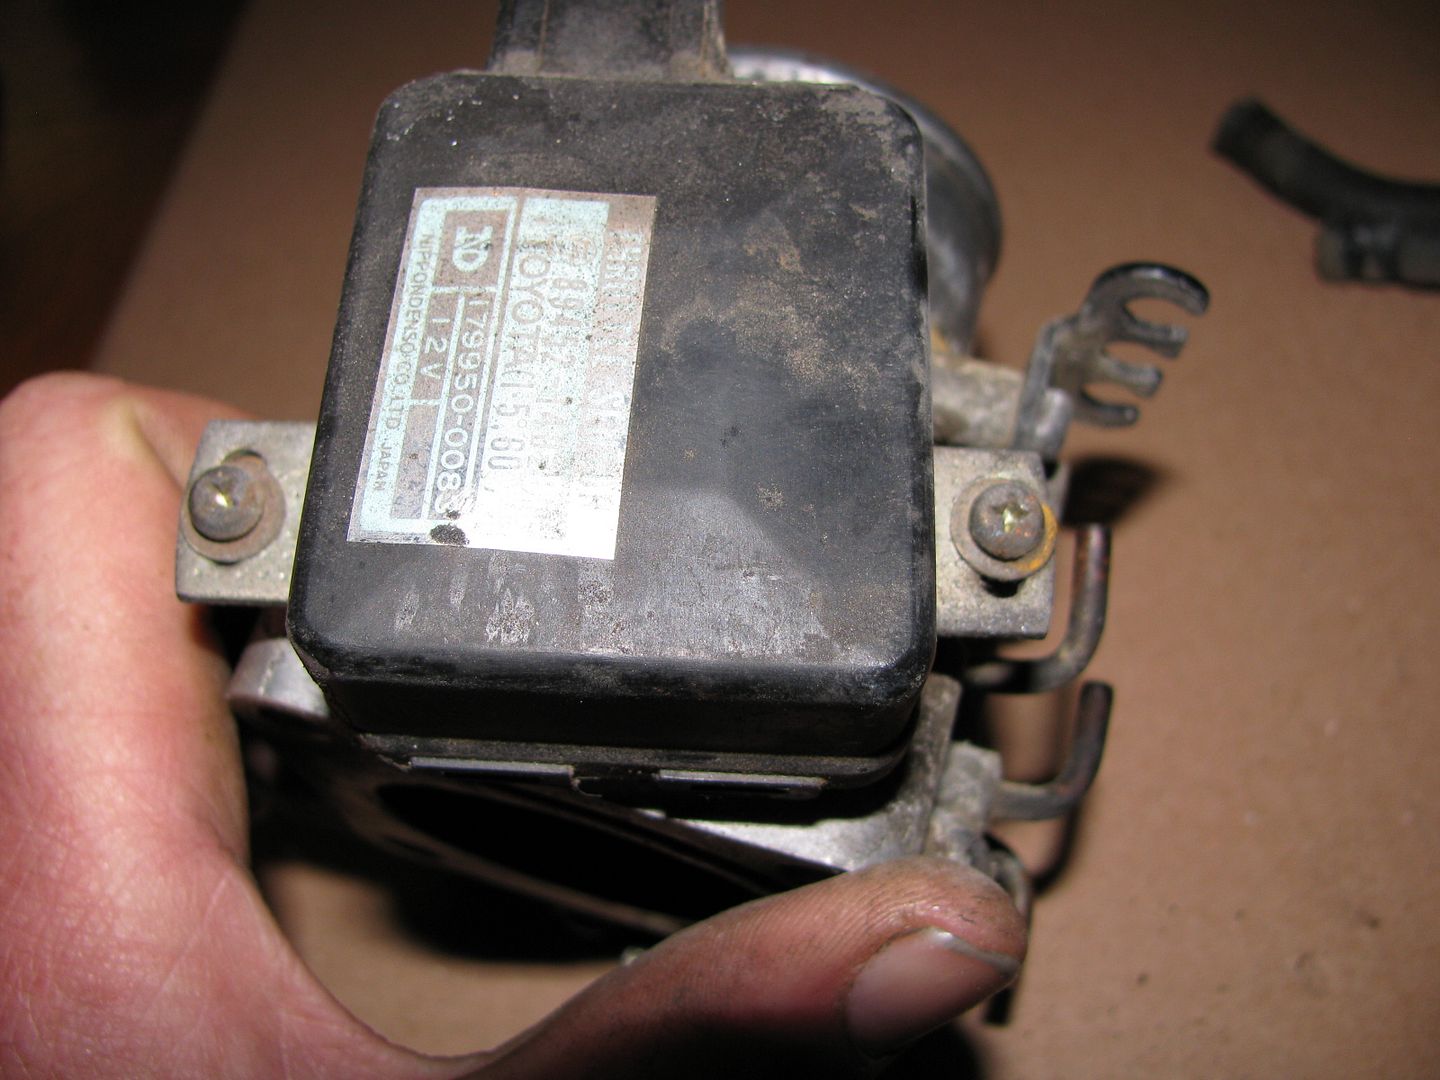
    Now it's time to remove the TPS........just two screws and it pulls straight off the shaft.


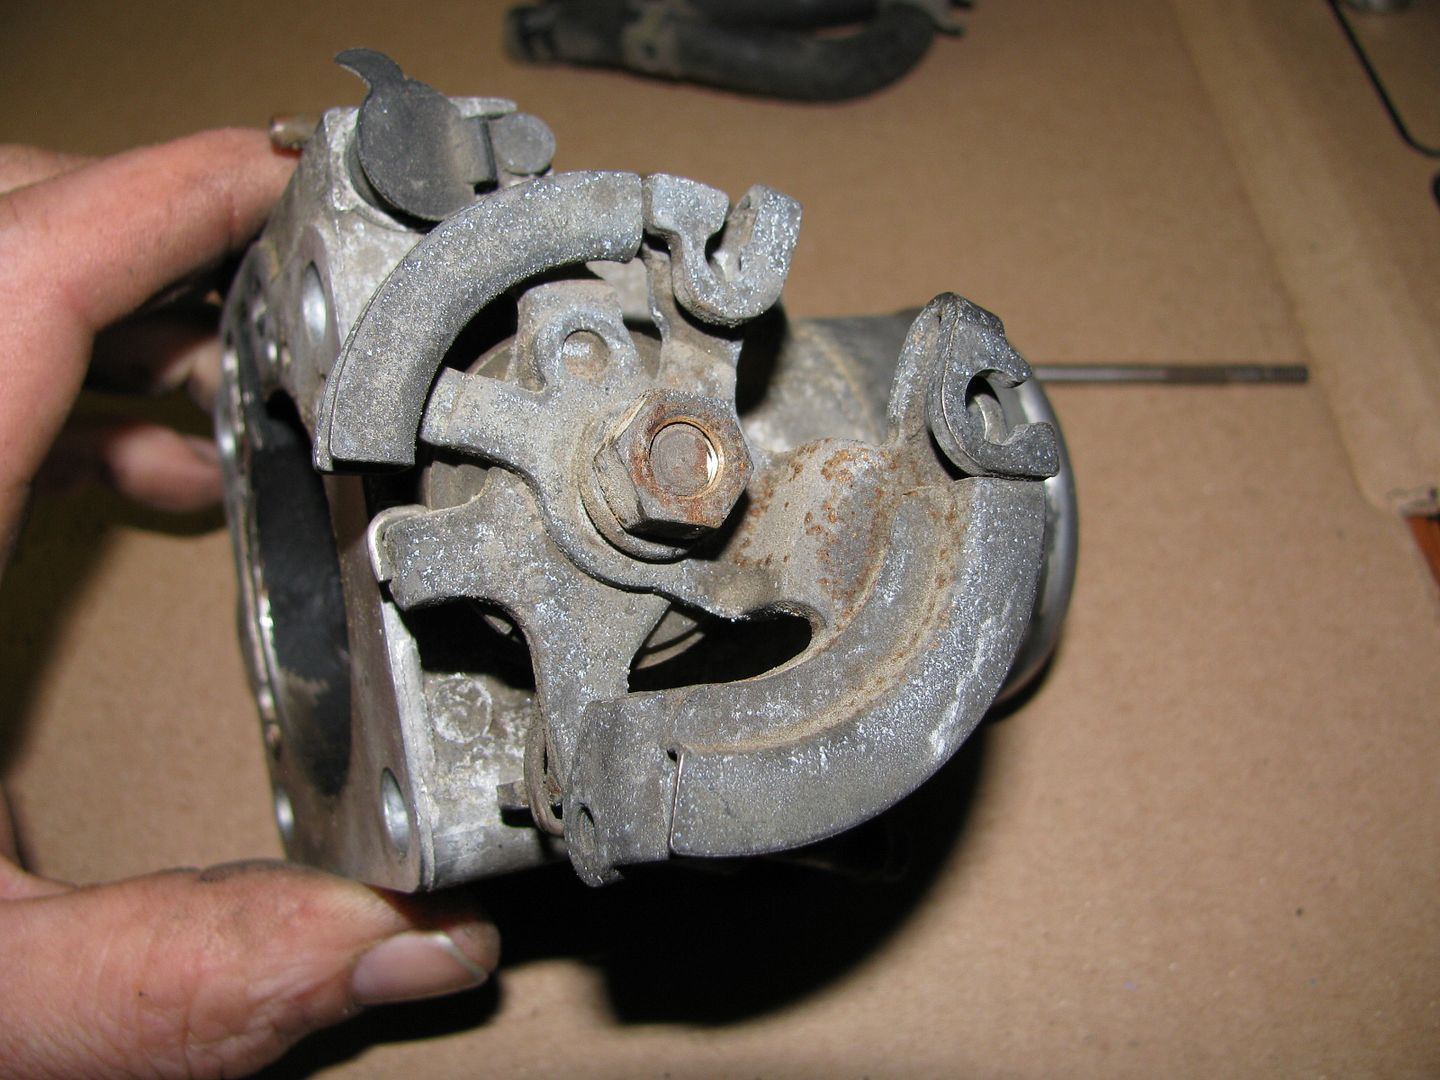
    Next remove the nut, the cable guide, throttle return spring, and other associated parts from the throttle shaft. Take a picture or make notes so you can put this back the same way later.


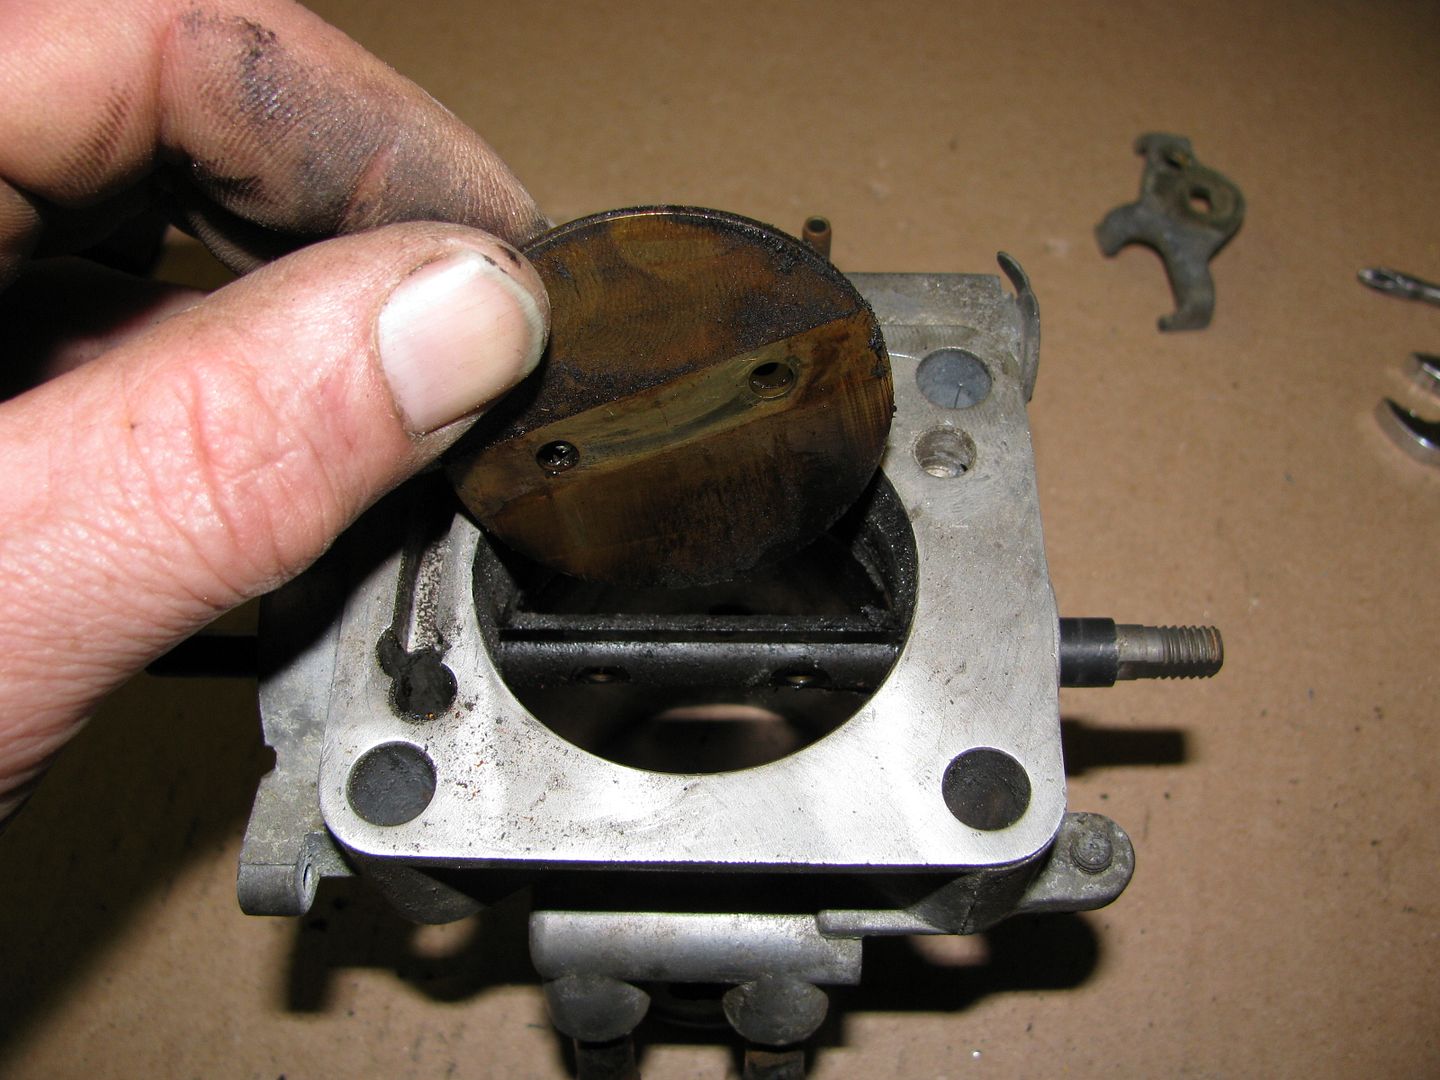
    Now the 3.5mm screws can be removed from the shaft & the butterfly can be removed. Note: These screws are a bit "soft" so be sure to use a high quality #2 Phillips screwdriver bit & make sure the tip is in good condition. Bear down hard on the screws when you rotate. You will only get one shot at this & these screw heads strip out easy. Sometimes the crushed threads extend up in the shaft area a bit so occasionally these screws are hard to remove. Remember when I said "you'll only get one shot at this"?...........well I might have lied just a little . That was to get your attention so you'd try your best! . Sometimes even when you do everything right the heads still strip . When this happens use your Dremel to make the Phillips heads into slot tips. Remember, you will still want to re-use these & this is your last shot..........unless you drill and tap for new screws........so be careful and do a good job. After the screws are out remove the butterfly.


    Now the throttle shaft can be removed.
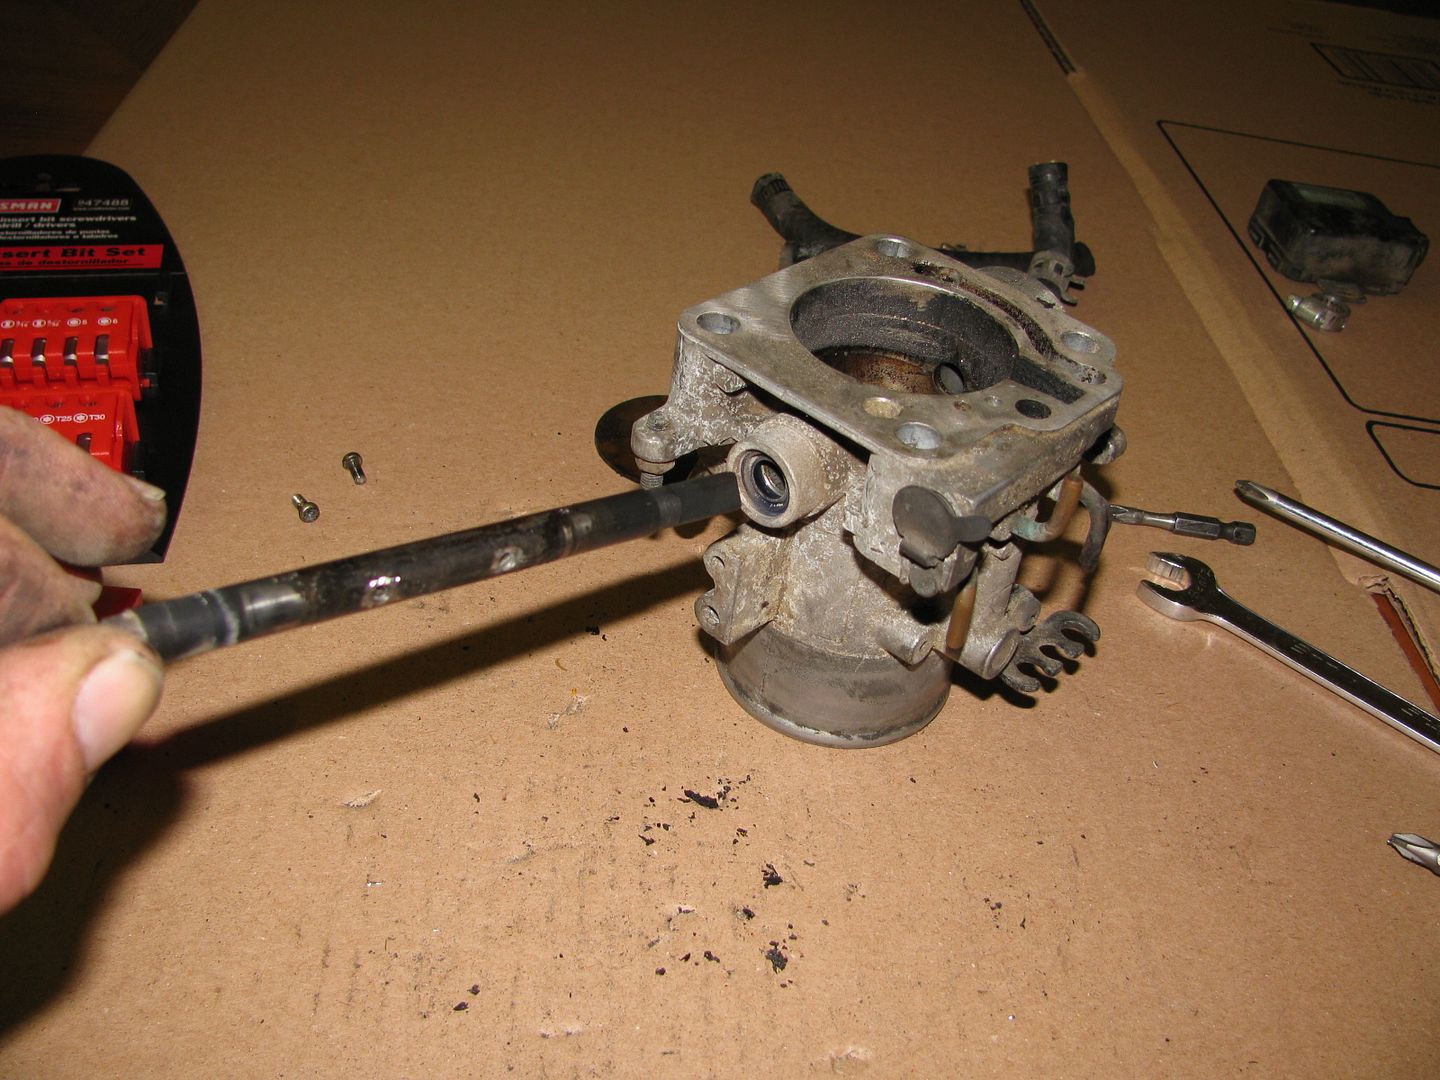


    Take a slot tip screwdriver and gently pry out the throttle shaft seals.
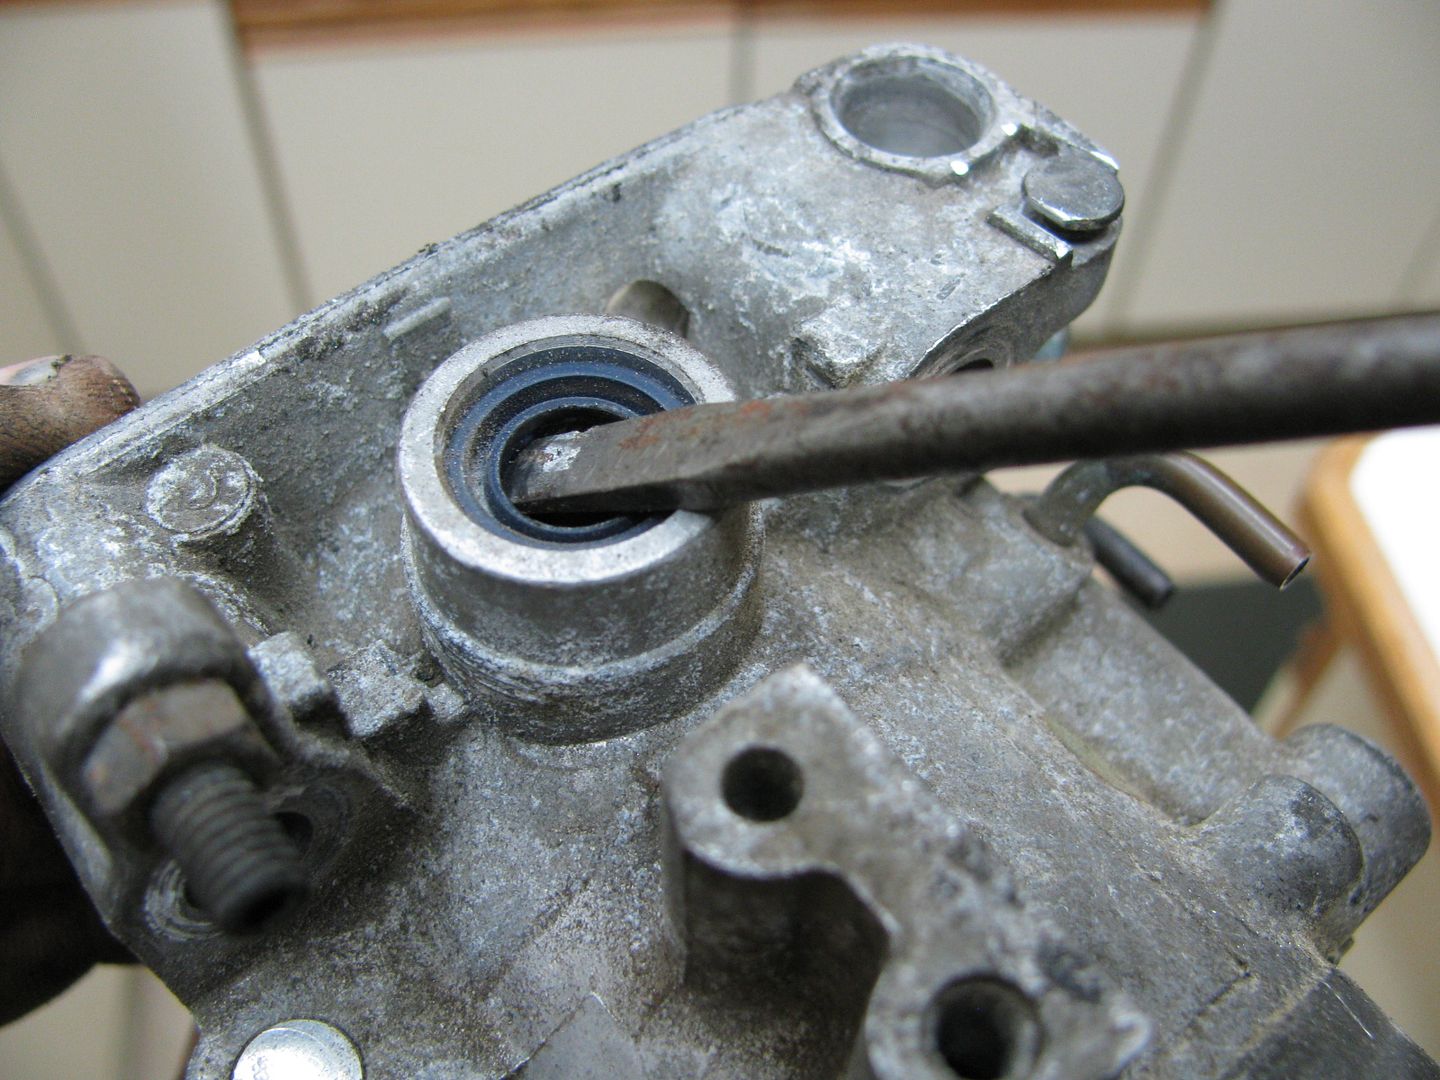


    These typically pop right out.
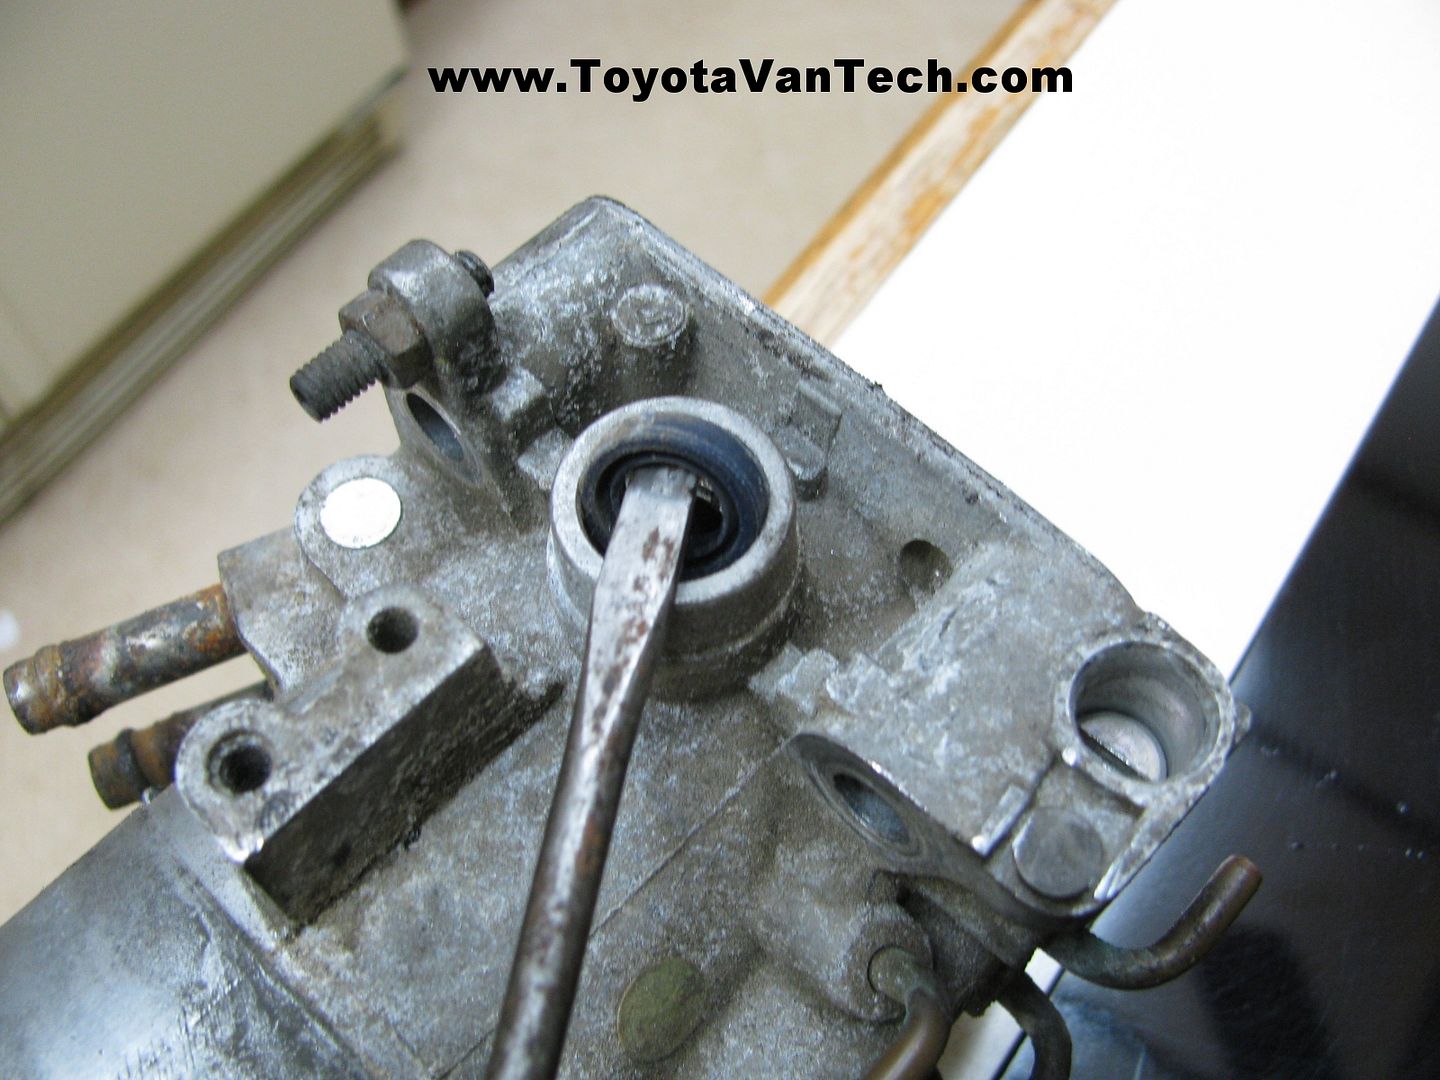


    When it comes to your idle adjust screw, get a slot tip screwdriver and while counting revolutions, turn it clock-wise until it bottoms out. Record the number of turns for future reference and then remove it. Sometimes the rubber o-ring will make it difficult to remove. If you have one, an expanding tip slot tip screw driver works well for extracting the idle screw. If you don't have that then it can be "blown out" by using compressed air through the exit port. If you use the compressed air method cup your hand under the screw so you don't lose it. Once removed, carefully remove the rubber o-ring from the idle screw and save for later. The other parts on the throttle body are pretty self explanatory. If you don't already have some, go to your local parts store and get yourself a gallon of Chem-Dip. Remember this stuff is nasty so read the directions and avoid skin contact. Load all the metal parts into the basket (included inside the gallon container) and lower into the can. Put the cover back on the can and forget about it for a couple of days. Hint: Chem-Dip will eat almost anything, but it will work better if you remove excess dirt before dipping. Also, I recommend scraping/cleaning all old gasket material prior to soaking. Soaking won't always remove gasket material so it's better to get it off before hand. Another thing to consider is how long you may want to keep/use your Chem-dip. The more junk it eats-up the less effective it becomes. The can I'm using now is one I've had for over 10 years. It's getting weak, but it still does the job.
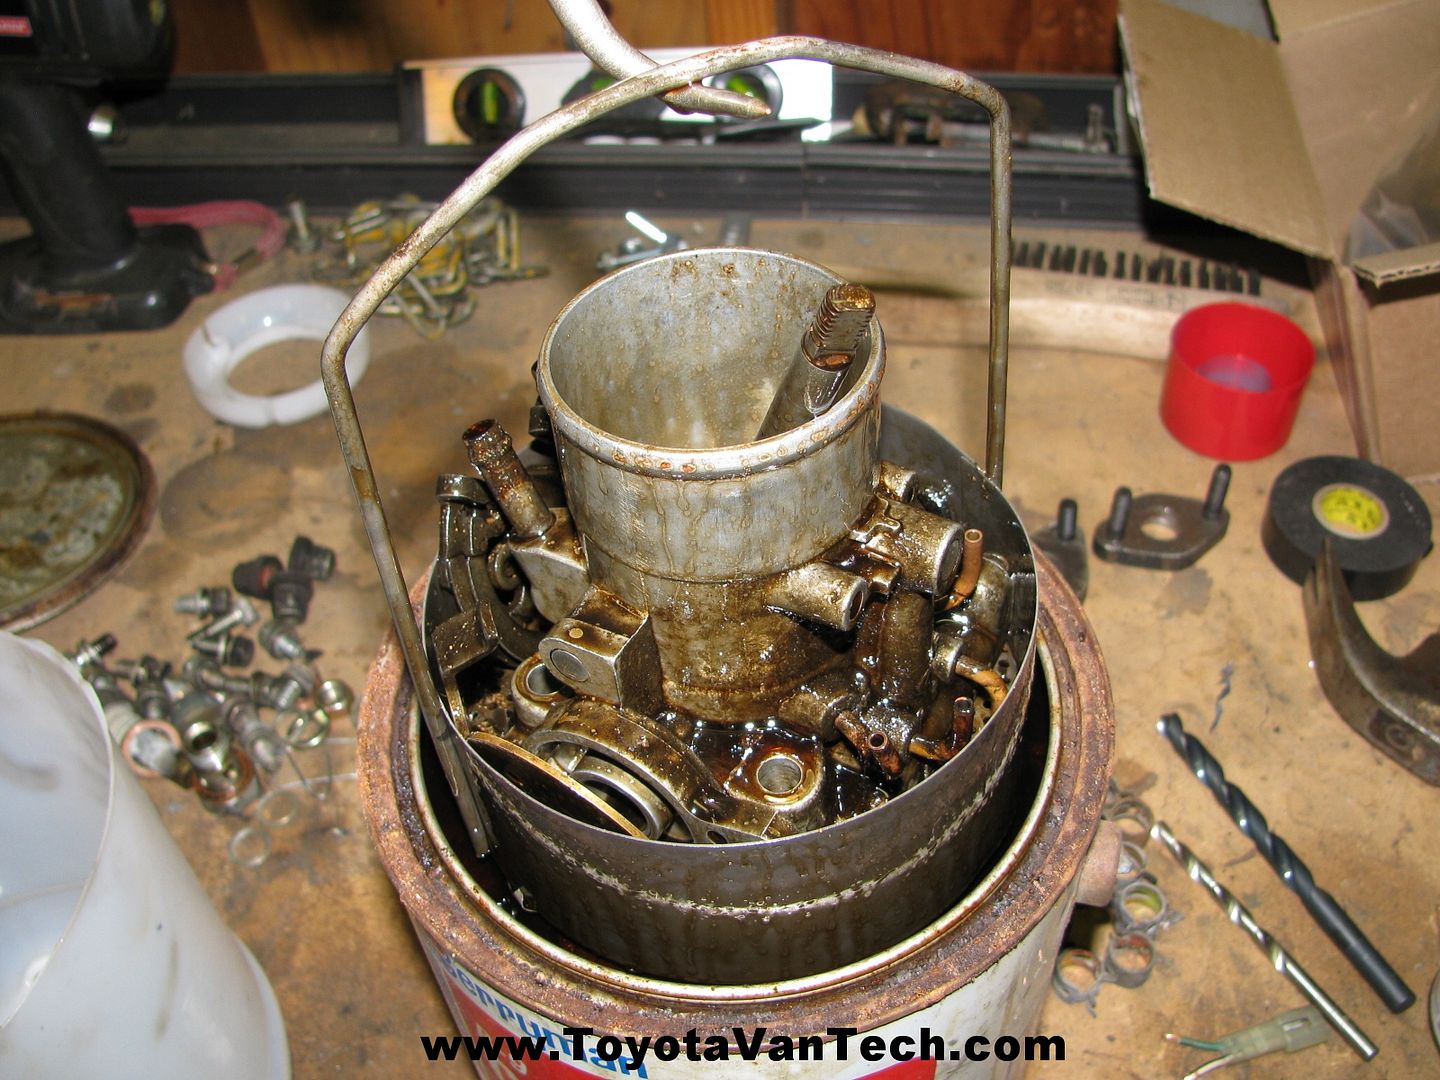


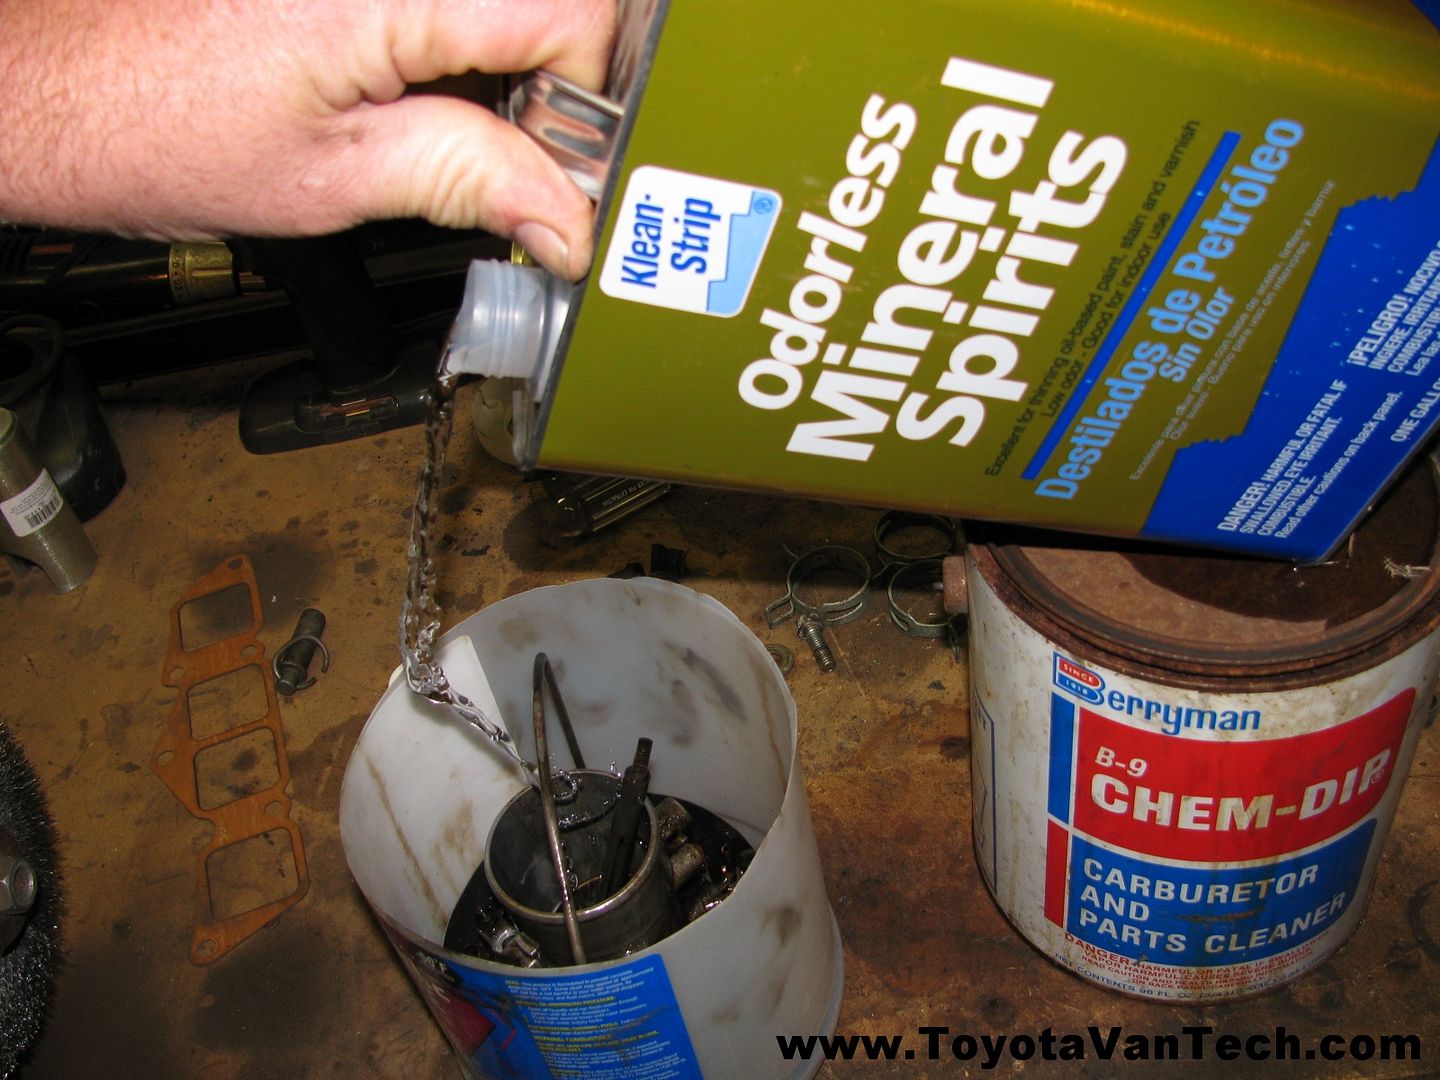
    Okay, so a couple days have passed, now it's time to get back to it. Use a pair of pliers or a wire hanger to hook the basket and pull out of the Chem-Dip. Have another container of an appropriate size ready to set the basket in. I use Mineral spirits to dilute and remove the residual Chem dip. After the parts are covered with mineral spirits I agitate the basket to rinse. Now parts can be removed one at a time and a parts cleaning brush is used, then compressed air to blow dry.......Be sure to use eye protection!


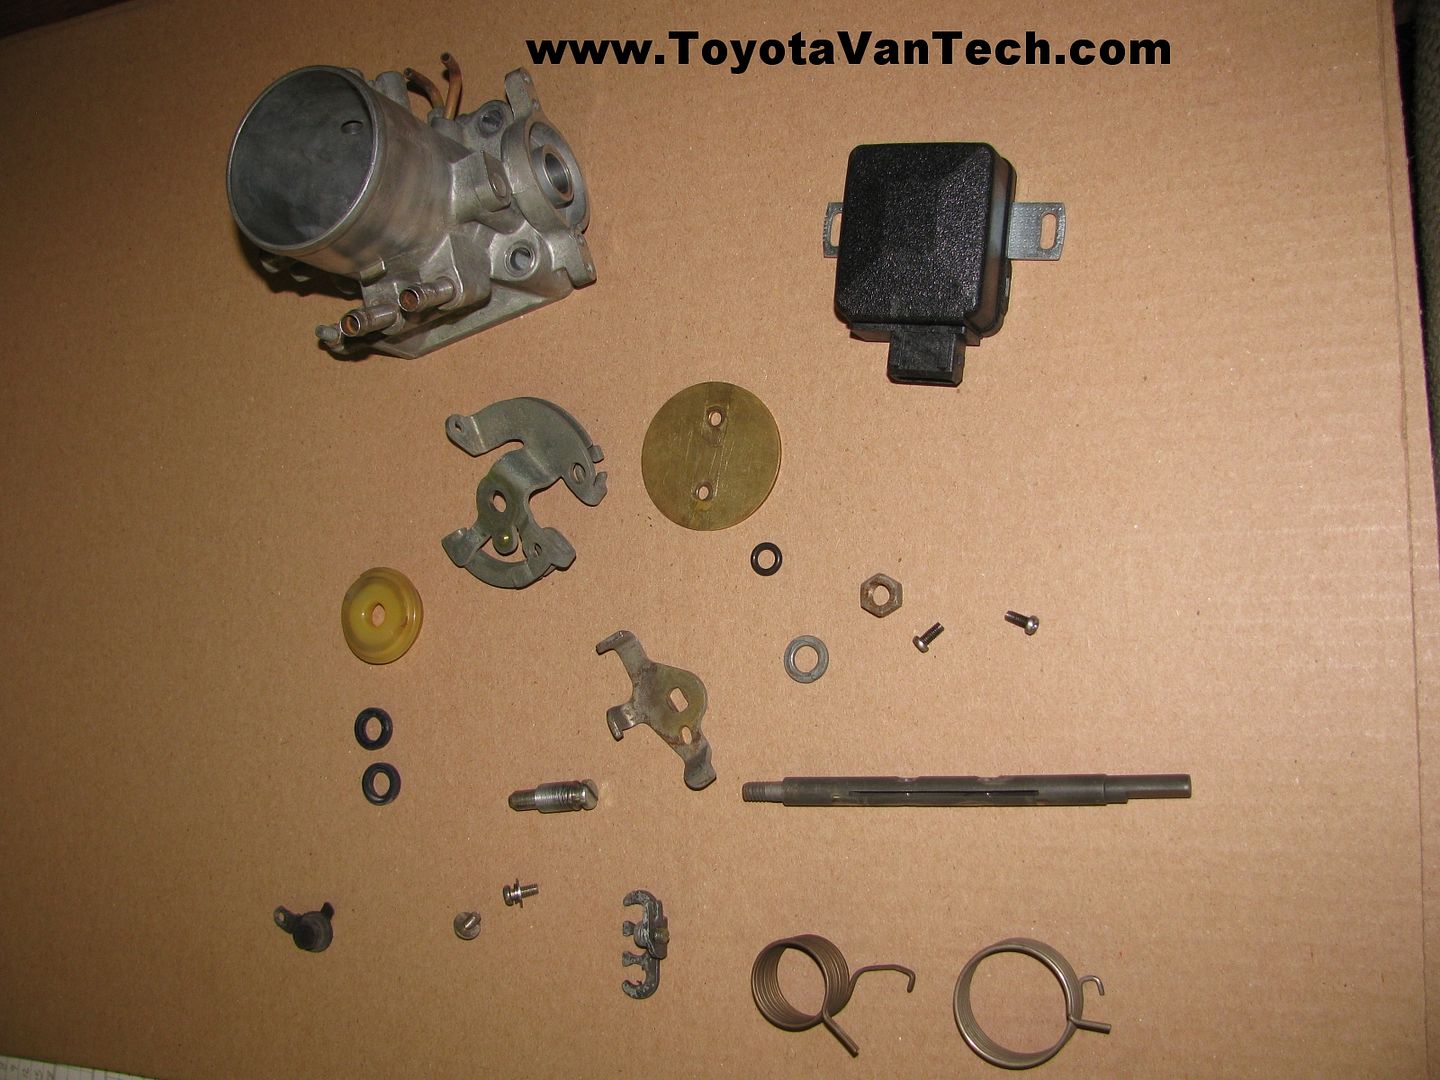
    Could these be the same parts I had before? Okay, the TPS is new, but everything else is original!


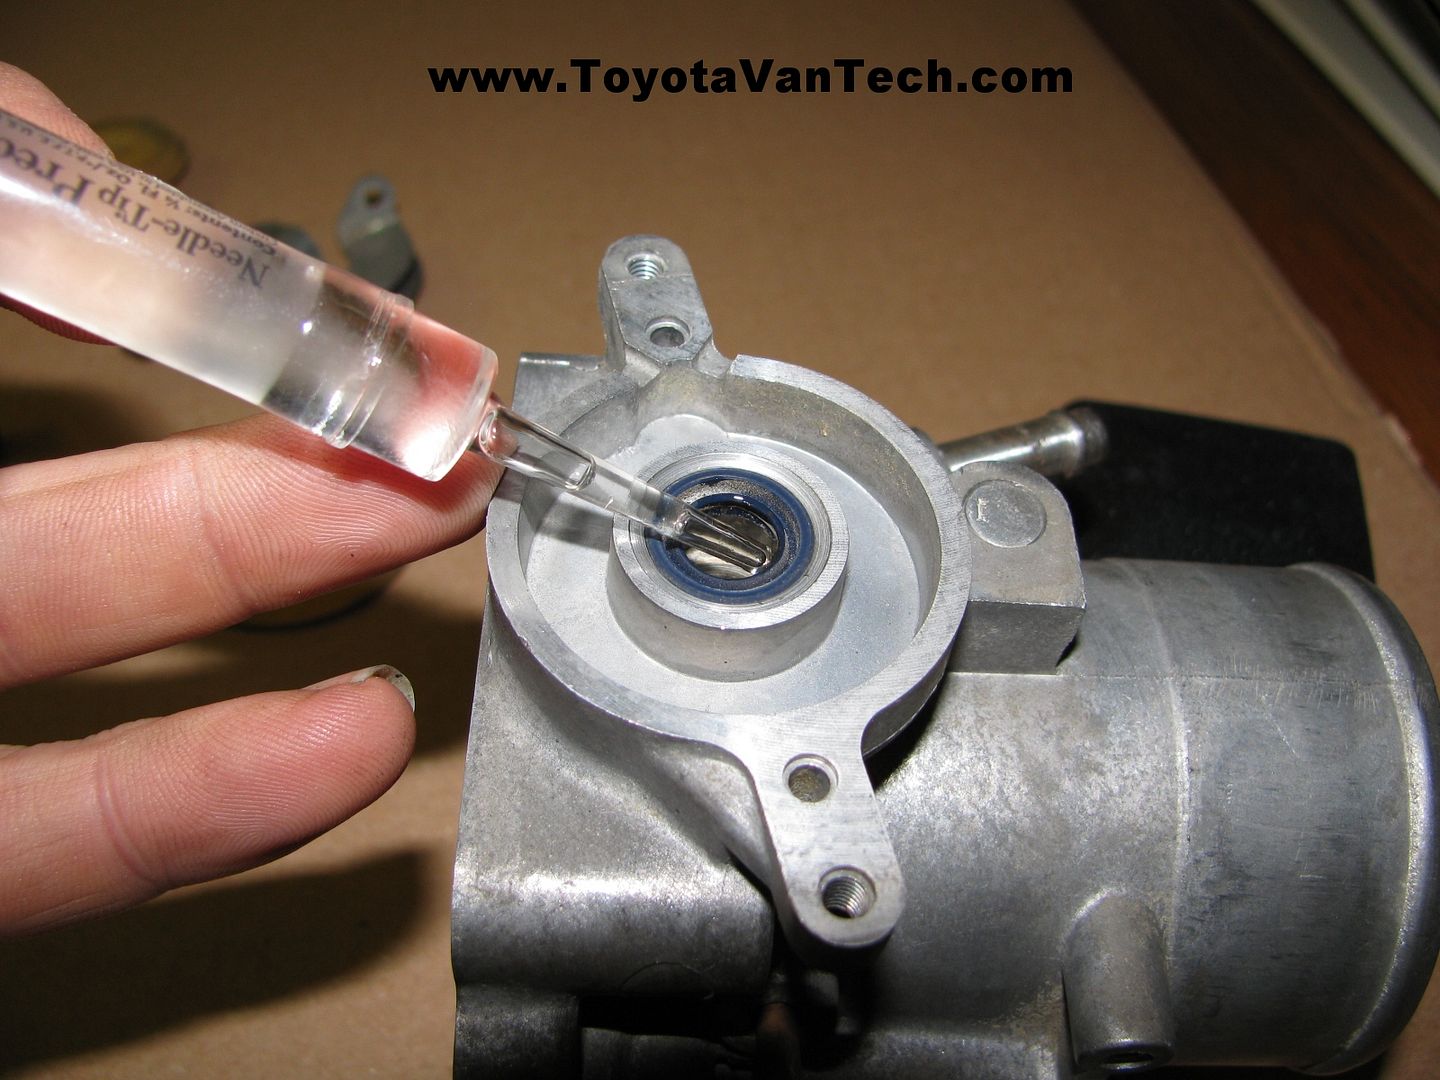
    The old shaft seals will usually push right in with just thumb pressure. I'm using a synthetic lubricant with PTFE to lubricate the throttle shaft seals & bores.


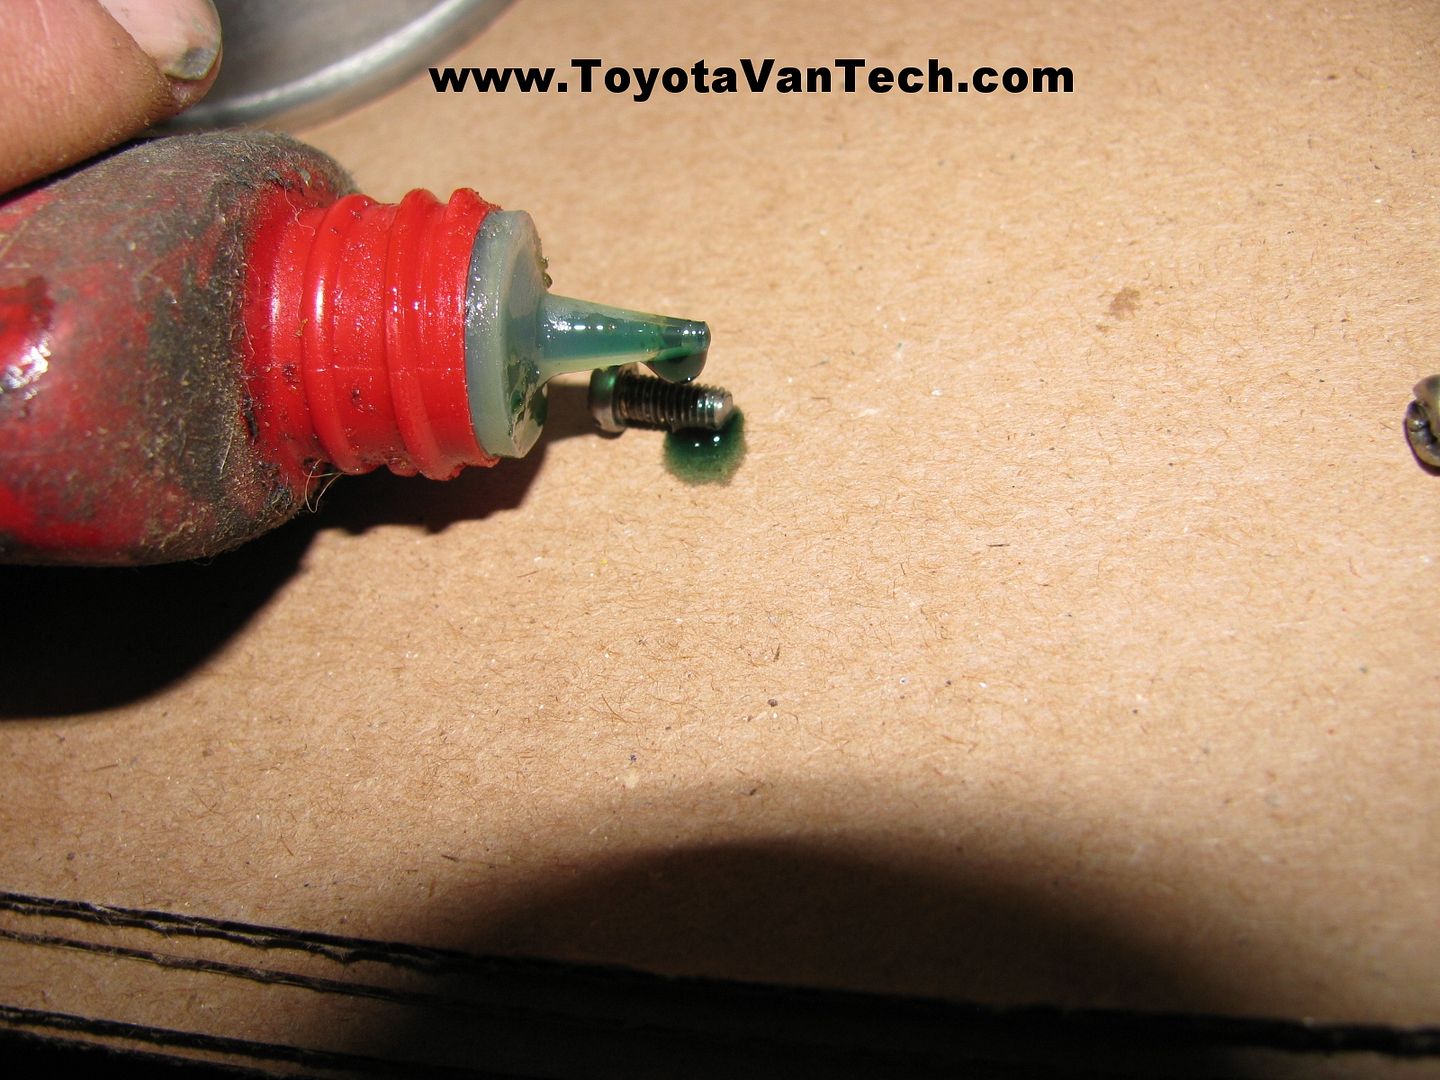
    After installing the throttle shaft & aligning the butterfly, I clean the burrs off the shaft screws threads & apply some semi-permanent Lock-Tite.


    Screws are installed but left loose. Before final tightening allow butterfly to self center by closing throttle all the way & then tapping on it & the shaft. The periphery of the butterfly is precision machined at an angle to match the inside of the throttle body, so Make sure it's oriented correctly! Without the throttle stop assembled, while closed it should make an air-tight seal. Hold it up to the light to verify it's centered & intimate with the throttle body bore. Once you're satisfied tighten the screws.
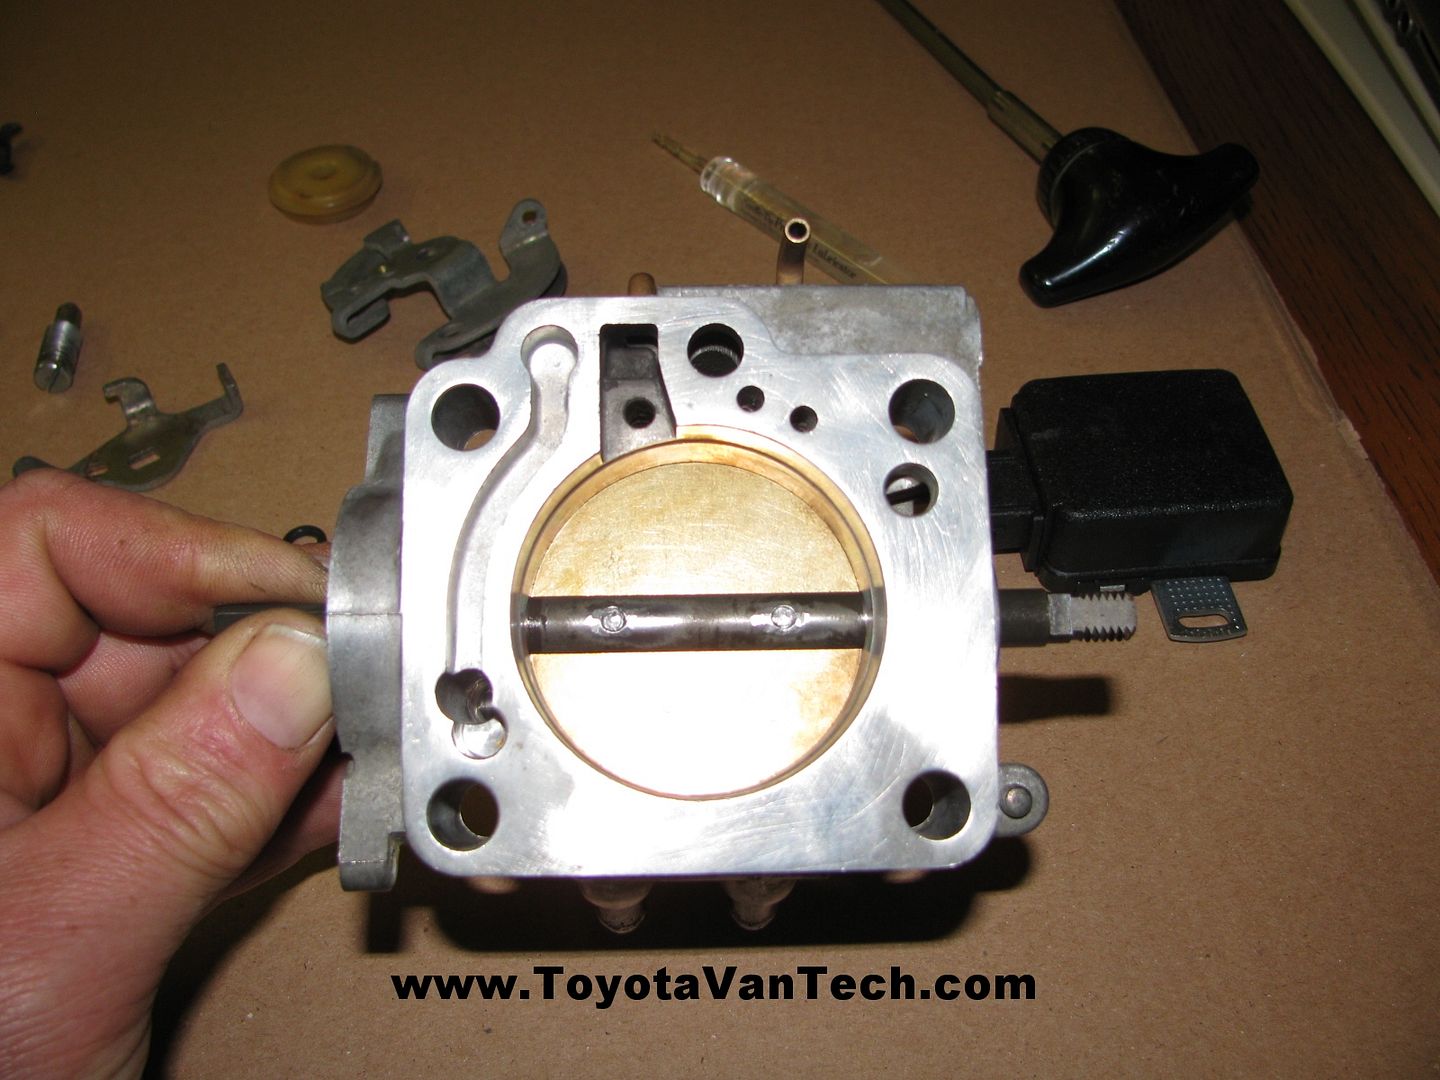


    O-ring is installed on idle screw and lube applied.
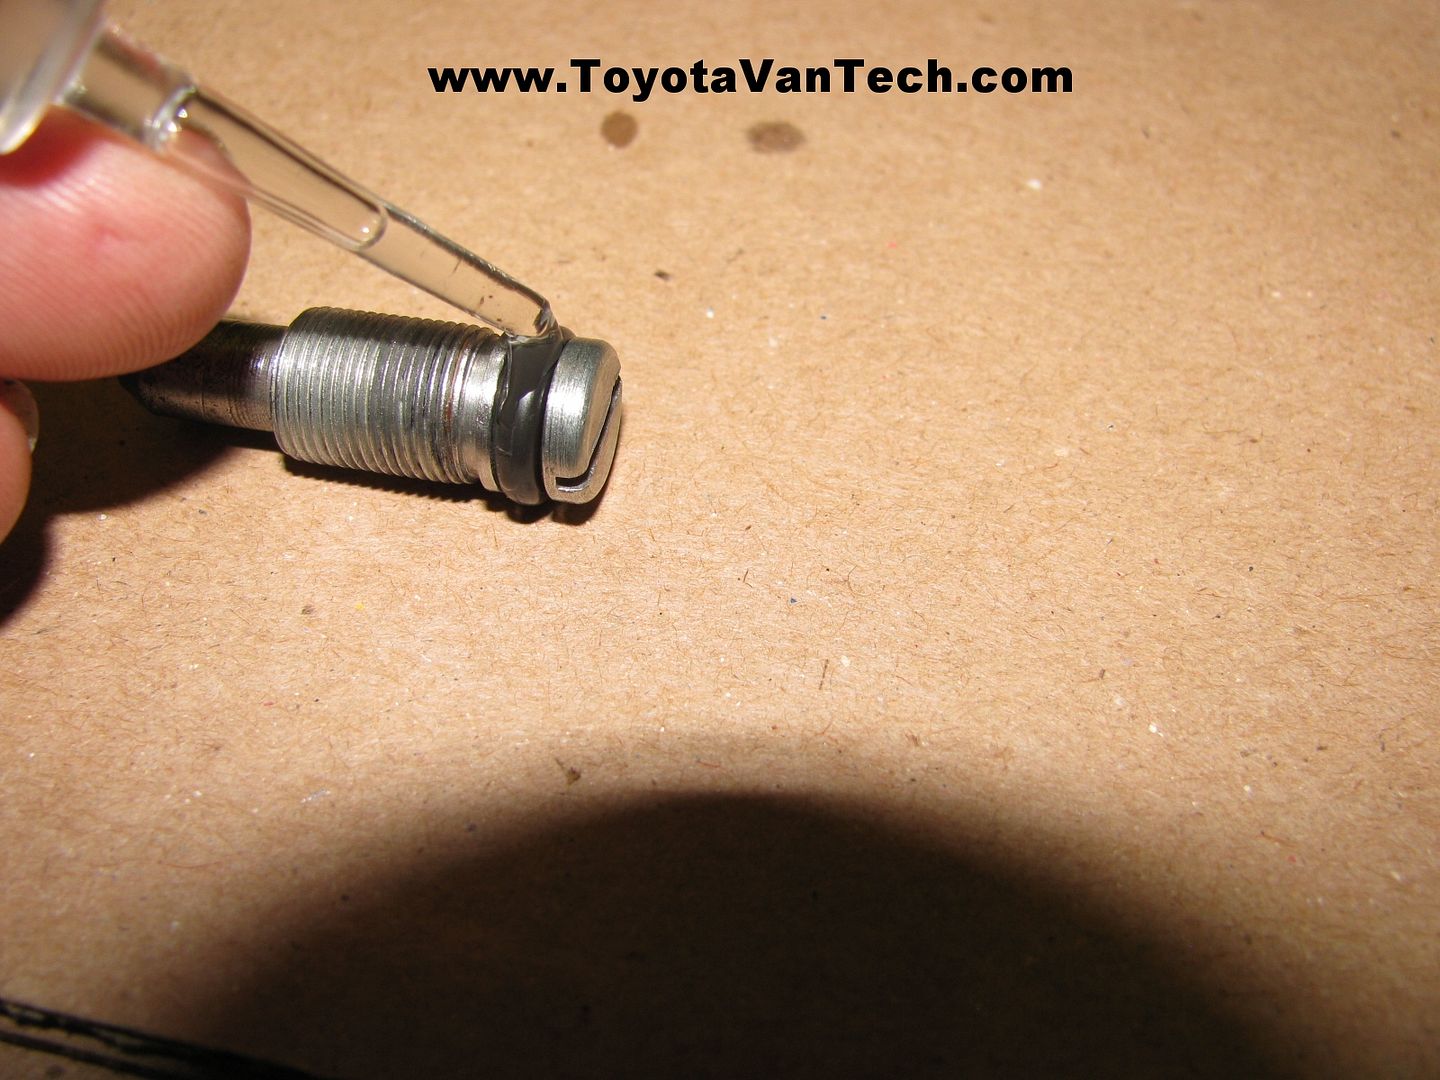


    Idle screw is installed & bottomed out. Next we back it out the number of turns previously recorded.
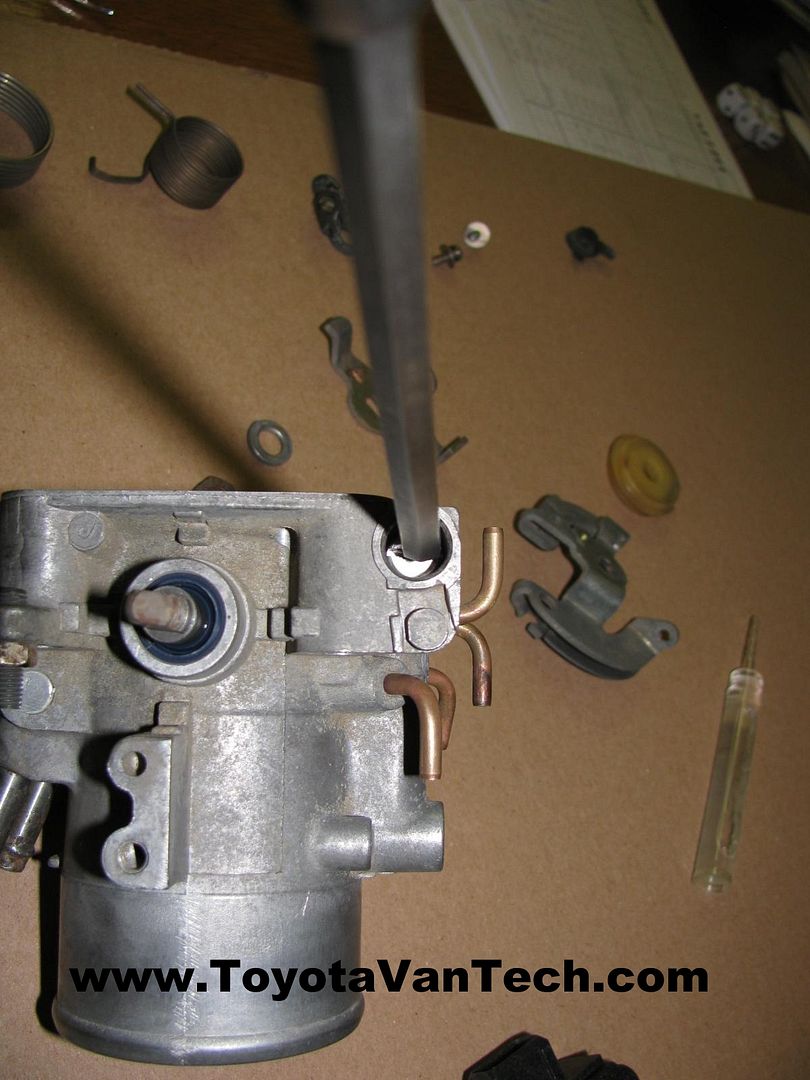


    Throttle shaft built up with return spring, cable guide & associated parts. Nut is installed and tightened.
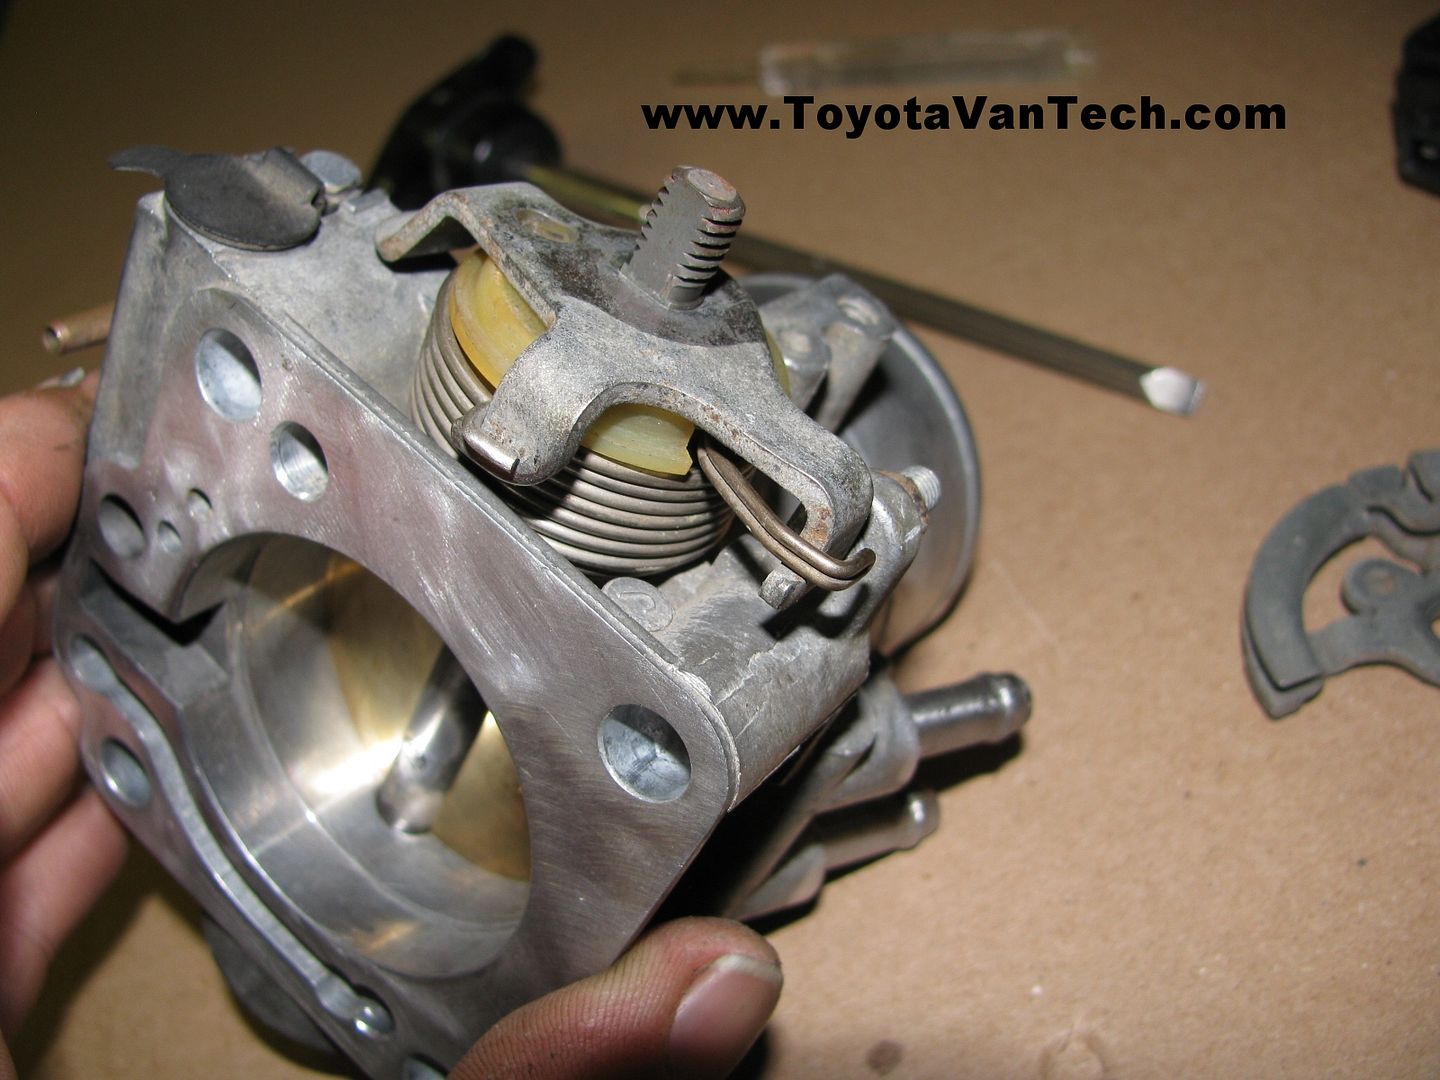


    New throttle position sensor is installed & other misc pieces of throttle body are put back like before.


    And here's the end result .


    Now that the throttle body is reassembled the only thing left to do is adjust the TPS & install it on your van. Here is a video on how to do this (click on the image below to view video).


    Before you install check the condition of the throttle body coolant hoses. If soft or deteriorated now is a good time to replace. I suppose a bulk 5/16" or 8mm hose could be used here, but the bends are rather tight and you may end up with a crimped hose. Last time I needed these they were still available through Toyota. They are part #16267-73010 & 16264-73021. You'll also want a new throttle body gasket & that one is Toyota part ##22271-73011 & sells for ~$5. Tim
    This article was originally published in forum thread: The Throttle Body Thread started by timsrv View original post
    Comments 150 Comments
    1. spacecruisers's Avatar
      spacecruisers -
      awesome write up! i may inspect my throttle body etc as I imagine it could use this cleaning. have you ever seen one of these (the "intake snake")? is it worth $50? seems like if it worked it would save a lot of time and effort.
    1. timsrv's Avatar
      timsrv -
      Quote Originally Posted by mistershmi View Post
      have you ever seen one of these (the "intake snake")? is it worth $50? seems like if it worked it would save a lot of time and effort.
      They should have a link to an instructional video. Maybe I don't have much of an imagination, but I fail to see how that could aid in cleaning the throttle body. Tim
    1. Surf5557's Avatar
      Surf5557 -
      Upon disassembling the entire intake side of my engine to essentially just clean 30 years of gunk and fix a minor water leak on the bypass pipe No.2, I'm having issues with my throttle position sensor and my distributor advancing mechanism.

      Issue 1) When fully throttled my engine cuts out, and when I back off power returns and I take off. The cut out only occurs at the end of the throttle's.

      Issue2) The Idle was factory spec upon the beginning of my project, but now after reassembly I find the idle low upon warming up and high after warm up. I did not mess with my distributor but I did change the cap and rotor. To correct the high idle I turned in the screw on the throttle body that controls the idle, but I feel like the timing may still be advancing when it shouldn't.
    1. JPERL's Avatar
      JPERL -
      Maybe a vacuum hose is cracked or loose since the 1984 Ignition timing advance is not electronic and maybe the advance diaphragm could be damaged or faulty. I do not believe that the throttle position sensor has much or any influence on the timing advance since if memory serves the ECU does not monitor any sensory input from the ignition.

      The second generation Vans 86-89 diagnostics is more robust and does incorporate into the ECU, ESA which is electronic Spark Advance which monitors sensory input from the throttle position sensor, igniter,coolant 02 etc.

      If I remember the 84 Van has something like 6 DTC codes while the 89 Van has like 14 or 15.

      I would say replace your TPS first to resolve the hesitation or cut that you experience on full throttle if you cannot determine how old the current TPS is.

      When you took apart the intake it is more likely you may have disturbed a wire in the connector or wiring harness to the TPS as the insulation on the wires cracks very easily especially in the environment these engines are in plus being 33 years old. Also in this vicinity is the auxiliary air valve for cold starts. if the connector or wiring is damaged , you will get inconsistent idle because the auxiliary valve even though is designed for giving you fast idle at cold starts it is working all of the time to adjust idle. If you are getting high idle when the engine is warm the bimetal switch in the valve will stay at whatever position it was in when the connector plug or wire broke or the connector was loose. My guess is that your auxiliary valve is intermittently making a connection producing inconsistent idle. I had this experience on my 1985 Van which took along time to track down as the check engine light never came on. I don't think I ever saw a check engine light in my 85 with the exception of a bad 02 sensor but that was it
    1. Deemoney's Avatar
      Deemoney -
      Quote Originally Posted by timsrv View Post
      You're using the manual.............Awesome! The transition from continuity to no continuity can occur anywhere between .0224" - to .0335". If you're testing/checking and you're in that range, it's good enough. If you're going to the trouble to set it up, it's my opinion you should go for being as close as possible (I'm trying to hit that spot exactly in the middle). If you do the math, .0275" is the number exactly in the middle of .0224 - .0335. (.028" is the closest feeler gauge you're going to find..............unless you have a .70 mm feeler gauge). Tim

      PS: How thick is the black stuff? Being black inside the intake is okay............assuming it's just colored black. It's not crusty or caked.......right?


      Hey Tim,

      Don't know if you're aware already but Warner Music Group/Youtube have blocked your video regarding this topic... I'm hoping to adjust my TPS and would love to access that video, anywhere else we can find it? or anywhere I can find a written step by step adjustment instruction? Thanks in advance.
    1. AD2101's Avatar
      AD2101 -
      Really? Because there was Pat Benatar randomly playing on the radio in the background??? That's the only thing it could be. I've been against the music industry since Napster but that's real petty even by their standards, hopefully this can be cleared up easily enough, if not then someone is going to have to either remake the video or scrub the audio from the original and overdub it.
    1. Deemoney's Avatar
      Deemoney -
      I have my TB dismounted and ready to make adjustments to TPS. If I figure out how to properly set it I will record the process and play 'Strauss' 'Also Sprach Zarathustra' royalty free version in the background to ensure no interruptions.
    1. timsrv's Avatar
      timsrv -
      Wow, you're right, that's petty. They wiped out all my chihuahua puppy videos too because of the same thing (30 year old music quietly playing in the background). On one 3 minute vid there was "Gray's Anatomy" TV show playing in the background (couldn't even see the tv screen in the video) and they took it down for copyright violations as well. You'd think I did something really bad (like say something positive about Trump)........jeeze.

      I'll eventually redo that, but it will have to wait until I do that job again. Not sure when that will be. Video isn't really necessary though. The manual lays it out and with the written instructions here it should be a cake walk. Tim
    1. Deemoney's Avatar
      Deemoney -
      Quote Originally Posted by timsrv View Post
      Wow, you're right, that's petty. They wiped out all my chihuahua puppy videos too because of the same thing (30 year old music quietly playing in the background). On one 3 minute vid there was "Gray's Anatomy" TV show playing in the background (couldn't even see the tv screen in the video) and they took it down for copyright violations as well. You'd think I did something really bad (like say something positive about Trump)........jeeze.

      I'll eventually redo that, but it will have to wait until I do that job again. Not sure when that will be. Video isn't really necessary though. The manual lays it out and with the written instructions here it should be a cake walk. Tim

      The Manual says if you can't find continuity in the specified range replace the TPS and the throttle body as a set... say what??? Mine I rotated for the magic continuity spot at .57mm and was not continuous at .80mm (manuel specs .85mm). Going to install tomorrow and clear codes... Hope it goes well...
    1. timsrv's Avatar
      timsrv -
      The only thing I might add is to ignore the stuff in the manual about continuity at different angles of throttle rotation. Even if you had a good way to check that, there's nothing you could do about it if it were off anyway. If the TPS has more than 100k miles on it don't even mess around trying to make it work. Just get a new one and set it with the feeler gauge in the throttle stop. You're done.

      As I've said before, these TPS's are a common failed part and they seldom last over 150k miles. I would almost consider their replacement as routine maintenance. On the other hand, about the only thing that justifies throttle body replacement is a coolant leak from it's nipples (corrosion) and/or maybe wear on the throttle shaft bore. Personally I've only had to change them due to corroded coolant nipples. Tim
    1. Deemoney's Avatar
      Deemoney -
      Quote Originally Posted by timsrv View Post
      The only thing I might add is to ignore the stuff in the manual about continuity at different angles of throttle rotation. Even if you had a good way to check that, there's nothing you could do about it if it were off anyway. If the TPS has more than 100k miles on it don't even mess around trying to make it work. Just get a new one and set it with the feeler gauge in the throttle stop. You're done.

      As I've said before, these TPS's are a common failed part and they seldom last over 150k miles. I would almost consider their replacement as routine maintenance. On the other hand, about the only thing that justifies throttle body replacement is a coolant leak from it's nipples (corrosion) and/or maybe wear on the throttle shaft bore. Personally I've only had to change them due to corroded coolant nipples. Tim
      Yeah, I bought an AC Delco of Rock Auto... Here is a picture of the inside of my original TPS
    1. Deemoney's Avatar
      Deemoney -
      Update: I reinstalled Throttle body and hooked everything up. Still getting code 2 and 11... Van hesitating perfusely. Not drivable. Could the MAF be shot?
    1. MyToy's Avatar
      MyToy -
      Hey Tim:

      I am ready to replace my TPS and found your video instruction not on you tube any more.Where can I get that, it was really good. I knew I would use it when I was ready and now I am ready and NO VIDEO.

      MT
    1. timsrv's Avatar
      timsrv -
      They took it down due to the music in the background. Some stupid copyright BS (like some 80's artist will starve to death now because of me). The video is pointless without sound, so I need to do it again with no background music. I plan on doing so next time I do this job, but don't have any immediate plans to do so. Sorry. Tim
    1. MyToy's Avatar
      MyToy -
      What? OMG, what a joke. I am sorry to have bothered you on this. I know what it takes to do this and the very reason why I was so grateful knowing that it was there for reference.
      I could not find any other detailed instruction onTVT. If you know of any let me know Other wise I will go back to the Service Manual.
    1. Tan Van's Avatar
      Tan Van -
      Hmmm... maybe for something like this we could send you a blank zip-drive and a self-addressed stamped envelope and you could send the original video (with music) to the party in desperate need ?

      Probably wouldn't come up often, right ??
    1. timsrv's Avatar
      timsrv -
      Okay, I had recorded two of these (same day back in 2011). I just uploaded the other one and updated the tag (bottom of post #1 of this thread). There's still music in it so it will probably be removed, but it's working now. Download it and save it quick before the music police find out . Tim
    1. MyToy's Avatar
      MyToy -
      Thanks Tim!!!

      Got it recorded. Anyone need it give a scream. Hmmm now I hate the song.

      MT
    1. AD2101's Avatar
      AD2101 -
      I ripped it as well. Hell, I even splurged and downloaded the "high quality" version of it, which clocked in just under 16MB, so I think it's small enough to send as an email attachment for any members here who will need it after youtube inevitably pulls it again. Otherwise, I can throw it in a .zip file and put it on a file sharing site if the demand is there.

      Also, a previous post I made in this thread mistakenly cited Pat Benatar as the artist whose music messed this all up in the first place (I swear one of her songs is playing in another of Tim's videos). AD2101 regrets the error.
    1. timsrv's Avatar
      timsrv -
      Quote Originally Posted by AD2101 View Post
      Also, a previous post I made in this thread mistakenly cited Pat Benatar as the artist whose music messed this all up in the first place (I swear one of her songs is playing in another of Tim's videos). AD2101 regrets the error.
      No, you were right......it was Pat Benatar. I had recorded two of those but originally uploaded the other one because it was better (not so jerky). Since they pulled that one I just replaced it with the other (both were recorded in May of 2011). Took a while to find as I had to scan through a bunch of SD cards from 3 different cameras. Tim
  • Recent Forum Posts

    karachaffee

    Re: 3C-T Townace 1993 Denso Injection Pump removal and refit

    Hi Everybody,
    Here is the update of the Denso Pump rebuild and installation. Got pump installed and bled injector lines and inspected everything inspectable and fired it up. I left the big shroud...

    karachaffee 05-15-2024, 03:12 PM Go to last post
    ClydesdaleKevin

    Bent pushrod dillema!!!

    Okay folks. I'm at my wits end! I bought a 1984 Van Wagon LE with only 129k from the original owner that stored it inside when it broke down 10 years ago. Keyway was sheared off the crankshaft by...

    ClydesdaleKevin 05-14-2024, 11:53 AM Go to last post
    jaders

    Re: Coolant question

    thanks for that info! I’ve been watching the level and it seems to be holding steady now. I’ll be interested in checking it again after I rack up some intense highway miles, but so far so good.
    ...

    jaders 05-14-2024, 05:46 AM Go to last post
    ishkatoo

    Re: fusible link 1.2 no longer available...is there a work around for this??

    Thanks very much for the getting back to me.
    I have looked over the info you sent.
    it is very helpful.
    I believe I may have stumbled into a solution. I did not realize the 60 amp AM1 link was...

    ishkatoo 05-13-2024, 07:11 PM Go to last post
    Gareth

    Re: Coolant question

    Since you have an LE, you might have a coolant level sensor in the expansion tank. There's a VERY GOOD chance the gasket around this sensor is leaking. When I did a coolant, hose, water pump...

    Gareth 05-13-2024, 06:28 PM Go to last post