Awesome, good to know. Any additional information that could help people in the future is great.
Originally Posted by tbkilb01


Awesome, good to know. Any additional information that could help people in the future is great.
stuff like that is why I too have two sets of crows foot wrenches.... one open ended and one flared
I've used the flared ones to replace the fuel filter in my corolla before... was a huge time saver because the screwed on fitting is buried above the wheel well and there's no easy way to fit wrenches there!
I'm glad I got them when they were 50% off at sears years ago... they hardly go on sale and back then they were still made in usa

Its a 24mm. 15/16 is just a smidge smaller than that, so if you have that and it fits, youre in business.
My 94 has been throwing the EGR Temp code recently. |ve cleaned the temp probe and it goes away for a while, but comes back, so I know Ive got this adventure in my near future.
Today I practiced on my new parts car.
A little background - A while ago I came across a 91 with only 150k and a dead engine. The owner said his mechanic had diagnosed it with a slipped timing belt. Some mechanic, I thought. The van is cosmetically a mess - the paint is baked, every panel is beat, the interior is moldy and reeks of cat pee. I picked it up cheap as an organ donor.
The rotor had come loose and made a mess of the distributor cap. Some replacement parts from my spares bin and the catpeemobile ran like a top. It's still disgusting, so I got started pulling it apart this weekend.
Thinking of my need to remove the EGR valve on my 04, I decided to see if I could get it off of the donor before I dropped the engine. I managed, but it was a battle. The easiest part, though, was the 24mm nut on the union between the exhaust gas feed pipe and the valve itself. It was easy because I took the starter off. Voila -
EGR-above-starter.jpg
Getting the starter off isnt exactly easy (especially if you have an AllTrac and have to drop the front driveshaft first), but its straightforward.
What was more of a challenge was getting the EGR valve loose from the exhaust supply pipe. I suppose that the parts I was trying to separate had been together for a quarter-century, and they were quite fond of one another. At any rate, getting the big nut off was only the beginning of separating the valve from the pipe. I had to remove the bolt and nut where the other end of the pipe joins the head, and the bolt that clamps the pipe to the top of the engine. That was one of those find-all-the extensions and a U-joint routine, but I could actually reach the bolt with my right hand, so once it was cracked loose I was able to spin it out with my fingers. With this clamp off, I could get the pipe off of the head. With the pipe now loose along its full length, and once the nuts holding the valve to the intake manifold were off, hoses removed, etc., I was able to wiggle the valve off the studs, still stuck to the pipe. Free of the studs, I then had space to wiggle it around and work it loose from the pipe. Perhaps a day or two soaking in solvent would have made this last bit quicker, but once I saw movement between the two got the two I just wiggled and pulled patiently until they came apart. The pipe stayed with the car, but the valve is now liberated.
Last edited by pdgizwiz; 03-29-2015 at 11:17 PM.
sounds like a huge pain either way
removing the starter isn't exactly easy on the RWD either, but it could be worse ;)
Well, like I said - removing the starter is not a cinch by any means, but it's a straightforward task with conventional tools and no battles for access.
I have a friend who is a professional mechanic in New Zealand. I watched him work on a Honda once and was surprised to see that he thought nothing of removing things in his way to get to what he needed. His hands are bigger than mine, but where I probably would have strained to get to fasteners buried under other stuff to avoid having to remove that stuff, he just took the stuff out first. "No worries, mate!" It changed my way of looking at such things.
I feel that level of comfort goes with people who are well versed, obviously since he is a professional mechanic. I would hate to take everything out, but honestly, I think that is the proper way, but for me, short cuts in that sense of not removing things is good for me unless I need to.
http://reactionprevia.blogspot.com/2...ode-p0401.html
This is another MUST DO on the previas, especially if you are having issues and code P0401 being thrown. P0401 is "Exhaust Gas Recirculation flow insufficient detected".
Parts:
- EGR intake gasket - 25628-76010 - this is on the far right side next to the exhaust.
- EGR valve gasket - 25627-76010 - used for the EGR valve to the intake manifold.
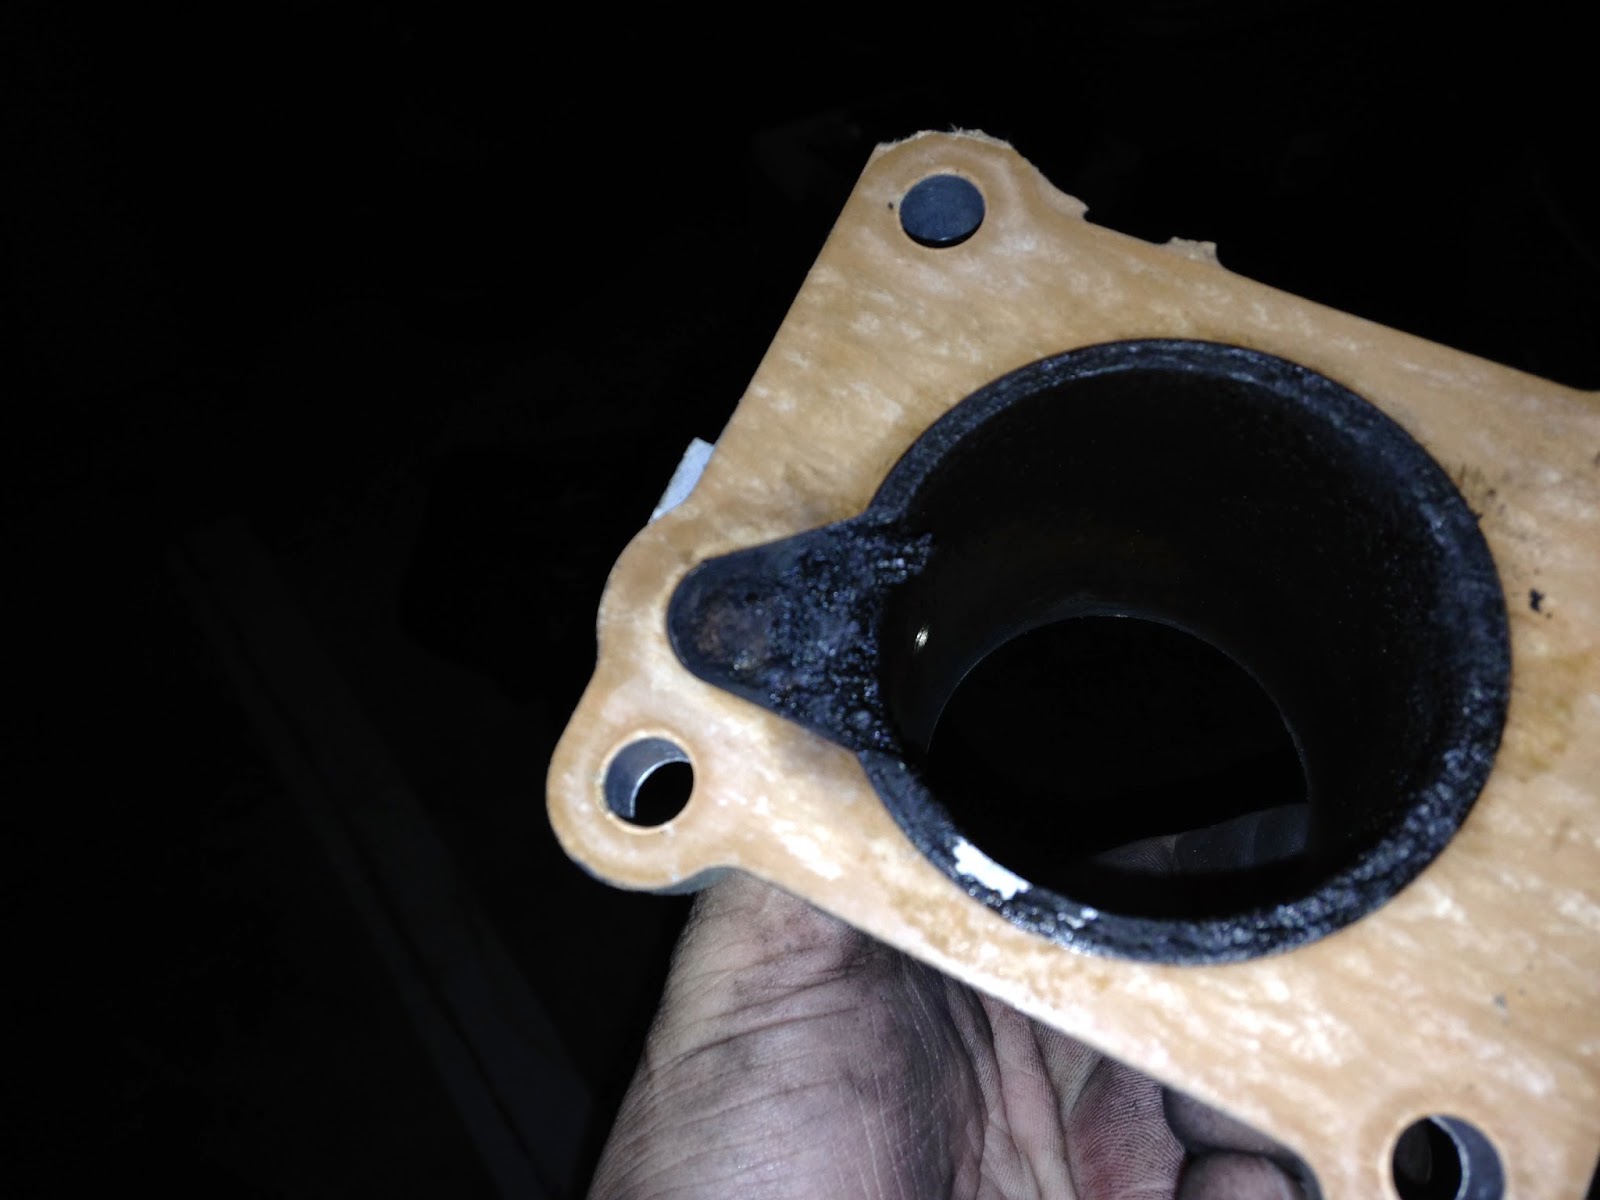
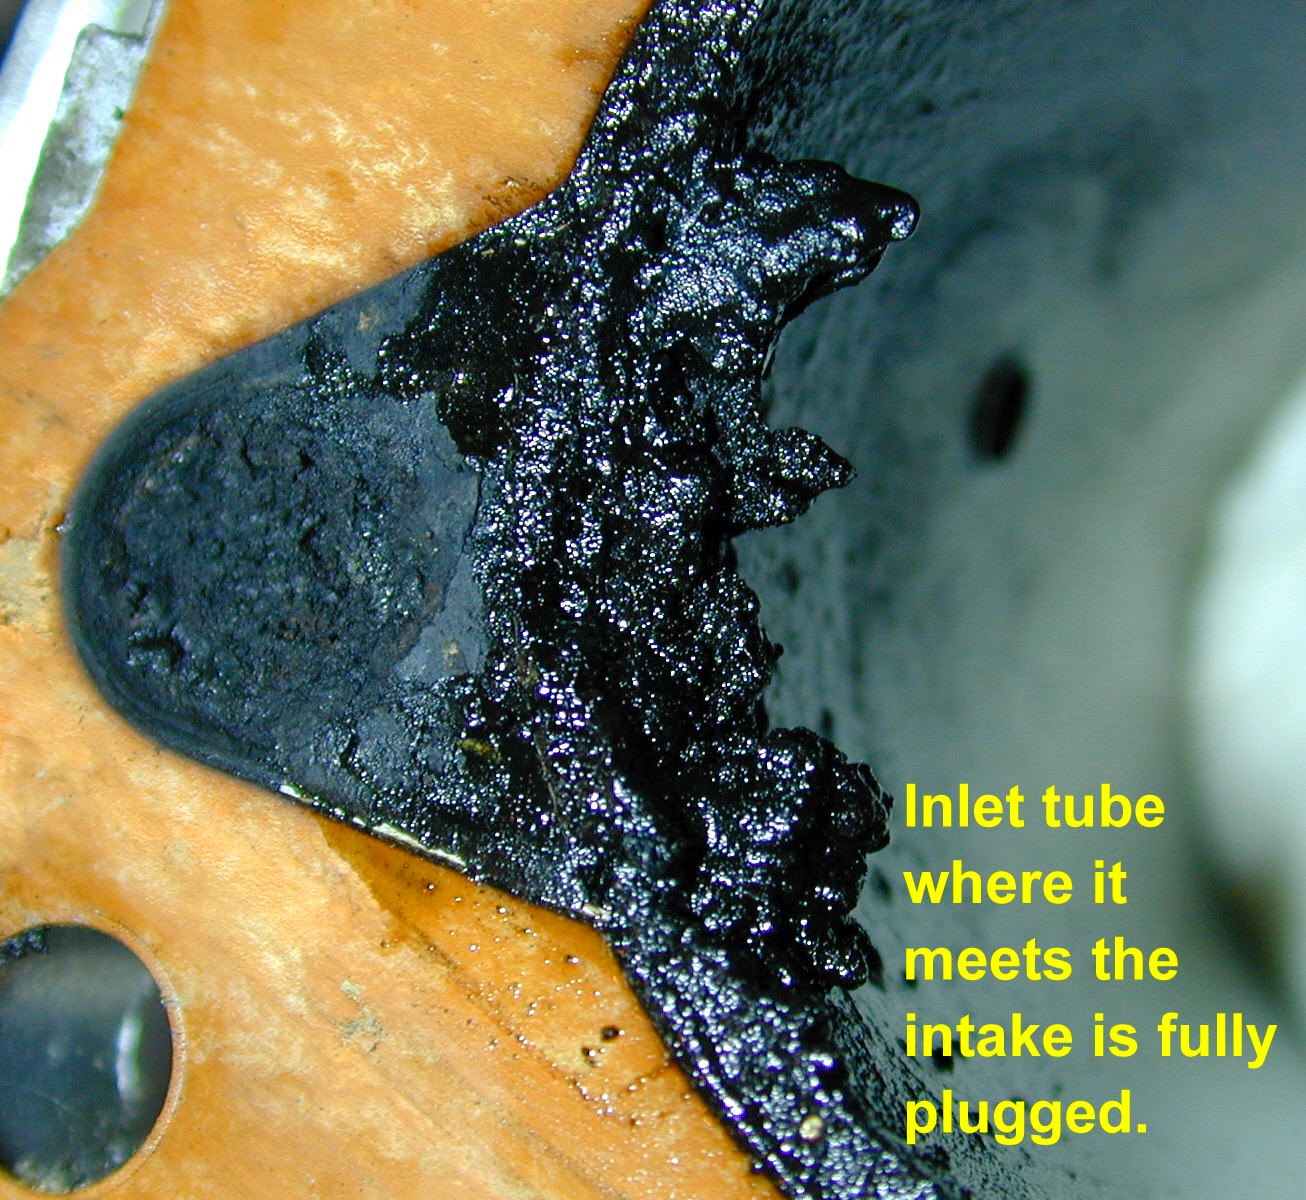
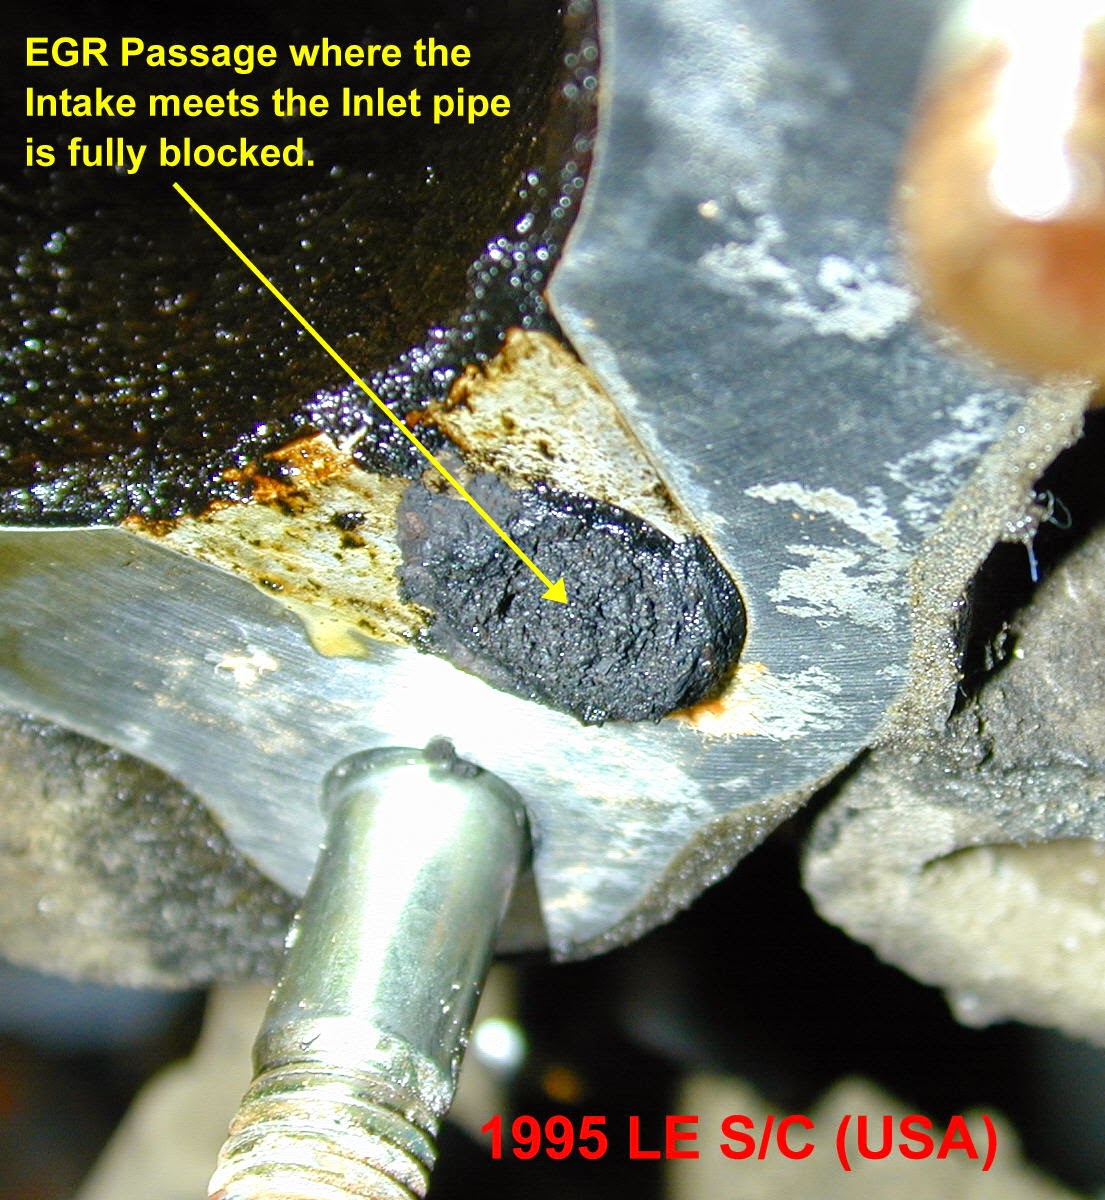
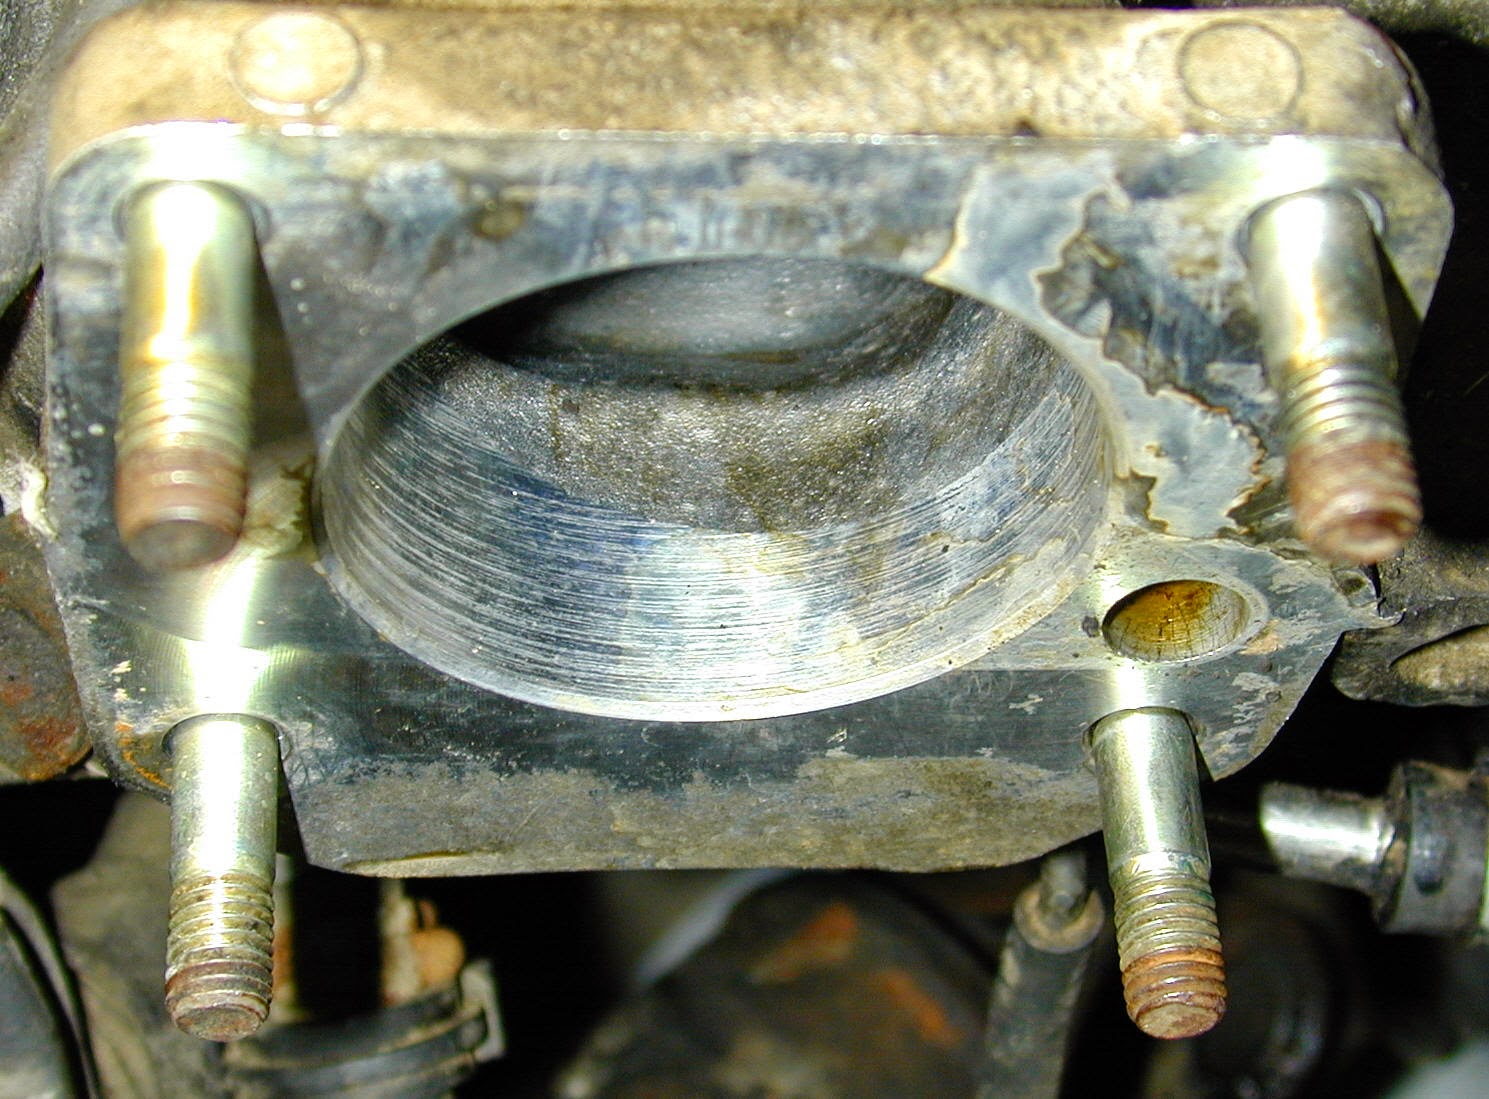
-Air inlet duct gasket - 22273-76010 - this is where the air goes into the intake manifold and where the EGR port gets plugged.
1 container of coolant
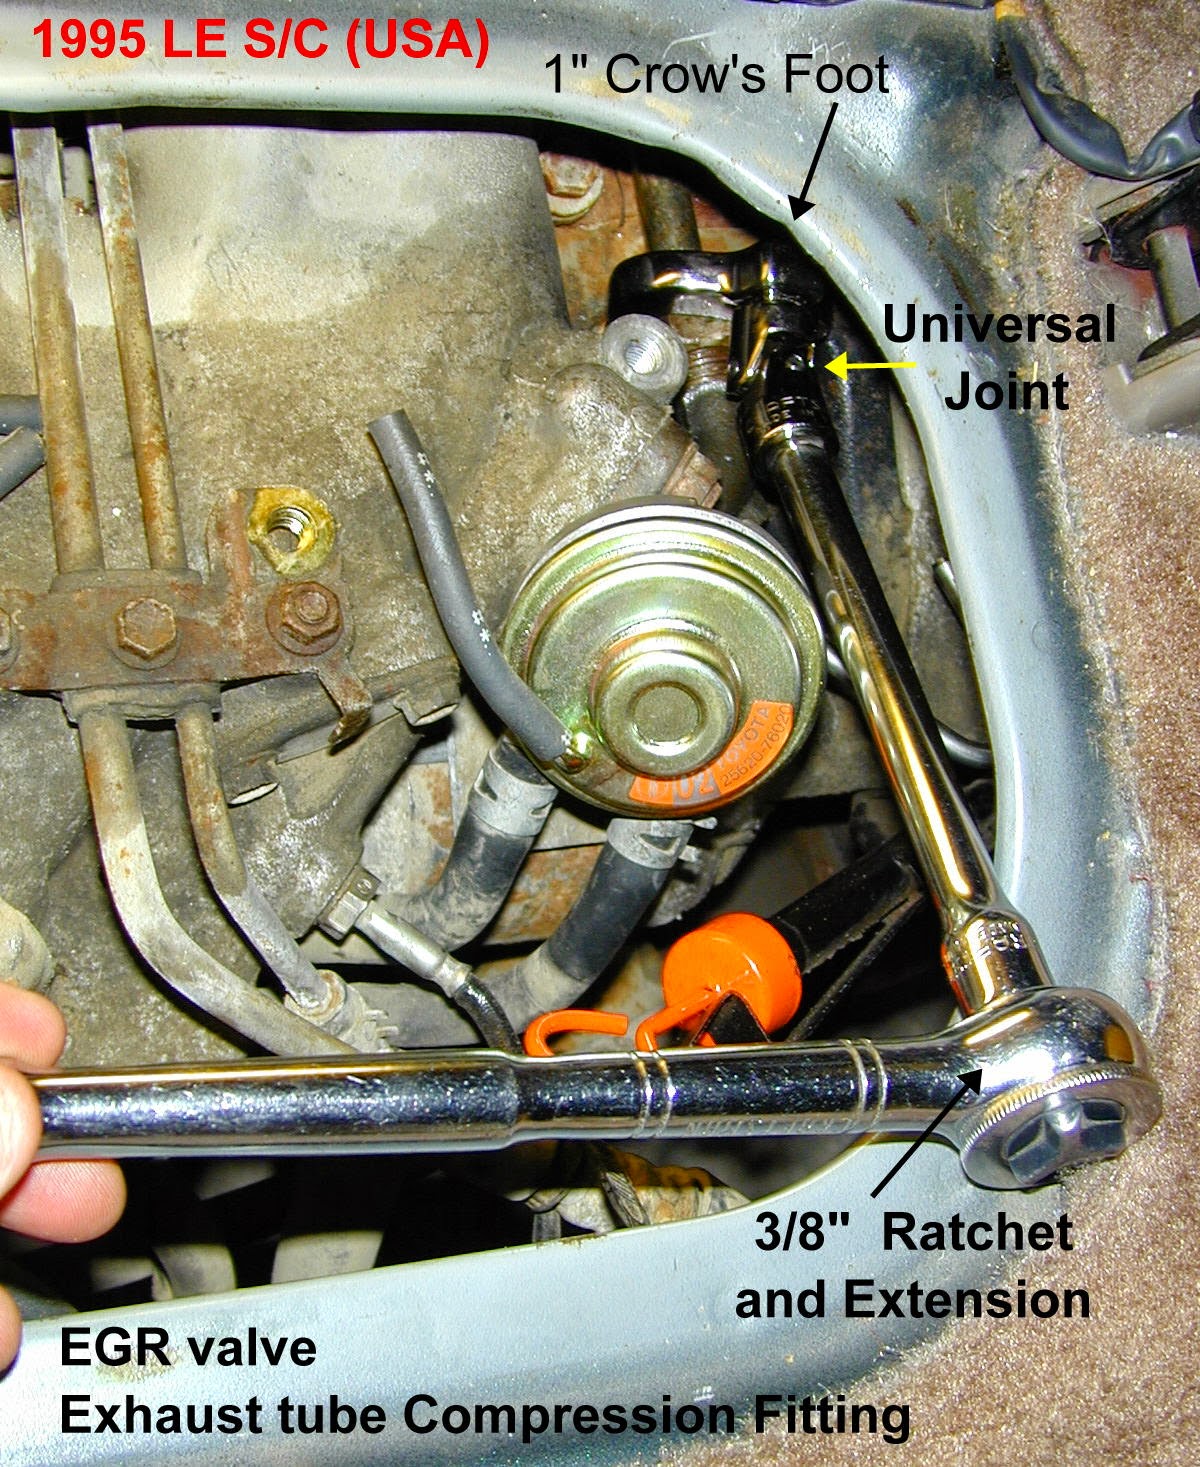
I bought a set of crow's feet and Universal joints for the exhaust pipe deal.
I followed Zenseeker's photo's on every single detail. If you haven't visit his website (http://zenseeker.net/Previa/PreviaMaintenance.htm) It is a great resource. Zenseeker gets the credit and this would have been impossible for me to do without those pictures!
**The pictures are located at the bottom of this post.
---------------------------------
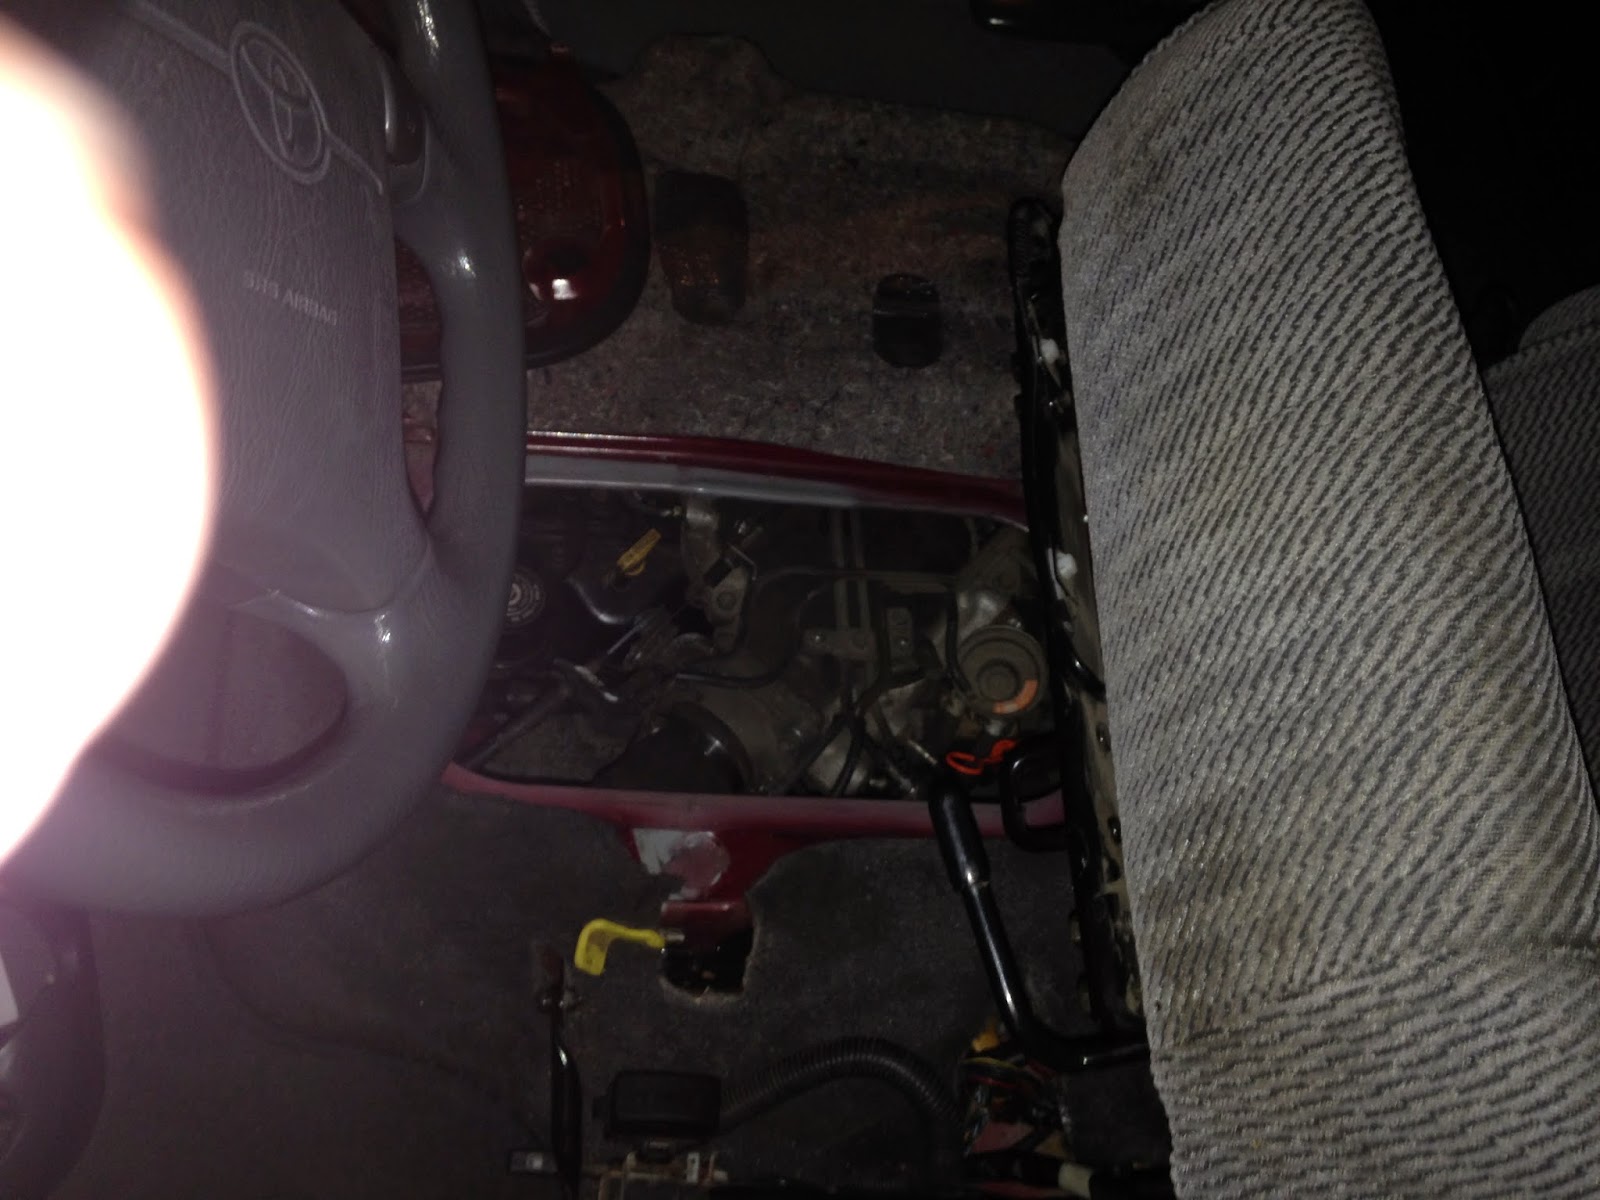
This part is going to be under the driver's seat if you didnt know.
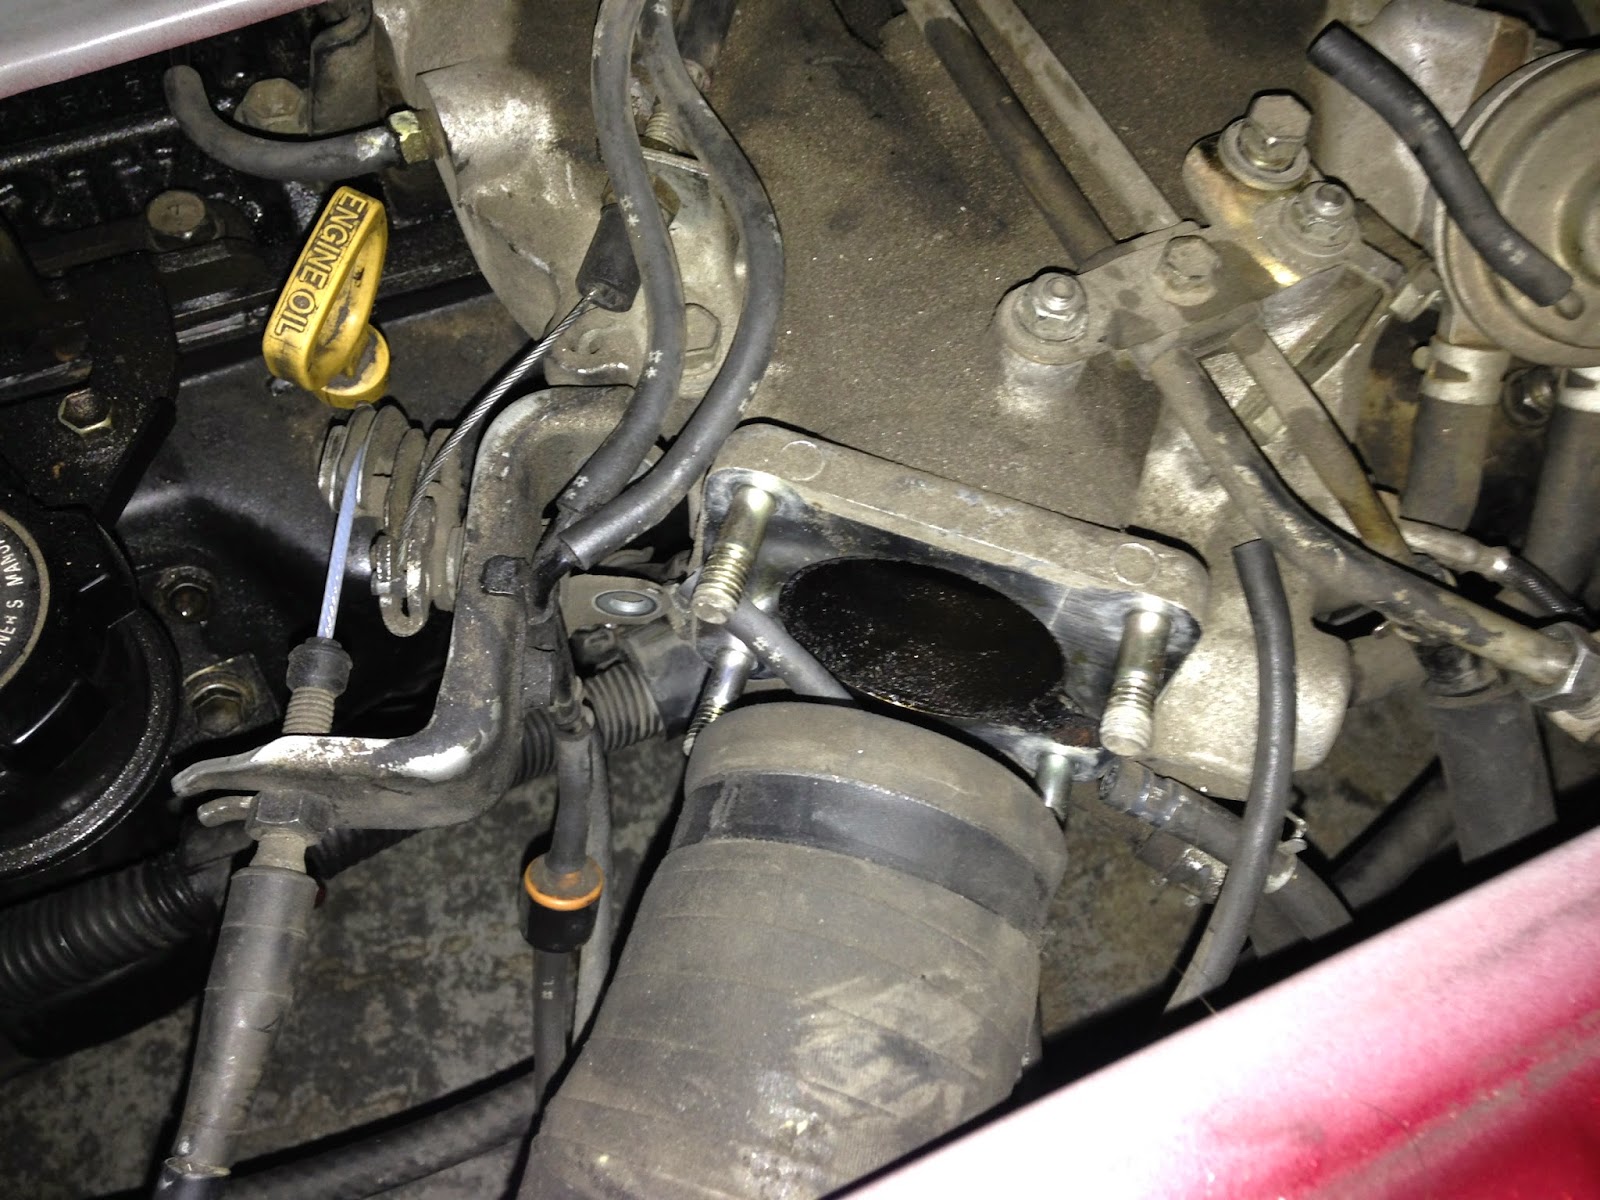
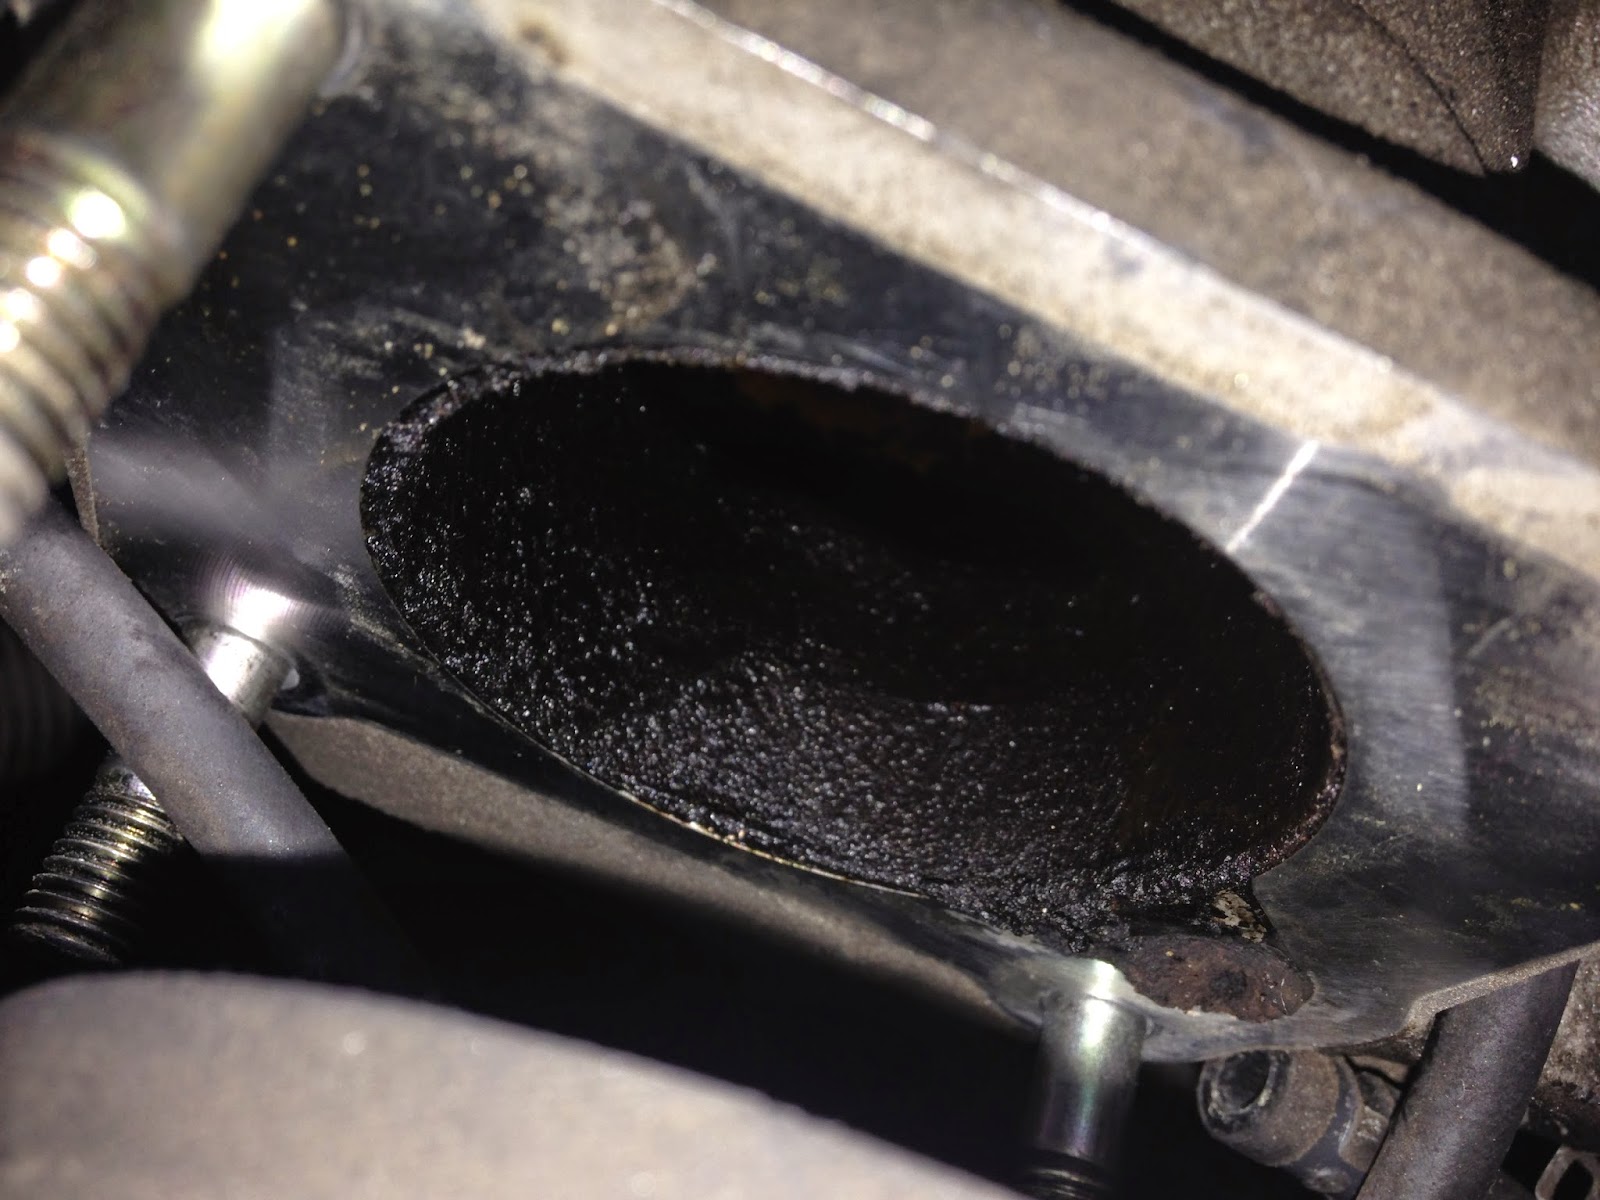
I started by taking off the hose clamps and taking off the air inlet.
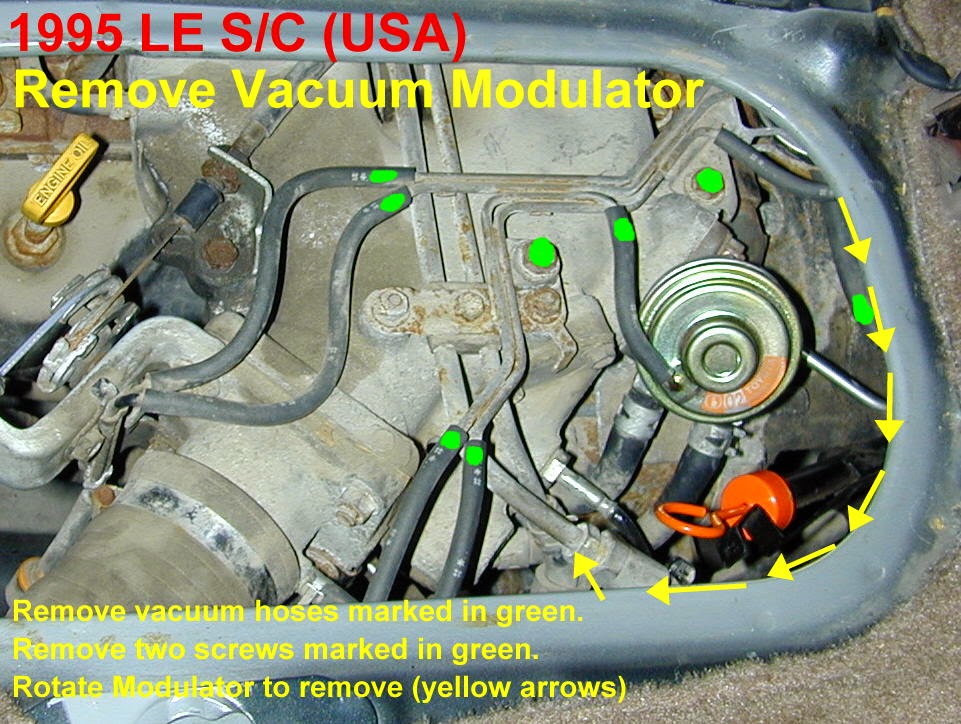
I started off with detaching all the small hoses to the EGR modulator matix and 2 bolts to remove.
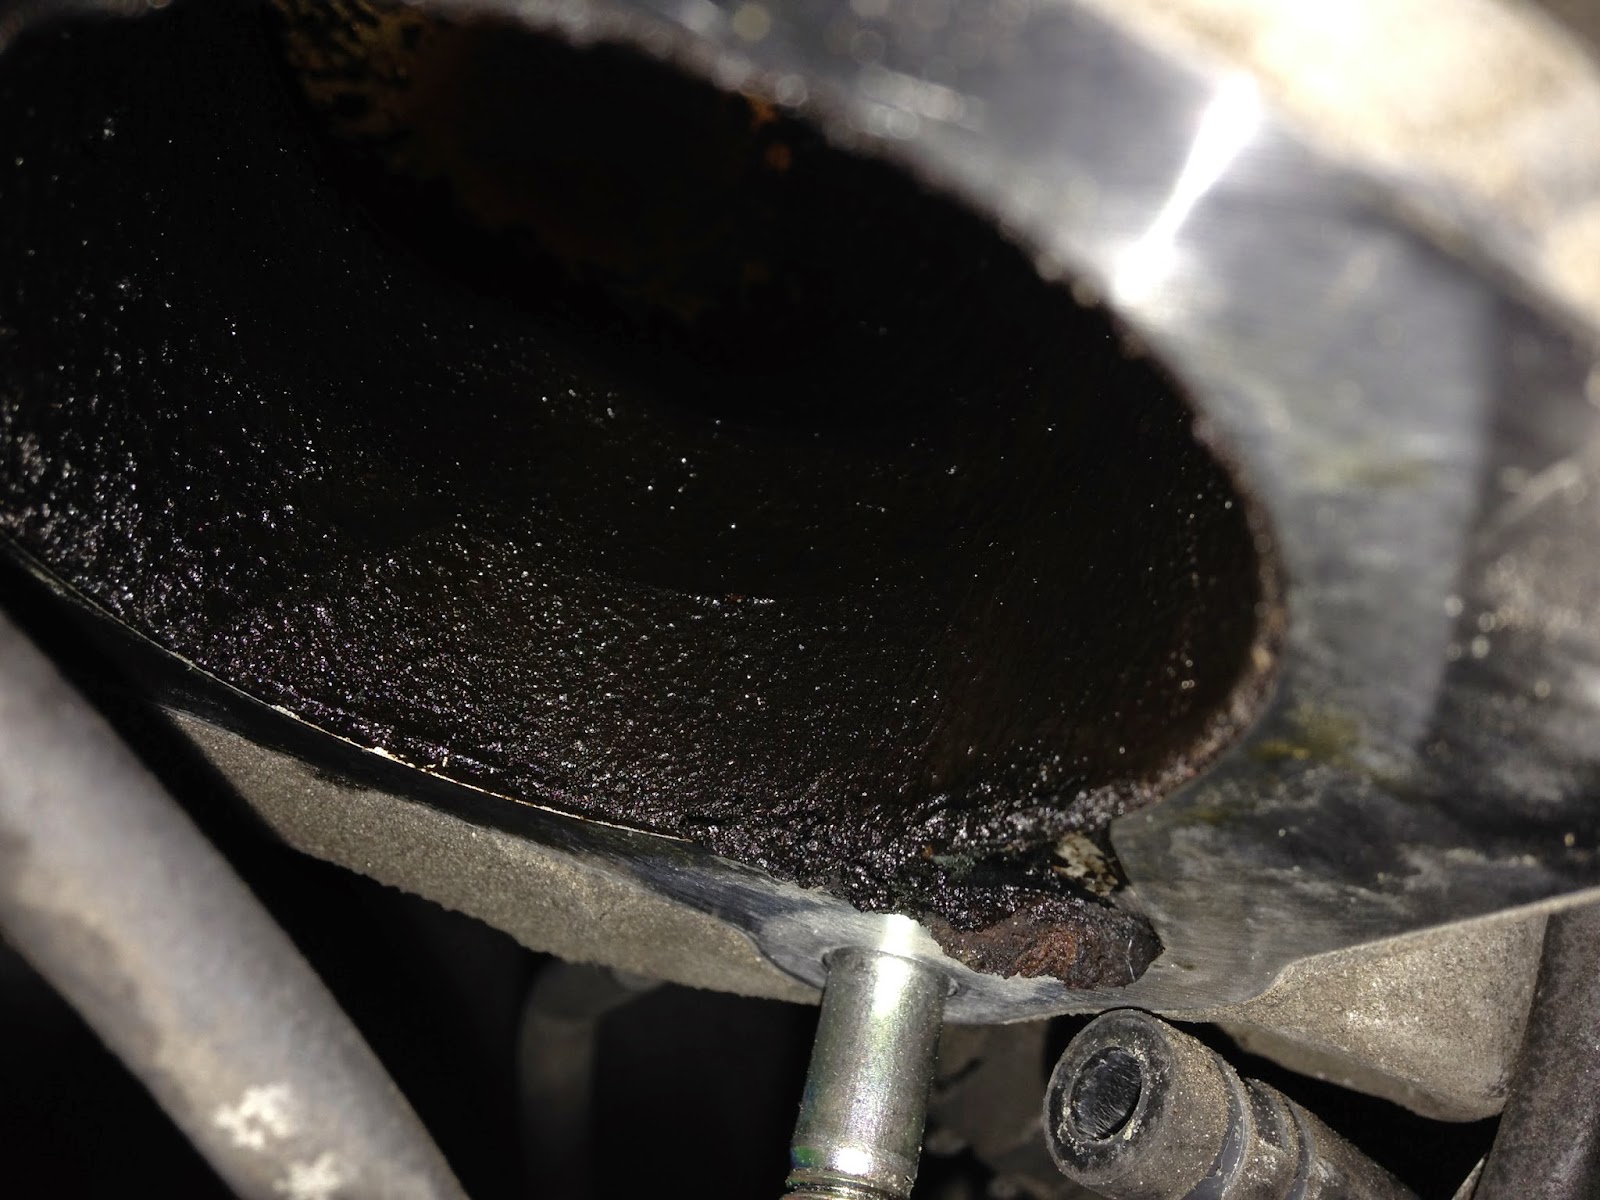
I then went to take off the air inlet duct (4 nuts, with throttle cable bracket). As you see in the above picture, it was plugged and dirty.
With the EGR system and dis-assembly, I followed zenseeker's info to the T. I didnt have a 1" crow's foot for the EGR pipe union nut, so I ended up buying a set just for it (Craftsman - $50) On a side not, I think the shop I went through put anti seize on pipe, which was helpful.
I dont know why, I had issues with the nuts for the EGR valve itself, especially the one underneath. 2 hoses and getting a coolant shower and it was out.
My EGR valve wasn't dirty and the EGR modulator worked fine.
Also took out the temp sensor and cleaned of the tip.
Worked on the plugged portion with 50 state legal carbon cleaner (I am environmentally conscious), which means this stuff wasn't as powerful. Pulled out the turbo snake and got some gunk out. Blew carb cleaner and canned compressed air through the other side to get as much as possible out.
Reverse and everything is good to go. Test drove and no CEL and a bit smoother as far as idling.
-----------------------------------------
ZENSEEKER'S DIY PICS!!!
http://zenseeker.net/Previa/PreviaMaintenance.htm
 ...I just didnt snap in time.... thought they'd work
  ! Yesterday l spoke to a master mechanic... He knew exactly the right tool..was nice enough to lend them to me. Real expensive SNAP ON.. Only the nut is pretty rusted on, I busted my universal, so tonight I'm just soaking PIPE/EGR nut with PB BLASTER again till i go to pawn shop...I really need to start listening to you guys
 .
.
 Reply With Quote